Before I started on the sachets I plan to make for this year's decorations, I quickly made up this garland. The sachets can be added at any time, but the garland needs to go on before the other decorations, so I wanted to get it finished first. To be able to see the
larger photos, go here.

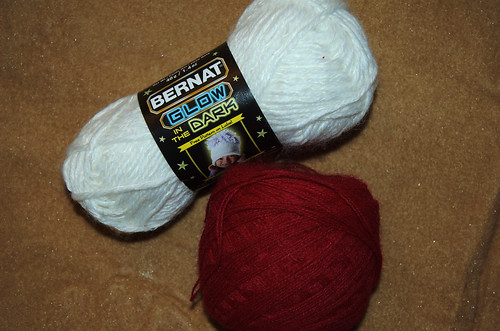
First, the materials.
I chose white glow-in-the-dark yarn that came out for Halloween. I even paid full price for it. ;-) I'd originally intended to use it to make this year's decorations. When I changed my mind about those, I still wanted to find a way to incorporate it into the tree, so I came up with the garland idea.
The red... I have no idea what it is. I found it in the yarn bin at the Reuse Centre. It's a 4 ply yarn but the strands aren't twisted together at all, but just lie side by side.
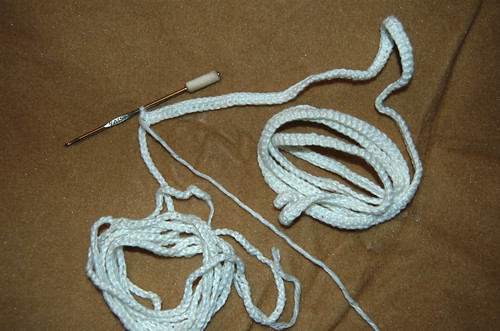
I also used a 00/3.50mm hook instead of the 5.00mm hook recommended on the yarn's label, as I wanted the stitches to be a fair bit tighter.

The garland itself is really simple, and can be easily modified in many ways. For mine, I wanted something with a gentle spiral to it, so I made a length of chain (15 ft long), then did a row of sc down the length of it. I then went back down the length of it again, this time working pairs of dc in each sc in the previous row. Had I wanted a tighter spiral, which I briefly considered, I would have skipped the sc row completely, and done 3 dc in each chain.
Unfortunately, none of the photos I took of that part of the process came out. My memory card was corrupted, but I didn't realize I didn't have the photos I thought I took until I tried uploading them - after I'd already finished the garland. Oops.
As I was making it, however, I discovered a problem. I was getting about half way through the dc row when I realized that, for a 15 ft garland, I needed 3 balls of the glow-in-the-dark yarn. I only had two. I knew the Michaels store I got them from was out of stock in white, so I started making phone calls. I eventually discovered that there wasn't a ball of this yarn in white left in the city - at least no where that I could find. In fact, it looked like the only place that ever carried it at all was Michaels.
So I had a choice. I could undo the whole thing to the foundation chain, then undo that by about 4 feet, which is about how much I was short when I ran out of the yarn, then start over. Or, I could dig around and see if I had a similar yarn in white. I figured that a shorter garland wouldn't drape the way I wanted on the tree, so I went with the alternative. I did have a yarn I could use, though it was just a little bit thinner than the glow yarn. To maintain the spiral I wanted, I did two pairs of dc, followed by group of 3 dc, for the rest of the garland. It worked out rather well. As I was doing the red edging, I literally could not tell when I passed the plain white yarn and started working on the area with the glow yarn.
The red edging was done with just 1 sc in each dc in the row previous. If I'd wanted a frillier edge, I could've done 2 sc in each, or I could've added beads, picots, etc. to fancy up the edge. At the last minute, I did add some gold filament thread together with the red, which was something I happened to have on hand, just for a bit of sparkle. Unfortunately, photos with the filament spool were among those that didn't work, and I emptied the spool while doing this, so I couldn't go back and take another photo.

It was the wee hours of the morning when I finished this, so I stuck it into our undecorated tree (we're still training the kitten to stay away from it, which seems to be working quite well). I wanted the girls to find it in the morning. When my elder daughter saw it, it reminded her of a polychaete worm. She thought it would be funny to add buttons for eyes and a ribbon for a tongue (though as far as I know, polychaetes don't have tongues, and I'm not sure what they have for eyes).
I thought it was a hoot.

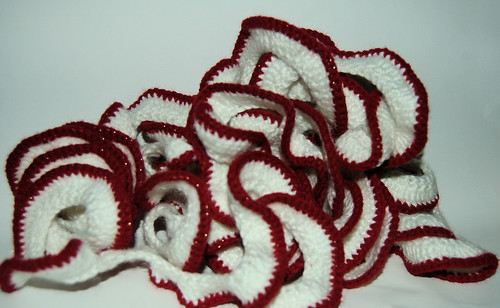
Here's what the garland looks like stretched out. I had to shape it a bit to get it to spiral instead of ripple. For storage, I'll wrap it around something - the tube from wrapping paper looks to be the right size for that.

Here's all 15 feet, set up in my light box. I left it there to charge for a bit (and you can see the sparkle of the gold filament thread in the red fairly well, too).

And here it is with the lights out. You can sort of see on the left hand side where the regular yarn is, and only the foundation chain and sc row are glowing.
I'm quite happy with how it turned out. I don't know that using the glow yarn will mean very much, since the tree will be lit up when it's dark, anyways, but we'll see. :-D I think it was a rather successful experiment, even with the yarn change.
The glow yarn was a bit of a pain to work with - the strands had a tendency to untwist and catch on the hook. Surprisingly, the red yarn, which wasn't twisted at all, plus at the gold filament thread added in, didn't catch at all. It was really great to work with.