Pages

Showing posts with label how-to. Show all posts

Wednesday, February 24, 2016

How to block a crochet lace crown: Part 2

Part 1

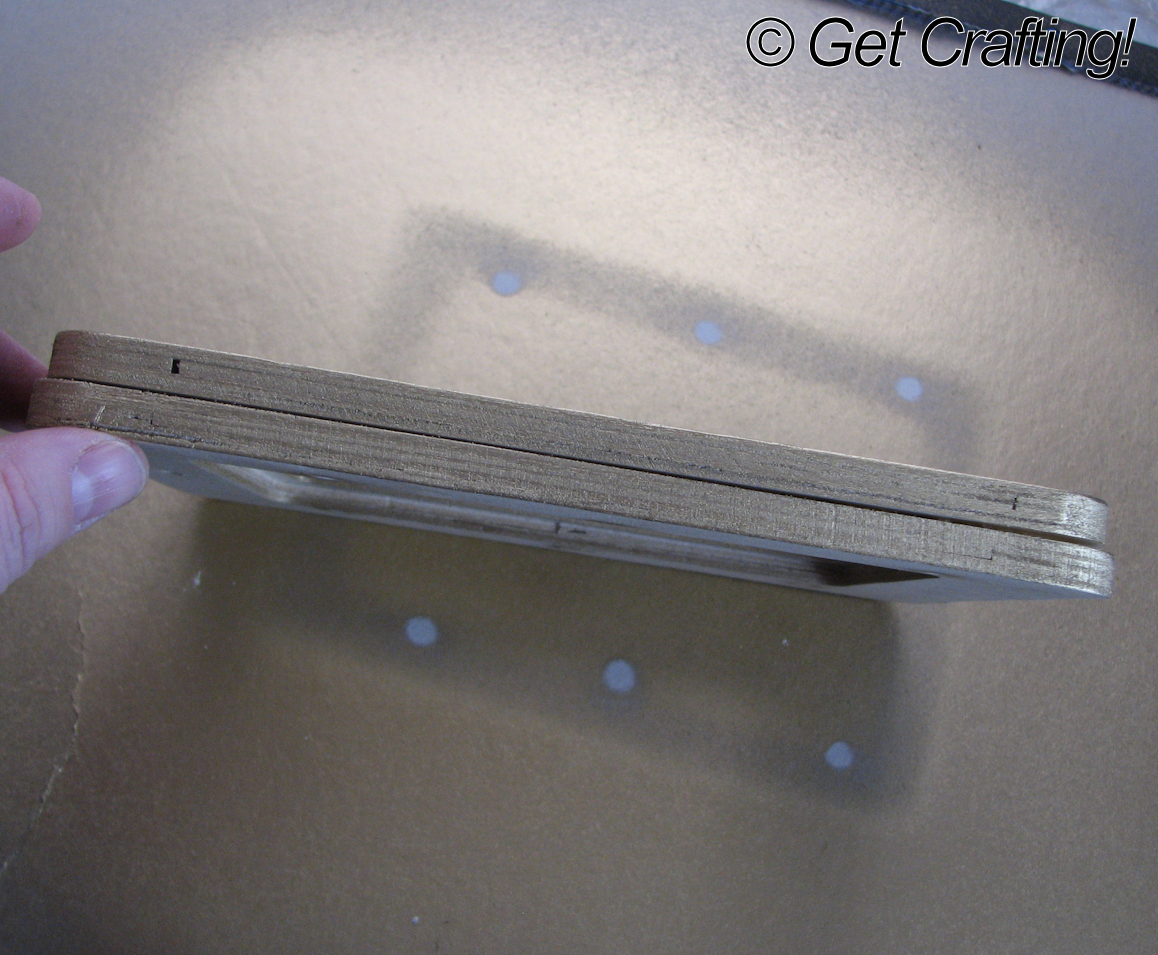
Okay, so my crochet crown has been pre-blocked to open up the lace.  Now it's time to block it to shape, using a glue based liquid that is supposed to be permanent.

First thing to do was make sure I had everything I needed handy.  Here are my materials.


The plastic bin that I used as a form.


Plastic food wrap.

White glue. (150 ml bottle)

a jar with lid to mix the glue with water.

a container to saturate the crown in.

laytex gloves.

Plastic drop cloth to cover your
work surface.


My older daughter also offered some glitter from her vast collection.  I ended up using all three colours.

There was one other item that I found I needed rather unexpectedly.  A spray bottle of water.

Make sure you've gone one handy.  You'll need it!!  Having to get one while in the middle of things is not fun.

Trust me on this.

You'll also need tape to fasten the plastic wrap in place.  I also ended up needing to use elastic bands large enough to fit around the bin.


First order of business was to wrap the bin in a layer of plastic wrap.  The plastic wrap, of course, stuck to itself really well, but not to the bin at all.  It takes a bit of doing to get it well covered.


After wrapping the bin, I poured the glue into the jar, then filled the glue bottle with water to get a 1:1 ratio.  Some "recipes" has a ratio of 2 parts water to 1 part glue, but it all depends on just how stiff you want the final product to be.  Given the longish chains around the triangles, I decided the 1:1 ratio would be best.

Then I added the trio of glitter.  I used the purple the most, with a fair bit less of the almost black purple, then a bit less of the reddish gliter.

Then it was time to close up the jar and start shaking.


Here is the glue misture after a whole lot of shaking.

As you can see near the bottom, there was still some that didn't really mix.

That done, I set the jar aside and got back to the crown.


On sliding the crown over the bin, I found that, while pre-blocking it made everything nice and straight and open, my hopes that it would tighten up the base of the crown were dashed.  Once straight, the crown fell farther down the bin than before, almost enough to slide right off the open end.

So I put a double layer of elastic bands where I wanted the base of the crown to be.


One the elastics were in place and straight, I added a second layer of plastic wrap.

The elastic bands serve a double purpose.  They were a guideline for where I wanted the crown's base to be, with enough room for the rest of the crown below it, and it gave me something to pin the crown to.


Time to get messy!

And cover everything with my plastic drop cloth.

Glue, gloves, bowl and crown at the ready.


After getting this photo, there was no opportunity for me to take more until after the crown was in place, since I no longer had a clean hand to hold my phone with.

Here, about a quarter of the glue mixture was added to the bowl and mixed in.  I did add a bit more later on.  It's really important to make sure all of the item is coated and saturated with glue.

Once saturated, the excess is gently squeezed out.  Very, very, gently.

Then it was time to put it over the bin, line the base up to the elastic band, then try and get it flattened against the sides.

Things got very hectic for a while.

What I discovered was that the glue on the surface of the crown, and on my gloves, would start to dry faster.  The parts of the crown against the plastic, however, were still very damp.  Which meant that, as I was trying to use my gloved hands to smooth the crown against the bin, the curved sections would instead stick to my hands and lift right off the bin.

I had to spray my gloved hand with water, as well as lightly spray the surface of the crown, to keep that from happening.

I also ended up taking one of the gloves off completely, since I found I couldn't grab the pins with the glove on.

The base of the crown was still wider than the circumference of the bin, so I had to rely on the pins and the elastic band to hold it in place, re-adjusting the pins as needed to have it all even around the bin.

Then I simply smoothed my gloved hand down the sides to get the crown to lie evenly against the bin's surface.

Along with needing to spray my hand with water to keep the drying glue from lifting the crown off the surface of the bin, I also found myself dipping out some more glue from the bowl to add to the surface as well.

Once done fighting with it, this is how it looked.


After a couple of hours, I used a damp cloth to wipe glue off the beads.

Then it was time to let it dry overnight.


And here we are, the next day!

Getting those pins out was rather hard on the finger tips!

You can even see the glitter a bit.


All done, and looking good!


 Isn't it pretty?  I was so happy with it!


 A closer view of the beads, and you can see the glitter a bit better, too.


Of course, I then had to set up a pretty little photo shoot and get more pictures...


 ...at different angles.


Then I broke out Dolph to get some shots of the crown actually being worn on a head.

I tried it on Dolphina, but the female head is not at all human sized.  She would have done for a child sized crown, but not an adult size.  The crown just slid right over the face and down to the table.

I noticed that with almost all the display heads I've looked at.  The female heads are all stylized and tiny, while the male heads are more human sized and shaped.

Which irritates me.


But that's okay.  The crown looks fabulous on Dolph.


Here are some more close up shots.


The points aren't quite as distinctive anymore, since I had nothing to pin them to to keep it, but they're still not as rounded as they were before the first blocking.


All in all, I'm really happy with how this turned out.

Once blocked, the larger size was much less of an issue that I was afraid it would be.  It's actually just normal head size.  So using a thicker cotton and larger hook turns out not to have been a problem at all.

In the future, I would like to find some way to cover the plastic bin with a layer of foam that I can pin to.  The bin itself is great for stability, compared to some of the other ideas I had thought of, like rolling up a towel or something like that.

The crown itself was quite easy and quick to make.  Figuring out how to block it was much more of a challenge, and the interwebz was of little help.  Which is why I made a point of taking so many photos and doing this step-by-step!

Happy crafting!


How to block a crochet lace crown: Part 1

I had a friend I wanted to surprise with a crochet lace crown.  The pattern I used was a variation of this free pattern from Red Heart.

I had a couple of issues with the pattern; the first being I didn't have any No. 5 crochet thread.  In fact, I've never even seen No. 5 anywhere other than online.  I've only been able to find No. 3 or No. 10.

My other issue was the disappearance of my 2.25mm hook.  I know I have one.  At least I'm pretty sure I do.  Even though I don't do thread crochet often, I do try to keep all my steel hooks together, but no sign of a 2.25mm anywhere.

So I ended up making the crown out of No. 3 crochet cotton with a 2.75mm hook.

Which means I knew I would have a final crown that was larger than the pattern.  And it already look pretty big on the model's head in the photo.

When I first started making it, because of the size difference, I followed the instructions for size changes and reduced the starting chain by 15.

It wasn't until I got to the 4th round that I realized the error in the pattern.  It's not a 15 stitch repeat.  It's a 30 stitch repeat.

Which meant starting over, but without trying to change the size.  Taking 30 stitches out of the pattern would have made it child sized.

Well, I wasn't making it to be worn.  I was making it for an inside joke.  So I wasn't too worried.

I also decided to add matching beads to the bottom of the crown, 1 bead for every 2 stitches.  In the pattern, there is no turning at the end of the rounds, but for the beaded round, I did turn it, since the beads are all at the back of a single crochet stitch.

Making the crown itself was not difficult.  It's only 13 rounds.  It wasn't until I got to the very last row that I realized why the pattern called for 2 balls of thread.  I was doing the many, many picots at the top when I realized I would run out of thread.

By about 2 feet.  Maybe.

Well, I was not about to go buy another ball for that little, and I wasn't too keen on the picots, anyhow.  So I redid the last round without the picots, and liked it much better.

It also left me enough thread to do a finishing round of single crochet along the bottom of the crown, which tidied it up and made it much nicer.

Now then.  If you've ever worked with crochet lace, you can probably guess what my next step needed to be.

Blocking it.

But how?

So I started to do some searches on how to block a crochet lace crown.

What I found were patterns.  And more patterns.  Free patterns and patterns for sale.  Adults crowns and children's crowns.  Fine lacy ones and chunky, dense ones.  There are so many patterns out there for crochet crowns!  And patterns for sale that had "blocking instructions included."

But no blocking instructions.

I did at least figure out that I wanted to block it so that it would permanently hold its shape and, with liquid starch apparently gone the way of the dodo, chose to go with a white glue based blocking liquid.

I was still left with the problem of how to block it.  I had lots of ideas in mind, but they all had flaws.

So I did what I usually do.

I winged it.

I decided to block it using a small, plastic garbage bin as a form.

Since I wouldn't be able to pin the crown to the bin itself, that meant I had to pre-block the crown some other way.

Which is why this is a two part post.

In this part, I have a step by step on how I pre-blocked the crown before I permanently blocked it on the form.


To begin, here is the finished crown, looking all lumpy and bumpy.


As you can see, it slid down pretty far on the bin.  I was hoping that, in pre-blocking it, I could be able to stretch the lace upwards enough that the base might actually tighten up a bit.

Blocking something that's round is always a challange.  In this case, I also wanted to make sure not to stretch the base in any way.  My solution was to use one of the most useful things in my craft room.

Styrofoam insulation.

That stuff is awesome.  I honestly don't know what I would do without it.  I've got the 2 inch thick type, which is ideal, and it's easy to cut the length and height to whatever I need.

I had some already cut down to block a cowl, so I cut part of it down so that the crown would fit loosely around it.

The great part about doing that is I could block front and back at the same time.

Handy.

Normally, I would wet block something like this, but this time, I chose to dry block it, just to keep the mess down.


The adult size crown has 5 distinct, overlapping sections.  This allowed me to pin out two on one side, one on the other.

Since one of my main focuses was to keep the bottom of the crown straight, without any stretching or distortion, I made sure to pin it down first, and very, very thoroughly.  I put a pin at the top of every double crochet, above the beaded round.


I then pinned the center point of the curved section, followed by the points of the triangular sections, stretching them upwards as far as I felt I could, without distorting the stitches.  After that, I pinned each point of the curved section, trying to match the heights and distances of each opposing pair as much as I could.


Once pinned, I held it over a sink and poured water over each side until the cotton seemed saturated.  This photo is of the now-wet cotton.

Can't really tell that it's wet, I guess.  You'll just have to trust me. LOL


The next day, I unpinned the sections and turned the crown around so that I could do the remaining two sections.

Here, you can clearly see how much difference blocking makes!

In this photo, you can also see the seam of where each round began and ended.


Just a closer view of one of the remaining sections, after being pinned and soaked.

I left it to dry overnight again.


Let's take a look at the crown before it was blocked once more...


 ... and compare it to after blocking.


Each "point", instead of having 3 picots, as in the orignal pattern, is simply shells of 2dc, 2ch, 2dc.  By pinning into the 2ch space, it created defined points, rather than the curved shape the shells before blocking.

I much prefer this simpler variation to the triple picots.  I appreciate it even more, not having to try and pin out each picot!  I would have run out of pins. LOL

And here's a closer view of the triangular section with the seam, and the beaded row.

Next up, wet blocking the crown into its permanent shape.

Friday, January 29, 2016

Ear Bud Cord Cover: Step-by-step

I don't know about you, but I'm one of those people that got dragged kicking and screaming into getting a smart phone - and then once I got one, I used it all the time.

Just not really as a phone.  I dislike talking on the phone to begin with.  Talking on a smart phone is gross.  No matter how careful I am, my screen gets all ear juicy, and it sucks to get it clean again.

When it comes to phones, I much prefer the old style flip phones with a physical keypad.

I do love my technology, though, and found myself using my phone for oodles of other things.  As I had to upgrade over the years, I found myself appreciated the improved cameras and photo quality.

I just had to replace my Galaxy S4.  It had served me well, but started to get glitchy.  All sorts of things started failing on it.  I really would have preferred waiting, but when I asked my husband to start doing some research for me, I suddenly found myself with a new phone.

One of the deciding factors in choosing a phone was the camera.  (Another was the operating system; I'm a die hard Android fan.) It's got to the point where I don't really use our cameras anymore.  I just use my phone.  The Galaxy S6 camera has gotten rave reviews, and now that I have one, I can see why!

All the photos in this step-by-step were taken on my new phone.  I used the default settings, mostly because I haven't taken the time to go through the phone's settings yet.  I did accidentally discover something called "selective focus", which lets you decide where you want to focus on your photo *after* you've taken it!  Pretty cool.

When I started this, there was still some daylight coming through my window, but my primary light source was a "daylight" LED.

The only post processing I did was to resize the photos to 30% (the default is huge!  With my old phone, as well as my cameras, I usually adjusted to 50%), cropping, and for 2 of them, rotating 90 degrees.  That's it.  I tend to be minimal in post processing to begin with, adjusting for light, but little else.  For these, I didn't even do that.

I'm quite pleased.

Now, with a new phone comes new ear buds with microphone, and a new charger with USB cable.

Did I mention I don't like how my screen gets when using the phone?

So what I'm wanting to get into the habit of is using the ear buds it came with, so my phone won't go anywhere near my ear.

I've got a number of them laying about from not only my own old phones, but the phones of other family members, too.  I find they all tend to get tangled up on things.  I noticed I'm not alone in that being a problem, as I've seen images on Pinterest of cords covered in crochet.

I decided to give it a try.

I didn't want to add too much bulk to the cord, so I went through my stash of crochet thread.  I also had a couple of cones of what looks like wool in a very fine gauge.  My mother had given me a bunch of cones, since she doesn't really crochet anymore.

Other possible options included embroidery floss, pearle cotton or any of my fine or superfine weight yarns.

I ruled out wool right away.  Even if I'm not sure if it's wool, I don't want to take a chance.  I am mildly allergic to wool, so it's not something I want touching my face and neck.

I admit I was really tempted by the metallic stuff, but again, this is going to be touching face and neck, so I didn't want anything scratchy.


I also considered going with white, since the cord is white and it would be more subtle that way, but then I figured it would start looking dingy much faster, and it's not like it can be through in the wash or anything.

I finally settled on the paler green of what I think is cotton.  There's a label inside, but I can't read it without taking it out, and it's stuck there pretty good.  It's another one from my mother.  I have no idea how old it is.


Time to break out the steel hooks!  I went with a 1.50mm hook for this, as I wanted it quite snug, and I was going to work only in single crochet.

I started with the section with the microphone and volume control, and began working near the ear bud itself.  I figured I wanted to get the shortest bits done first.

I joined the thread as close to the ear bud as I could.  The cord has a rubbery feel to it and is slightly elastic, as well as being flat, rather than round, like my other ear buds.  The texture means the stitches can't easily slide down the cord.  So it was important to work the stitches close together, and push them together often.

I don't usually work in thread, so this took some getting used to!


I also made sure to work over the tail end of the threat at the same time as working around the cord itself.  After working about an inch or so of single crochet, I pulled the tail snug to make the start look nice and neat, then trimmed it.

After that, it was just single crochet around the cord until I reached the controller.


I worked the stitches as snug to the controller as I could, then after snipping the thread with a tail long enough to sew in, I locked it with 1 chain stitch.


I then used a size 22 tapestry needle to sew the end under the stitches.

Tapestry needles have rounded tips, similar to crewel or yarn needles, so there was little concern that the needle would stab into the wire. Still, it's something to watch out for.


I pulled the needle out after about an inch or so and didn't bother trying to go any further.  After pulling it snug to tidy up the last stitch, I snipped the thread as close as possible to the stitches.


Here is the finished section.


I repeated the process on the other side of the controller, finishing off at the join.


The process was repeated again for the other side.

When I was ready to sew in the tail end, I passed the strand through the last stitch of the previous side first, then hid the tail end under the stitches just worked.  This made it look like it was all in one piece.


Then the process was repeated for the rest of the cord, up to the jack.

The whole thing was quick to work up, even though I'm not used to working in thread and the cord itself kept wanting to twist on me, making it a bit of a pain.  With the pauses to fuss with my desktop (yeah, I need a new one of those, too) and to have supper, I'd estimate the actual stitching time took maybe 2 hours.


Now... the charger cord is something else entirely.  It's a thicker cord, and is not going to be touching sensitive skin at any time.

I foresee glittery yarn in my future.

Monday, January 18, 2016

Jewelry Frame Step-by-step: Part 3

Part One
Part Two

In part two, I talked about the problem I was left with in regards to spray painting the frame.  I admit, after about a week, I was sorely tempted to go with something else.

What I was able to do was set up an area indoors in the spare bedroom.  Which wasn't supposed to be a spare bedroom, but we inherited a spare bed, so now we do.  It meant taking down the photography set up I'd made in one corner, using a pair of small folding tables from Costco.


So I put one of those folded tables on the bed for a hard, flat surface.  I had some thin plastic left over from when I did some tie dying on the dining table last summer.  It was enough to cover the entire bed, though I would have like to have found a way to run it up the wall a bit.

I then took some cardboard (in this case, the back of an old desktop calendar pad) to put on top of the plastic drop cloth.

We already had the face mask from working with sprays before, plus I had the window open as far as it would go.  We also opened some other windows a bit for a cross breeze.  Then we had to turn down the furnace, because it kept turning on.

Things got pretty chilly for a while.


I also put some risers under the frame so it wasn't lying flat on the surface (in this case, some decorate glass beads that I happened to have nearby; anything evenly sized would do).  This was because I wanted to spray the sides, but didn't want it sticking to the cardboard as it dried.


Then it was just a quick spray.

This is after one coat.

My daughter made sure to warn me not to spray too close or too much, or the wood would absorb too much moisture and start to swell.

This photo doesn't capture the colour of the spray very well at all, though.  So...


Here is the first coat again, this time with flash.

That is some very metallic paint!!

After that, I closed the room up so the cats couldn't get in then let it sit for a while before I put on a second coat.


This is the frame after a second coat, and after it had sit for a few hours.

And yes, that's a cat's tail.  She made taking photos rather challenging.


Here's the back of the frame, where you can see the spacing of the glass beads I'd used as risers.  Good thing I don't need them for anything else, because they did get spray paint on them.

And a view of the edge.

The only real challenge was to spray the edges evenly, without also spraying my wall accidentally.


Here we have the frame after it was left overnight - and again, it takes the flash to really show off that metallic paint!!

Now it's time to put in the hooks.


At this point, I was really happy to have those pilot holes.

If I hadn't had a drill, I would have used a hammer and small nail, which would have really sucked.

To save your fingers when the hook is almost completely screwed in, a pair of pliers to do the the last few twists is very handy.  Just be careful not to damage the surface of the hooks, or scuff the surface of the frame.


Here it is!  The finished frame, with all 12 hooks in place.


Here's a closer view to show you how the painted screen looks, as well as the inside of the frame.


The finished frame, mounted on the wall.

Though I had intended to use the pre-drilled hanging holes in the frame, I decided to instead made use of the gap behind the screen and set up a pair of hangers, hidden in each inner corner.  This way, the weight of anything I hang won't off-balance the frame and cause it to tip.

It works very well!

The frame itself is quite small, so I will be making a larger one, eventually, but for now, I finally have some of my jewelry easily accessible, and also out of the cats' reach.

Including the one I found under the mini-fridge we keep my husband's meds in.  I had been wondering what happened to that one...

There you have it!

If you decide to make a frame using these instructions, please do feel free to send me photos, or post them on the Get Crafting! Facebook page.

Happy Crafting!