Pages

Tuesday, September 28, 2010

Green Cables

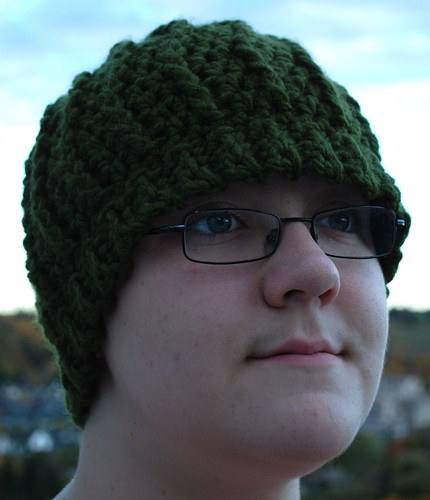
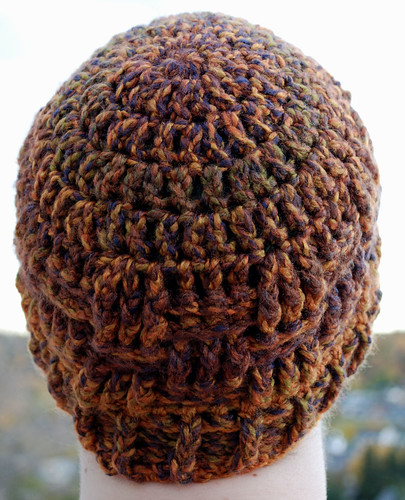
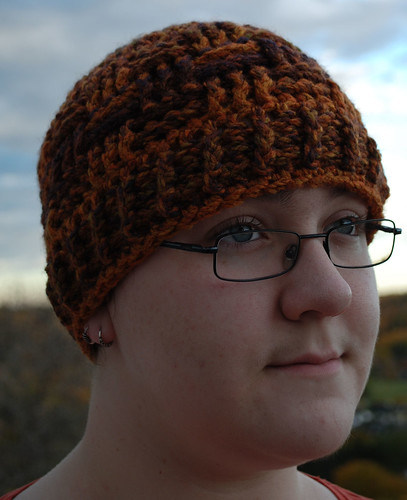
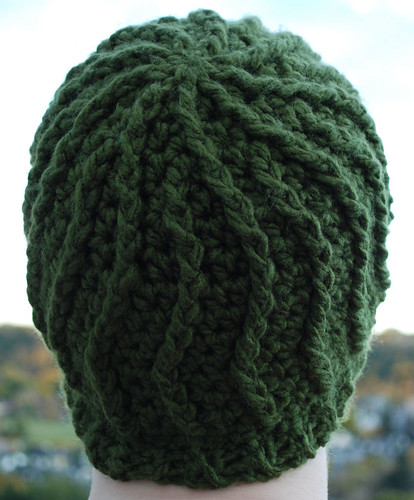
This next hat was done almost the same way as the Red Cables hat.  Even the yarn type is the same.  There are just a couple of notable differences.  First off, I used a 9.00mm hook. With the same number of stitches used in each round that was done in the Red Cables version, this made it a size larger than what I usually make.

Green Cables

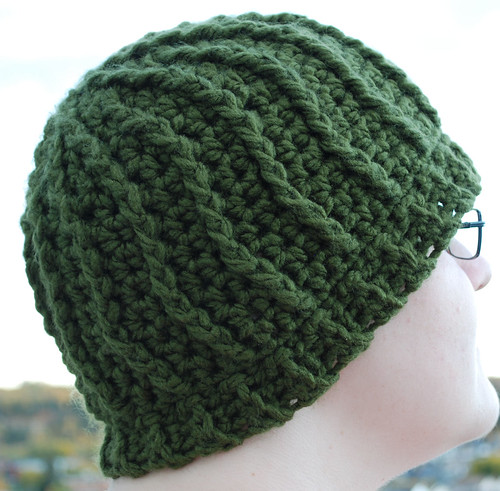
Though I used the same number of stitches, you can see that I joined the new cable into a different spot than the Red Cable hat, as well as experimenting when where I attached the fpdc to create the wavy cables.

Green Cables

You can see the changes in direction of the cables a bit better here.

The ribbing around the edge was also done the same way as the red version, including the round of sc done first.  The ribbing is only 3 sc long, which means I started it with a chain of 4 instead of 5.


Green Cables

Even with the narrower ribbing, this version is a fair bit longer than the red one.  It's a bit lower over the eyes than I normally like, but has better ear coverage.

I do like this variation of the cable hat, but I think the 9mm hook is a bit too big.  It's a great way to make a larger hat without having to change the number of stitches in the pattern, though.

Red Cables

Here's the next piece in my recent group of hat experiments.

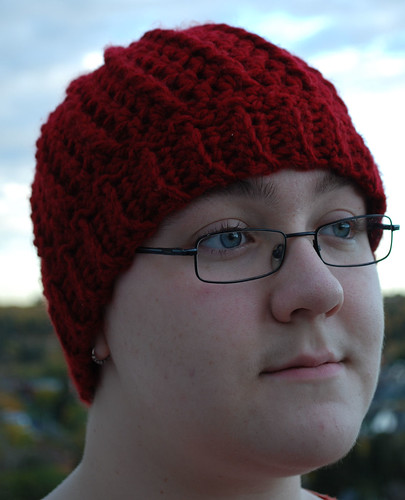
I was looking to try out a new yarn with this hat, Loops & Threads, Charisma from a local Michaels.  It's a very soft, 100% Acrylic, bulky (5) yarn made in Turkey.  Machine washable and dryable.  Recommended hook size is 8mm.

I don't have an 8mm hook.  I have a 7mm, which is being used by one of my daughters for something else.  It's also a plastic hook, the same as my 10mm, that I can't stand using.  They have an odd, sticky sort of feel to them.  I prefer aluminum hooks, and I have a 9mm hook in aluminum, which I used for a different hat.  For this project, I went with my 6mm hook.

Red Cables

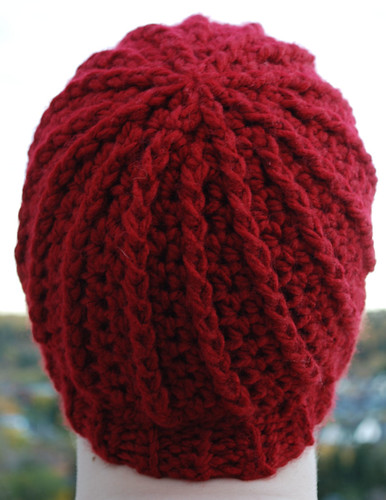
The basic structure of this hat is the same as my previous ones - flat disc for a crown with straight sides.  I decided to do a very simple cable pattern so I could see just how much of a natural curve developed.  I  started this one by working 8 dc into a magic ring.  The next round worked 1 fpdc and 1 hdc into each dc of the previous round.  The following round worked 1 fpdc and 1 hdc into the fpdc of the previous round, then 1 hdc into the hdc of the previous round.  In the following round, I added another cable by working 1 fpdc, 1hdc into the fpdc of the previous round, 1 fpdc around the first hdc of the previous round, then 1 hdc into the last hdc before the fpdc of the previous round.

For the following increase rounds, I alternated where the increase hdc was added so that each cable had the same number of hdc on either side of it until the disc was the size I wanted, which was at 1 fpdc, 2 hdc all the way around using this yarn and hook size.  Had I been working with a thinner yarn that needed more rounds to reach the size I wanted, I would have added another cable into the next increase round in the same manner as before; the key being adding a new cable where the next increase round would make an odd number of stitches in between the existing cables.  This way, the new cable is added by working a fpdc around the middle stitch between the existing cables.


Red Cables

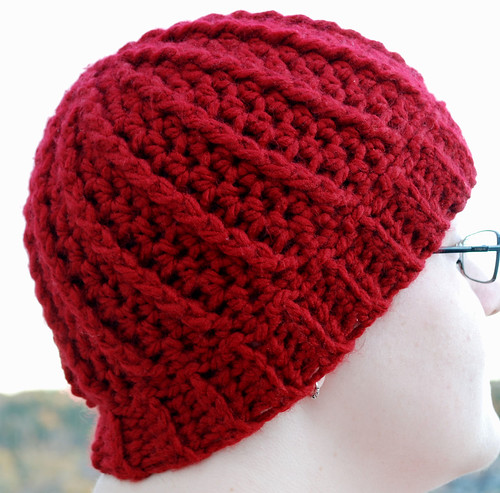
That pattern was continued to build up the sides for several more rows until it reached about half way down my forehead when I tried it on.

I decided to change directions for the ribbed finish.  First, I did one more round in sc.  After slip stitching the round closed, I chained 5, then worked 4 sc back down the chain.  At the end, I slip stitched into each of the next two sc in the body, then turned, rotating counter clockwise and pulling the yarn strand across the top and tucking it snug against the body of the hat so that it's between the slip stitch and the first stitch worked in the new row.  I find this looks better than rotating clockwise.  Whichever direction you choose, just make sure it's dine the same all the way around.

The next row is 4 sc worked into the back loops only of each sc in the previous row.  Ch 1, then turn.  That pattern was repeated all the way around.

Red Cables

The last row in the ribbing ends away from the body of the hat with a ch 1.  Working on the inside of the hat, the first and last rows were slip stitched together.

I like the simplicity of this pattern.  The gentle curve of the cables that naturally forms when working in the round is quite attractive, I think. 

I really enjoyed working with this yarn, too.  It's got a nice texture, flows smoothly and doesn't have a tendancy to split like so many bulkier yarns do.  The finished hat is very light and warm.  A very nice yarn for winter headgear.  I just picked up a couple more skeins last night, since it happens to be on sale again right now.  It's a less expensive yarn, but I still hate paying full price. *L*

Autumn Basketweave hat

This next hat was made using the same yarn as my Simplicity Itself Reading Jacket and a 6.00mm hook.  I really love this yarn.  It's got a wonderful feel and I like the gradual shading.

The hat itself is pretty basic.

Autumn Basketweave

I started with 8 sc in a magic ring, then worked the flat disc for the crown in dc until it had the diameter I wanted. 


Autumn Basketweave

This sides were worked in a basketweave pattern, which is just alternating groups of front post and back post dc.  To figure out how many in each group, I divided the total number of stitches in the crown's final round by different numbers to see which would give me an even number of groupings.  The even number ensures that the last group is done in the opposite stitches of the first group, so if you start with a group of fpdc, you'll finish the round with a group of bpdc.  With the gauge in this hat, it worked out to multiples of 3, so that's how many stitches I did in each group.  I could have gone with 6, but I thought it wouldn't have looked as good.  Personally, I would not go with more than 5 stitches per group, just for aesthetic reasons.  If you like a larger grouping, go for it.

The first round was done in just dc with no increases to get the straight side started, then the second round was done in groups of 3 fpdc, 3 bpdc around.  The third round reversed the pattern, doing bpdc into the fpdc of the previous round.  The fourth round worked fpdc into fpdc, bpdc into bpdc, matching the 3rd round, then the pattern got switched again in the 5th and 6th rounds.  I stopped at 6 rounds, but if you wanted something a touch longer, you could add a couple more rounds here, or into the "cuff" section.

Autumn Basketweave

The hat was then finished with a "cuff" alternating one front and one back post dc for three more rounds and a final round of sc.  That last round of sc pulls the edge in just a little bit, so it not only tidies up the edge nicely, but it makes for a snug, draft free fit.

If I wanted to, I could have continued the rounds of alternating front and back post dc until it was long enough to be turned up when worn, but I think with this yarn, it would have been a bit too thick.  I could also have added an earflap section as in my Cable Petals hat.

I've made hats with this basketweave pattern a few times, with each one being slightly different due to the thickness of yarn and hook size.  It's a really basic hat with just enough texture to make it interesting, yet it's still the type of thing you can work on while watching a movie or having a conversation. 

Monday, September 27, 2010

Cable Petals

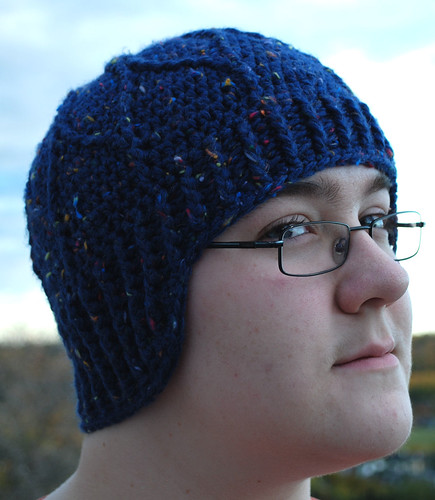
Recently, I got an itch to experiment with crochet cables.  The result was several hats.  Although I had no pattern or plan in mind, I used the same basic structure for all but one of them.  The crown of the hat is done in a flat disc until it's just wide enough to cover the top of a head, then the sides are worked without increases to various lengths, depending on if I want to so a ribbed "cuff" or add extras such as ear flaps.

For this hat, I used a some Patons Shetland Chunky Tweeds in Medium Blue that I had gifted to me, but hadn't found a project for it.  It was quite nice to work with, and I would definitely use it again.

The recommended hook size is 6.00mm, but for this project, I went with a 5.50mm hook - I think.  It was either that or a 5.00mm, and I really don't think I went that small.  I may or may not work the pattern again and write out an exact details, but until then, I hope this description is enough for you to figure out how to make one yourself.

Cable petals hat

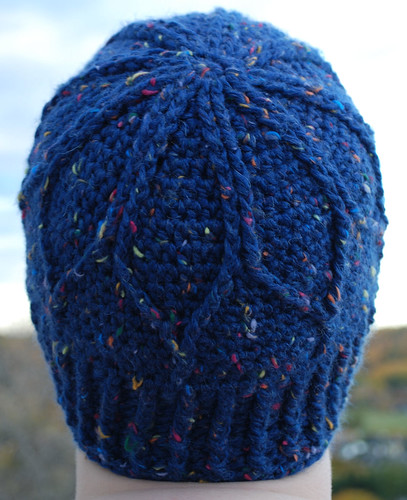
I started this pattern with a 9 sc magic circle.  The next round was increased to 18 in dc.  For the third round, I worked the increase stitches in hdc in between pairs of front post double crochet (fpdc).

For each round following, I kept working hdc in between the fpdc stitches until I reached the size I wanted.  The increase stitch was worked into the top of the second of each pair of fpdc.  I think I did one round without increases without changing where the fpdc were placed.  After that, I worked the straight sides and changed where I placed the fpdc stitches by one in each direction to bring the cables into the points of the petals.  The last round had one fpdc around both fpdc of the previous round, and one extra hdc added to make up for the one less fpdc.

Cable petals hat

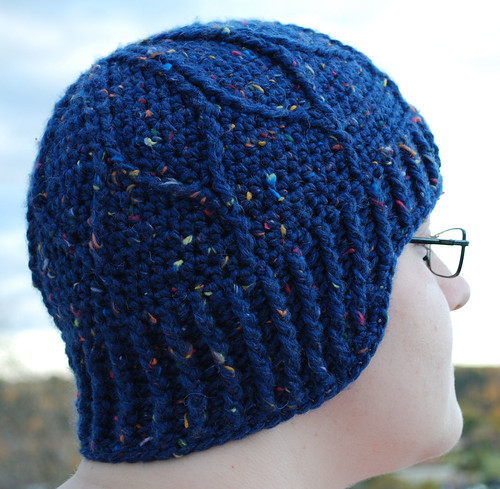
To finish the cap, I worked a "cuff" in alternating front and back post dc for several rows.  For the ear flap I worked rows into slightly more than half of the hat - I tried it on first, then marked where I roughly wanted the flap portion to begin and end in front of each ear.  I started and finished with an hdc, then did the rest in alternating front and back post dc, making I sure started and finished with the same stitch.  When working on the inside of the hat, I also made sure to work front post stitches into the back post stitches of the previous row and vice versa, so that on the outside, it all came out the same.

To make the slight curve of the earflap portion, I reduced by one stitch at the beginning and at the end of each row by skipping the second last stitch and working an hdc into the last stitch of the previous round.  Extra care had to be taken to make sure I did the front and back post stitches in the the next row in the right places.

Cable petals hat

The hat was finished with one round of sc.  The curve of the earflap was kept by working 2 sc in the "corners" of the flap, while two sc were done together where the flap switched to the forehead portion.

This hat used up most of the two balls of Shetland Chunky I had.  The smaller hook together with the cables made for a much snugger fit than I normally do.  I'm very happy with how it turned out, but to do it again I would move up to the 6.00mm hook.  Either that, or it would do well as is for an older child.  I really like how the earflap portion hugs around the ears and keeps out drafts, though for a glasses wearer, the snugness does tend to affect how the glasses sit on the face.

I've been busy...

Though I haven't been doing a lot of posts, I've actually been quite busy with my crochet hooks lately.  I've just coerced one of my daughters into modelling for me, and am about to process the photos.  So just a warning that there's going to be a bit of a rush on posts in the next little while, as I'll be doing a different post for each item.  I didn't use any patterns for these, so it'll be more about the process than anything else.  I hope you will find them useful.

Friday, September 24, 2010

Feature Friday: Nalbinding

I'm finally starting up my Feature Fridays again.  If there is any craft or artist you'd like to see featured here, feel free to mention it in the comments.

Sharon Silverman shared a video on nalbinding a while back, and I've been experimenting with it ever since - with questionable success!

Nalbinding, naalbinding, nalebinding or NÃ¥lbinding is an ancient pre-cursor to knitting.  The name literally means "needle binding" or "binding with a needle."  Nalbinding needles are flat and fairly wide, with a large hole, though a large yarn or tapestry needle can be substituted.  Using needle, yarn and your thumb, yarn loops are bound together to create an array of useful garments and other items.

After looking around a fair bit, the site I found myself using the most is Viking Girl's Workshop.  The instructional videos linked to were the ones I found the clearest, even if I couldn't understand any of the spoken instructions.

Here are a few of my experiments.


Nalbinding

I did these before I found Viking Girl's site, using videos I found by searching on youtube.  The very first ones I tried were using some Handicrafter cotton, and they really sucked. *L*  I would have taken pictures to show just how badly they turned out, but they seem to have disappeared.  No loss, there! ;-D

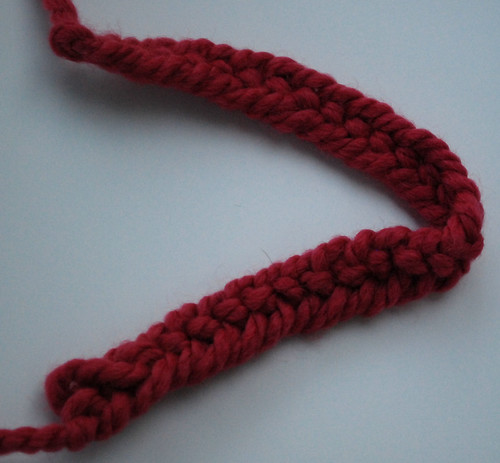
I then used some left over chunky yarn and tried again.  It was definitely easier with the thicker yarn.  In the photo are pairs done in different stitches, with the shorter lengths (2nd, 4th and 6th from the top) done earlier.  They're laid down to show both sides of each stitch.  The top two are done in Oslo stitch - the most basic stitch.  The second pair are done in Asle stitch, though I may have been doing it wrong - two different videos are showing me two different ways to grab the loops in the back.  The final pair on the bottom was done in Broden's stitch.  Click on the images to go to my flickr page and see closer views of each pair.

The next attempt was made using some leftover Lion's Brand Wool-Ease Thick & Quick and the biggest yarn needles I could find. 
Nalbinding

I was definitely getting the hang of the basic movement, though I am still having problems with tension.  I think the main reason is that, using yarn needles instead of the flat nalbinding needles, the loops are simply too tight.  Until I find some proper nalbinding needles, I'll have to learn how to compensate for that.

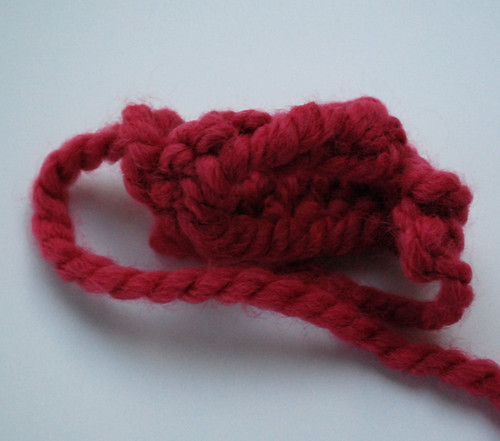
The video I was following went on to show how to work the piece into a loop, so I gave that a try, too.

Nalbinding

Unfortunately, I goofed and ended up putting a twist in it.  That would be fine if I were making a moebius shawl or something, I suppose. 

One down side of nalbinding.  If you're not happy with what you're working on or make a mistake, the piece can't be ripped like you can with knitting or crochet.  The yarn would need to be undone one loop at a time.

I started over with a new piece of yarn.
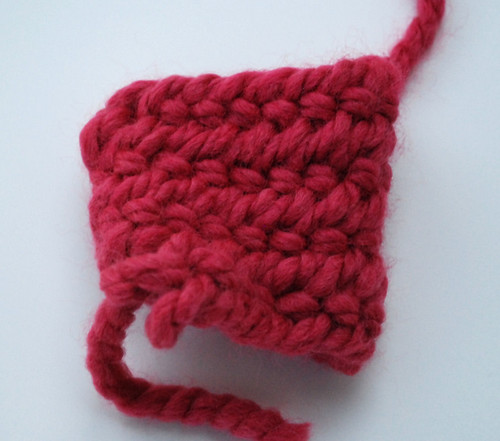


Nalbinding

I got it right this time.  This view shows the starting end of the piece.  It's not really visible in this photo, but I think I attatched the working end to the start in the wrong loops, as the starting end was sort of flapping around.


Nalbinding

This view shows where I stopped near the end of my yarn.

I'm kind of liking this.  I've got a lot more to figure out before I can make anything useful.  One thing I'll need to learn is how to work in a new strand of yarn.  Looking at the instructional video I was following for this piece, I could see that there was a lot of yarn somehow attached into the end of her needle, but I couldn't see in what way.  Because the entire length of the yarn has to pass through the loops, the working yarn needs to remain short.  Her yarn was looped somehow to keep the working length short, yet still have a whole lot of yarn to work with.  I used maybe a 10 foot length for the pink piece worked in the round and, as you can see, that doesn't go very far.  Considering that I'm working this way too tight, it would go even faster if I were doing it right. 

I'll definitely be working with this technique some more.  I'm definitely screwing up somewhere when I try to work anything but the Oslo stitch, but as I look closely at the videos, I get the impression my biggest problem with that is the tension of the loops.  Not the part around my thumb, but where the needle is drawn through behind the thumb, and I think my problem has a lot to do with my needles.  I'll experiment some more, trying to work things more loosely to avoid that, until I can find a proper nalbinding needle.  I think I might even be able to make one, if I can't find one in a store.

I'm certainly enjoying the challenge of figuring it out, though I must admit my left thumb isn't liking it a whole lot. LOL
Thursday, September 23, 2010

Yarn Bomb

Some time ago, my older daughter was out with her friends and spotted a yarn bomb.  Knowing her mother as well as she does, she made sure to tell me about it.  Today, I finally had a chance to get a couple of photos.  I love finding stuff like this!

If you're unfamiliar with the concept, yarn bombing is basically yarn graffiti.  Crafty folk sneak out in the dead of night (more or less) and leave knit or crochet pieces out in public places.  Sometimes they'll put a scarf or toque on a statue.  Others sew shapes onto poles or trees.  The truly dedicated cover entire buses, cars or buildings in yarn.

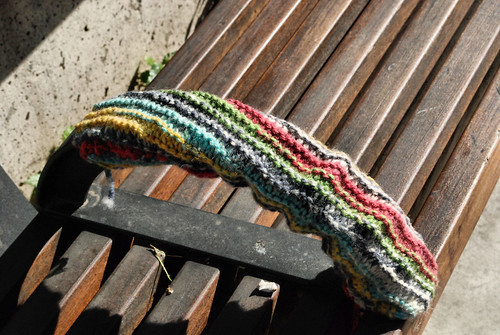
Our local mystery yarn bomber covered the arm rests of a public bench.


Yarn bombed arm rest

This one is still in pretty good shape...

I love yarn bombing!  I think they add a wonderful touch of whimsy and colour to unexpected places.  If you want to learn more about yarn bombing, visit the Yarn Bombing blog.