Pages

Sunday, November 30, 2008

Easy crochet Christmas garland

Before I started on the sachets I plan to make for this year's decorations, I quickly made up this garland. The sachets can be added at any time, but the garland needs to go on before the other decorations, so I wanted to get it finished first. To be able to see the larger photos, go here.

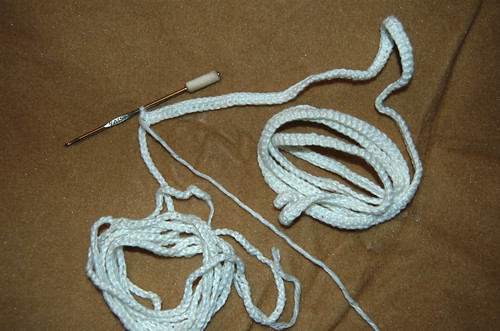
First, the materials.

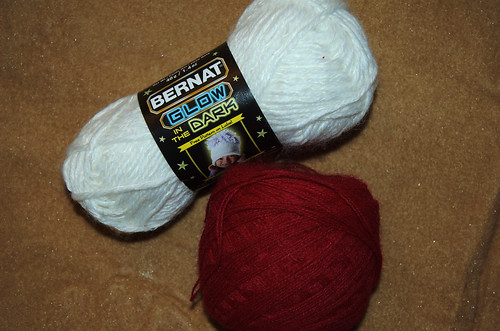
I chose white glow-in-the-dark yarn that came out for Halloween. I even paid full price for it. ;-) I'd originally intended to use it to make this year's decorations. When I changed my mind about those, I still wanted to find a way to incorporate it into the tree, so I came up with the garland idea.

The red... I have no idea what it is. I found it in the yarn bin at the Reuse Centre. It's a 4 ply yarn but the strands aren't twisted together at all, but just lie side by side.

I also used a 00/3.50mm hook instead of the 5.00mm hook recommended on the yarn's label, as I wanted the stitches to be a fair bit tighter.


The garland itself is really simple, and can be easily modified in many ways. For mine, I wanted something with a gentle spiral to it, so I made a length of chain (15 ft long), then did a row of sc down the length of it. I then went back down the length of it again, this time working pairs of dc in each sc in the previous row. Had I wanted a tighter spiral, which I briefly considered, I would have skipped the sc row completely, and done 3 dc in each chain.

Unfortunately, none of the photos I took of that part of the process came out. My memory card was corrupted, but I didn't realize I didn't have the photos I thought I took until I tried uploading them - after I'd already finished the garland. Oops.

As I was making it, however, I discovered a problem. I was getting about half way through the dc row when I realized that, for a 15 ft garland, I needed 3 balls of the glow-in-the-dark yarn. I only had two. I knew the Michaels store I got them from was out of stock in white, so I started making phone calls. I eventually discovered that there wasn't a ball of this yarn in white left in the city - at least no where that I could find. In fact, it looked like the only place that ever carried it at all was Michaels.

So I had a choice. I could undo the whole thing to the foundation chain, then undo that by about 4 feet, which is about how much I was short when I ran out of the yarn, then start over. Or, I could dig around and see if I had a similar yarn in white. I figured that a shorter garland wouldn't drape the way I wanted on the tree, so I went with the alternative. I did have a yarn I could use, though it was just a little bit thinner than the glow yarn. To maintain the spiral I wanted, I did two pairs of dc, followed by group of 3 dc, for the rest of the garland. It worked out rather well. As I was doing the red edging, I literally could not tell when I passed the plain white yarn and started working on the area with the glow yarn.

The red edging was done with just 1 sc in each dc in the row previous. If I'd wanted a frillier edge, I could've done 2 sc in each, or I could've added beads, picots, etc. to fancy up the edge. At the last minute, I did add some gold filament thread together with the red, which was something I happened to have on hand, just for a bit of sparkle. Unfortunately, photos with the filament spool were among those that didn't work, and I emptied the spool while doing this, so I couldn't go back and take another photo.


It was the wee hours of the morning when I finished this, so I stuck it into our undecorated tree (we're still training the kitten to stay away from it, which seems to be working quite well). I wanted the girls to find it in the morning. When my elder daughter saw it, it reminded her of a polychaete worm. She thought it would be funny to add buttons for eyes and a ribbon for a tongue (though as far as I know, polychaetes don't have tongues, and I'm not sure what they have for eyes).

I thought it was a hoot.


Here's what the garland looks like stretched out. I had to shape it a bit to get it to spiral instead of ripple. For storage, I'll wrap it around something - the tube from wrapping paper looks to be the right size for that.
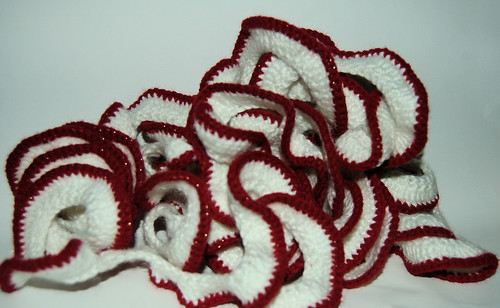


Here's all 15 feet, set up in my light box. I left it there to charge for a bit (and you can see the sparkle of the gold filament thread in the red fairly well, too).


And here it is with the lights out. You can sort of see on the left hand side where the regular yarn is, and only the foundation chain and sc row are glowing.

I'm quite happy with how it turned out. I don't know that using the glow yarn will mean very much, since the tree will be lit up when it's dark, anyways, but we'll see. :-D I think it was a rather successful experiment, even with the yarn change.

The glow yarn was a bit of a pain to work with - the strands had a tendency to untwist and catch on the hook. Surprisingly, the red yarn, which wasn't twisted at all, plus at the gold filament thread added in, didn't catch at all. It was really great to work with.

Wednesday, November 26, 2008

All done!!!

I'll eventually get some full-body shots of the coat. For now, here are a few detailed shots.


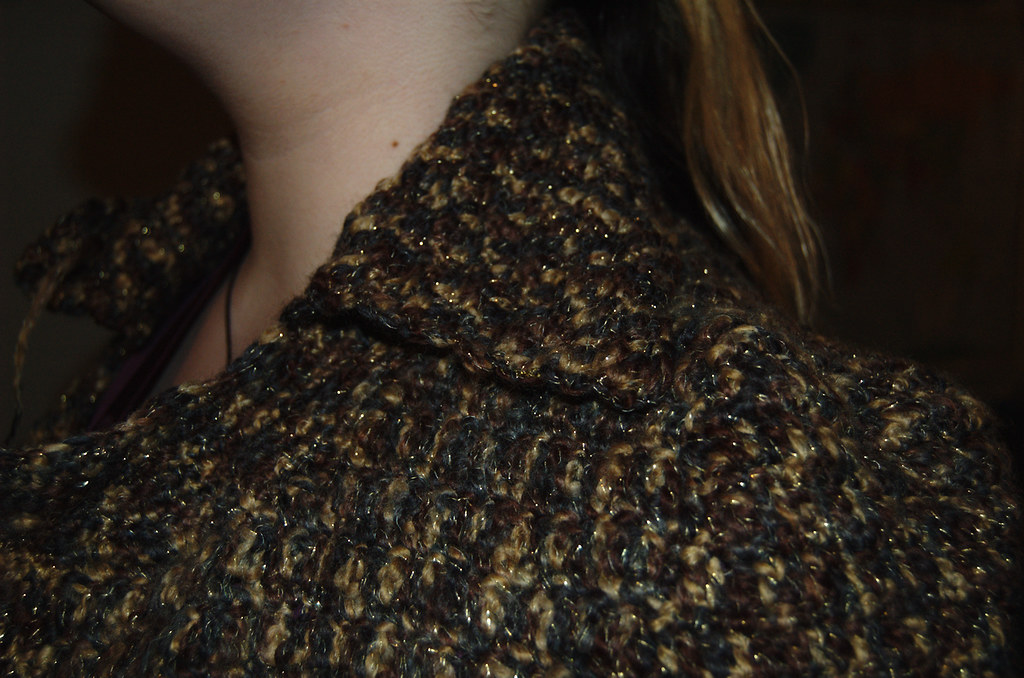
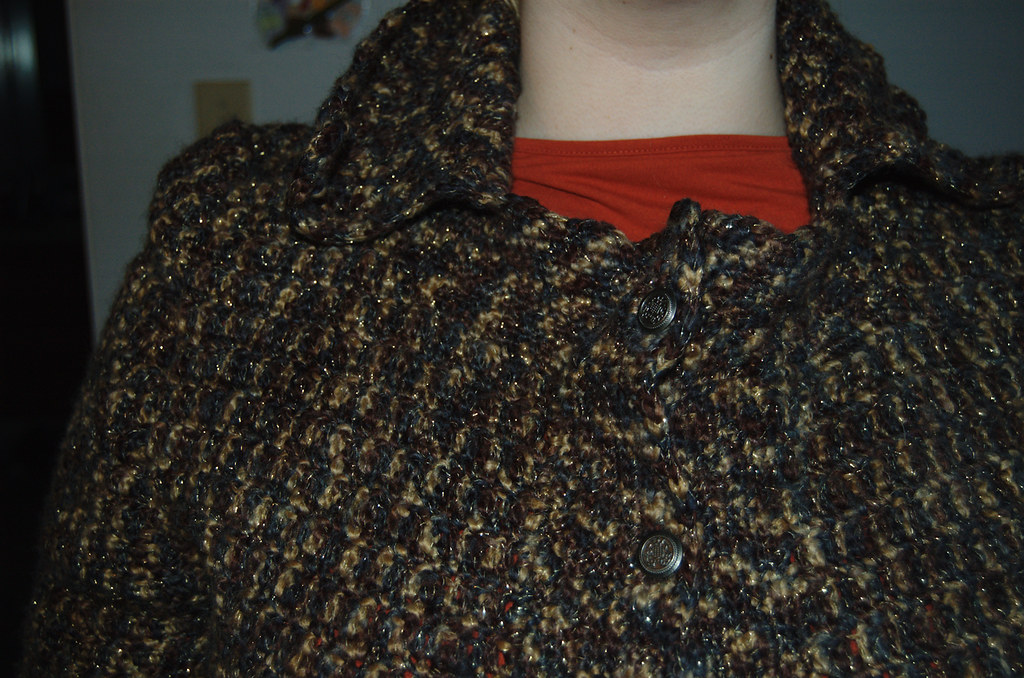
Here, my daughter is wearing the coat with the top button undone. I was a little surprised at how well they folded down into little flaps like that.


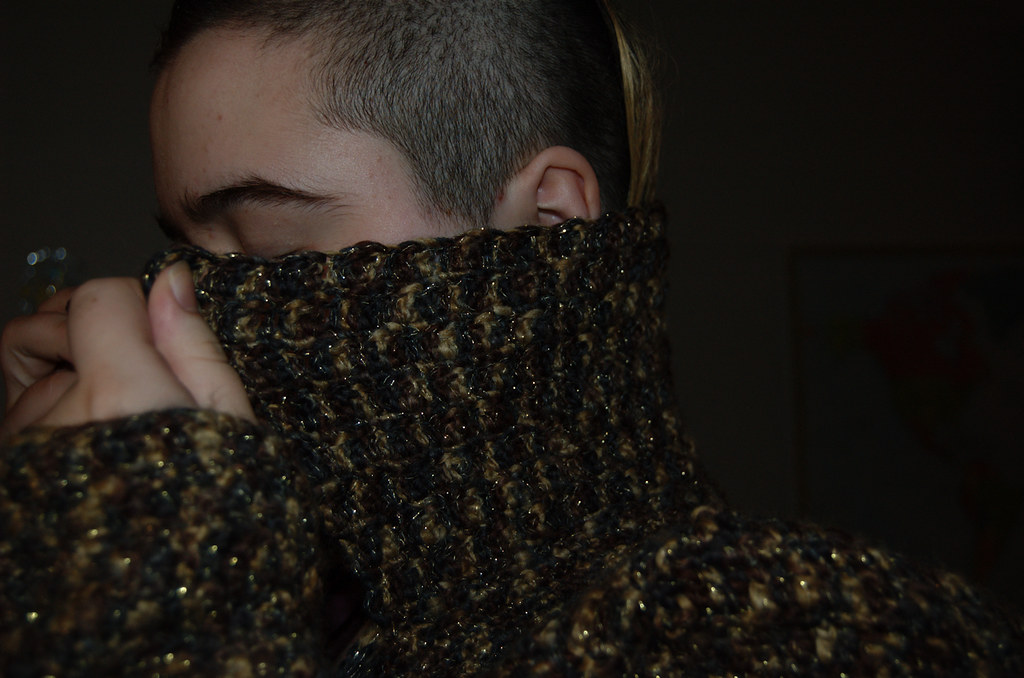
Unforunately, they don't looke quite so nice and smooth with the top button done up. The collar has a tendency to curl up a bit. I'm hoping that, as the stitched relax while being worn, this will work itself out.


A longer look at how the buttons look on the front. Although we added 7 buttons in total, my daughter figures she won't actually use the last two a whole lot.


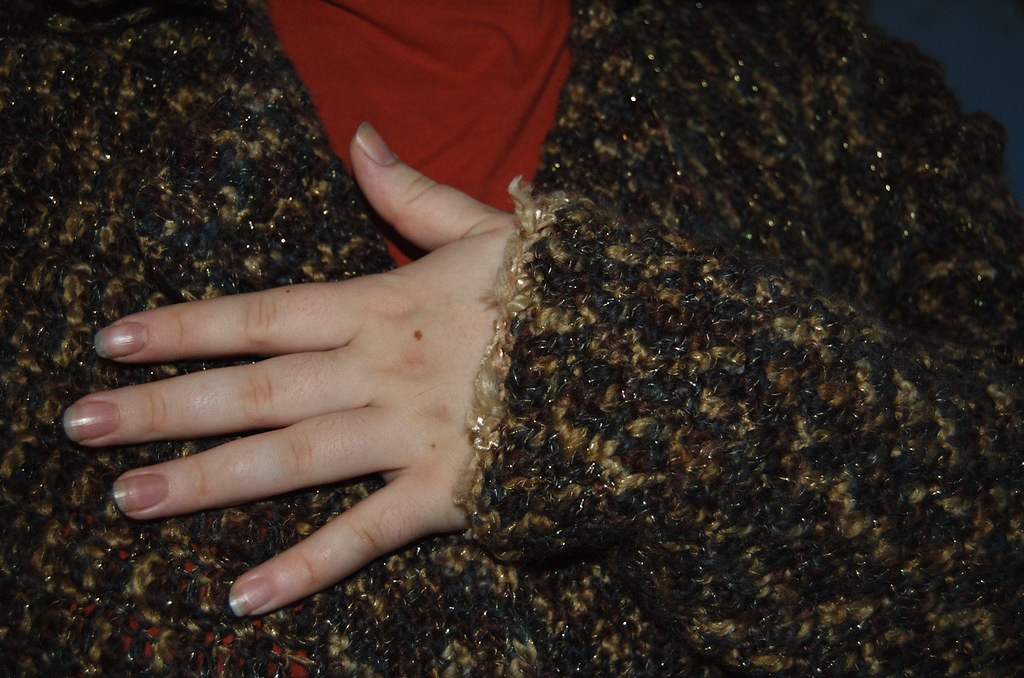
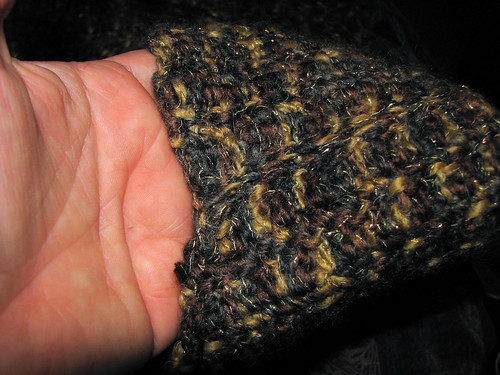
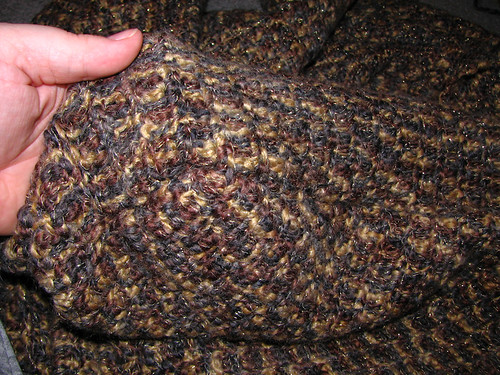
A bit of detail on how the cuff edging looks.


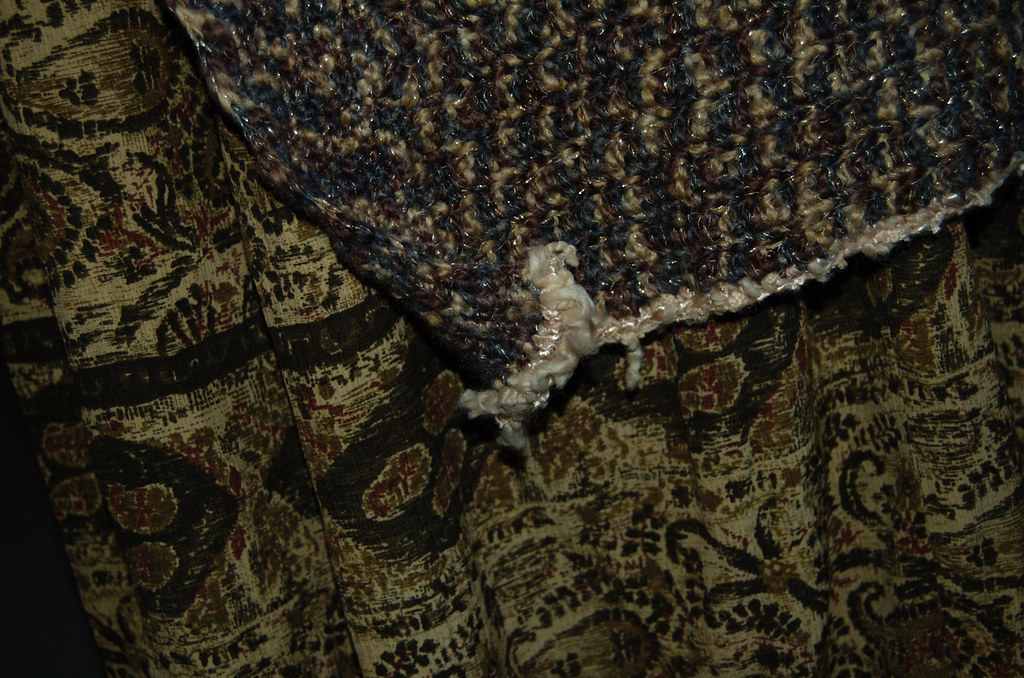
And the edging on the bottom.

Oh, I was wrong on the length. It doesn't reach her knees. It reaches half way down her calves. :-D

The corners here tend to curl up, too. In this case, it's because the edging is worked into each row of the button band, which was worked in the smaller hook and tighter than the panel edges. If I'd thought about it, I would've skipped a stitch or two at the button band areas to prevent this.

There it is! All done!

To recap the project...

What I changed: The basic pattern was a cardigan in Plus Size Crochet. I used it mainly as a guide. The yarn is completely different from what was used in the pattern, and I adjusted the length considerably. I chose to use the 2X size instructions, taking into account the varying width of the yarn I was using. I used the same sizes of hooks as recommended and paid particular attention to the instructions for the arm details, as that was where I was least confidant in what I was doing. The pattern had no collar at all, so that was another change.

What I would do different: I was really surprised by how narrow the front panels worked out to be, even going with the larger size. Adding the extra rows to the button band worked to a certain extent, but I really would've preferred not to have needed to do it. If I were to make this coat over again, I think the easiest thing to do would've been to go another size up. It would've made for a looser back, but I wouldn't have had to add so many extra rows to the button band.

Alternatively, I could have found a way to shape the front panels to conform to my daughter's body shape. Increasing the width to the body area, then decreasing towards the neckline, for example.

In the end, though, I think the unusual yarn with its varying thicknesses played a much bigger part in sizing than I expected it to. Were I to make the same coat using a regular yarn, the result would be *very* different, and I suspect a lot of the sizing issues wouldn't be there. At least not as much.

Final verdict: For a learning experience, this worked out quite well. I was flying by the seat of my pants in a few areas, which made it a fun challenge. For a project like this, I like the simple pattern of alternating sc and dc rows.

There are a few problem areas. The shoulder bunching up when my daughter moves her arms, for example. She's talking about making some "Warcraft shoulders of plus 3 resilience" to work around that. ;-)

More importantly, my daughter likes it. The only thing she doesn't like much is it how it fits around her waist and hips. Overall, though, she's happy with it. She also finds it VERY warm. This might work out to being an actual winter coat for her, rather than a cool weather coat. It won't cut the wind, though.

collar details and edging

First, a couple of details of the collar *before* the button band was completed. I wanted to make sure it was the width she wanted, first.


And it was. :-D

She wanted to have a collar she could flip up and snuggle into. The finished collar would be 3 sc rows wider than what you see here.


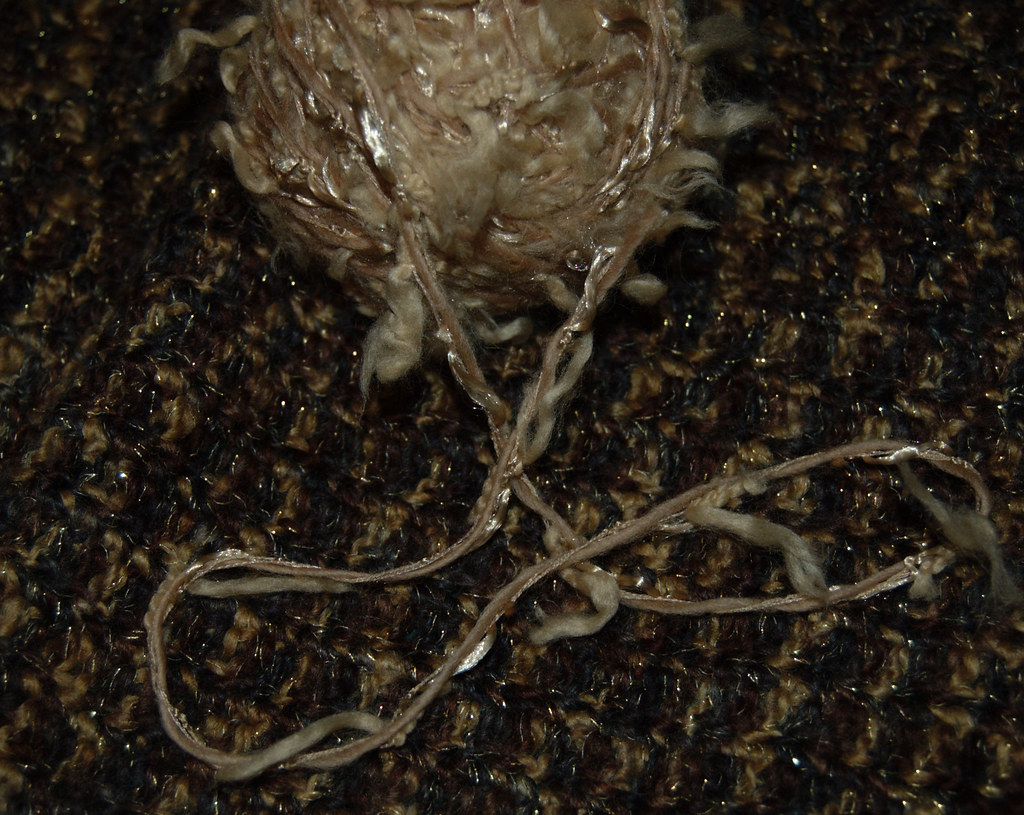
Once the button band was done, the coat was essentially complete. We decided to do a contrasting edging on the cuffs and bottom of the coat. This is the yarn my daughter chose for the edging.

I want to officially say that this yarn SUCKS to crochet with. LOL

I switched back to the larger (I/5.50mm) hook for this part. The extra size was really needed for this lumpy, bumpy yarn to be pulled through the loops.


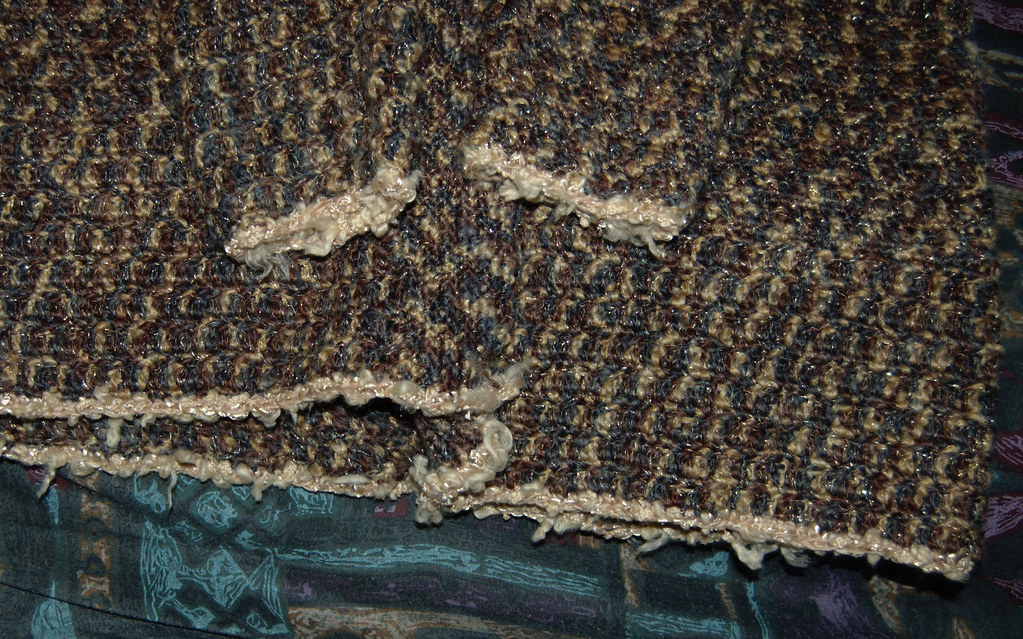
The finished edging, ready and waiting for my daughter to try it on.

I originally expected to do three rows of sc in the edging. I changed my mind very quickly. LOL I would've had a heck of a time finding the loops properly to do other rows. I think the yarn itself is textured enough not to need more width, anynow.


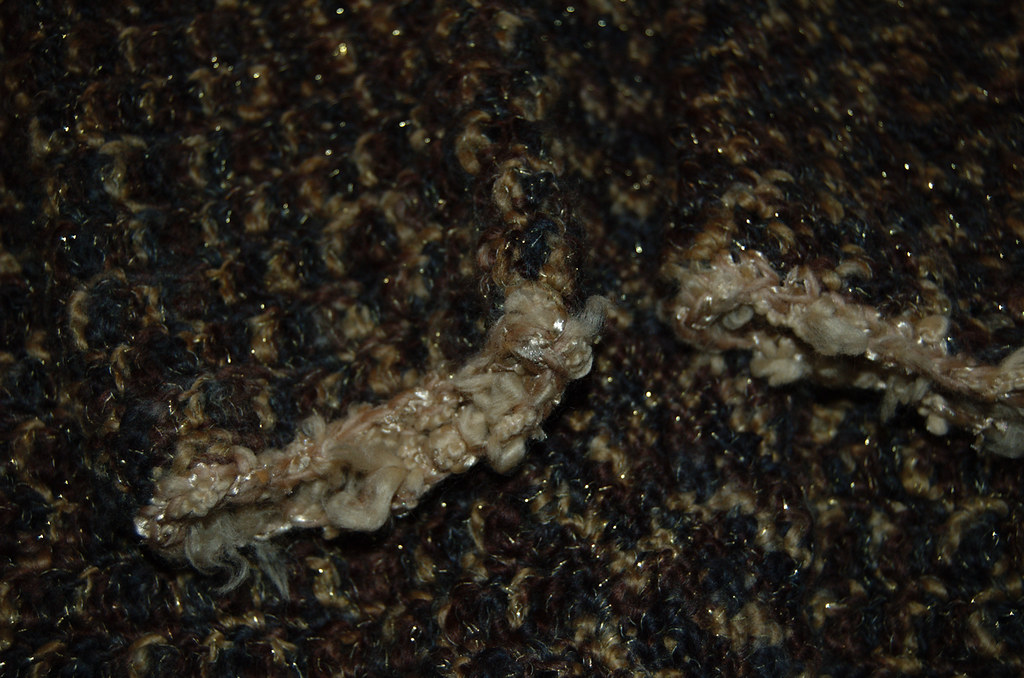
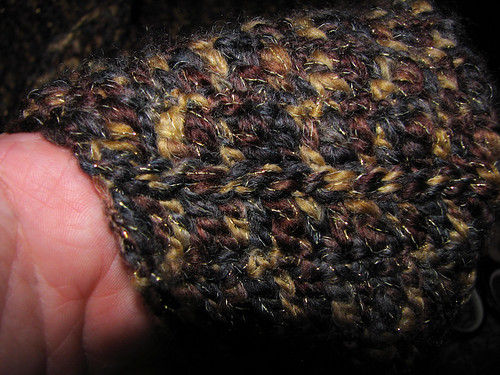
A closer look at the cuffs. Over time, the loose bits will work themselves out and the edging will have a shaggier look to it.


Next up - a look at the finished coat while being worn.

Buttons

I've finished the coat!!! I'll do groups of photos in separate posts, though, rather that one huge post. All can be seen in larger sizes here.

First, the buttons.


Once the collar was done, I got my daughter to put on the coat and placed markers approximately where we wanted the button holes. We decided on 7 buttons total.

Afterward, I adjusted the buttons so that they were evenly spaced - each button hole is 2 stitches wide, and I made them 15 stitches apart.


Here, I'm working on the button hole row. Once I reached the stitch marker, I chained 2, skipped 2, then kept on going to the next marker.


This is a finished button hole. There are two rows after the button hole row. In the first of them, 2 sc were worked into each 2 ch space.


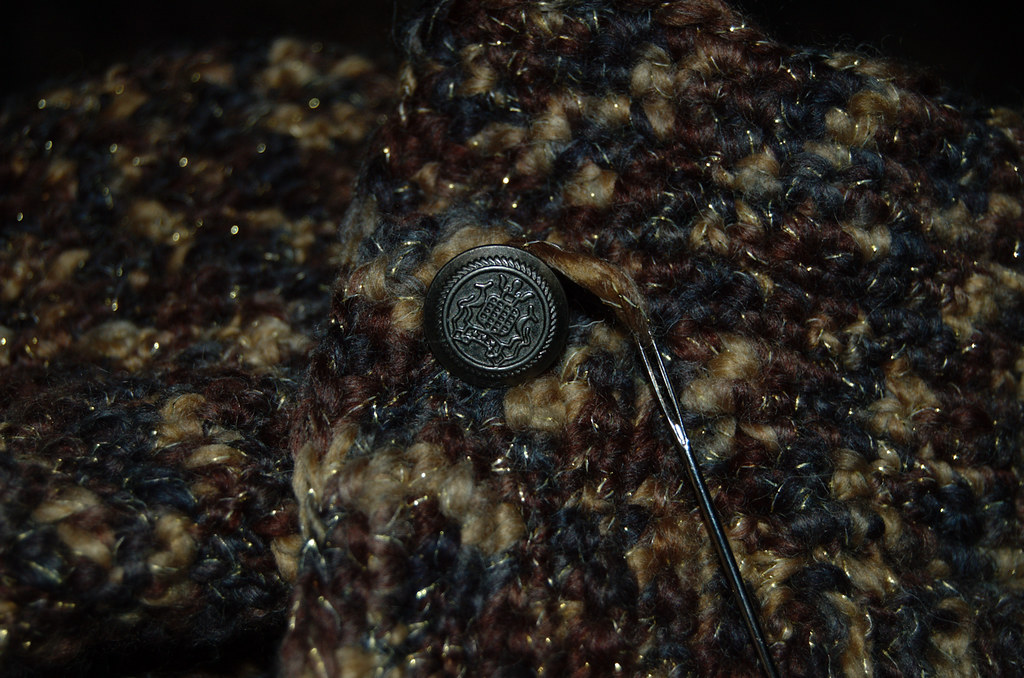
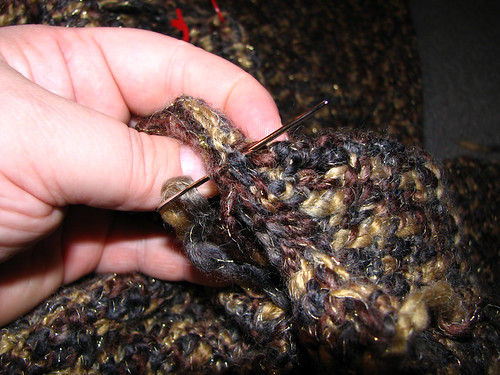
Once the button hole band was complete, I lined up the two sides and matched the button placement to the button holes, ensuring that they were evenly spaced. Once I had a button placed, I used a tapestry needle to sew it in place, using a double thickness of yarn.


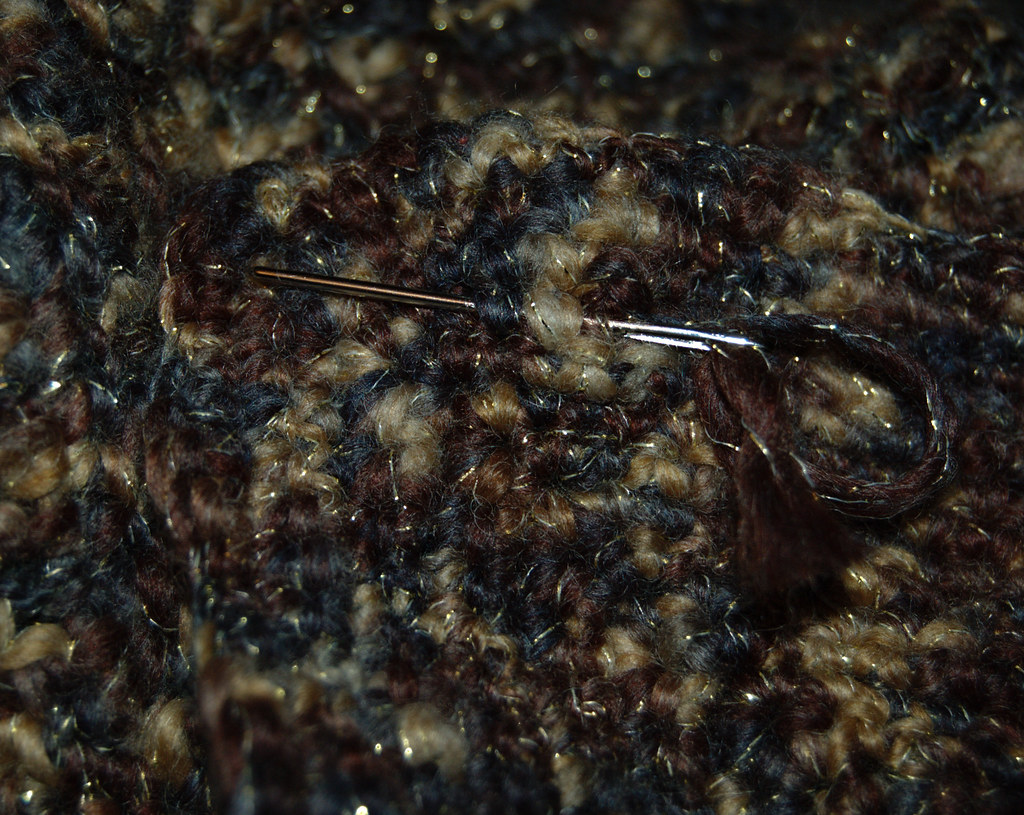
At the back, I tied the ends just into a single knot, in case I found I needed to move it, then cut the yarn leaving long ends.


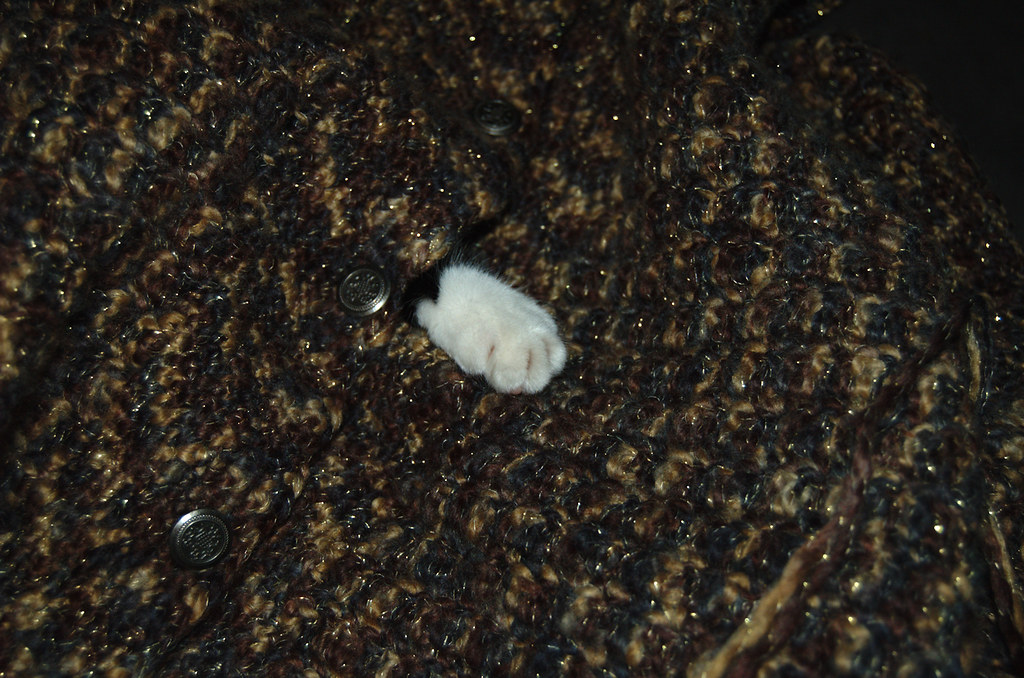
I closed up the buttons as I worked, making sure the fabric lay flat in between the buttons as I worked it.

The kitten helped. She LOVED being inside the coat!


Once I was satisfied with the placement of the buttons, I removed the kitten and opened the coat back up. I double knotted the buttons, then wove the loose ends into the stitches to hide them and make sure the knot couldn't work itself loose.

At this point, the coat was done. The only thing left was the edging in a contrasting wool my daughter chose, which is purely decorative.

On to the next post...

Sunday, November 23, 2008

Go here to be able to see a larger size photo.


I've finally started on the collar for my daughter's coat!

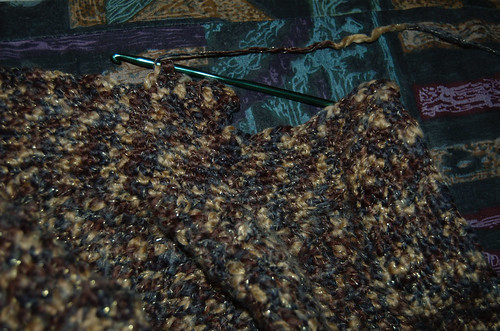
The button band has needed a lot more rows than the instructions stated. In the instructions, the band is 5 rows of sc (single crochet) wide. This didn't come close to closing at the front. In this photo, you can see the 10 rows of sc I've done so far. The corner is the front where the top button will be located. My daughter wants a large collar, so I started it at the spot where the front changes width for the neckline. I decided to work the collar directly to the coat, rather than as a seperate piece added later. I stayed with the smaller (H/5.00mm) hook while using the same pattern repeat as for the body of the coat. I did the first sc row, working from the right side of the coat, so that the right side of the collar faces the other way. That way, when it folds down, the right side will be on the outside. The smaller hook will have the collar slightly denser than the body, so it'll be a little stiffer and a little less open between the stitches.

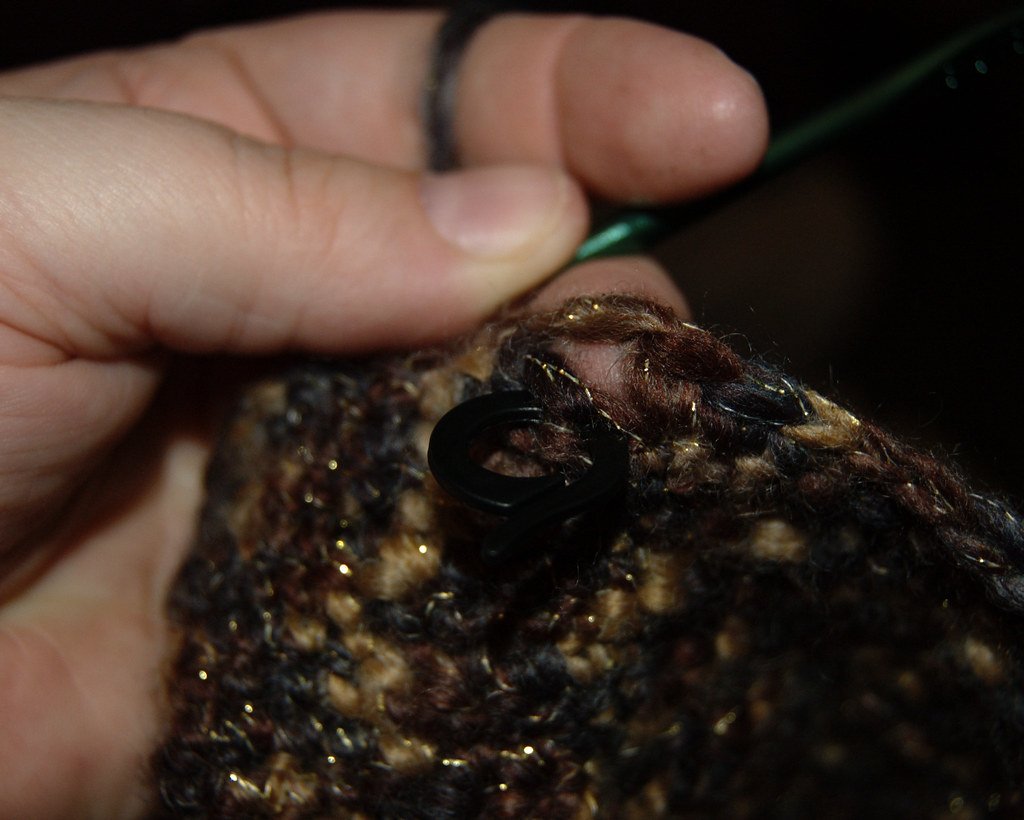
I am increasing the pattern the same way as increases/decreases were done in the rest of the coat. And extra stitch is added on the sc rows only. In this photo, I've done the foundation row of sc, one row of dc (double crochet) with the same number of stitches, the first increased row of sc, and have started the second row of dc. I don't know how many rows I'll end up doing - I'll get my daughter to try it on before I finish off - but I will end it on a dc row. When it's finished, I'll go back to the bottom of the coat, where I've still got an active ball of yarn attached (I just fastened the working loop with a stitch marker, then used a new ball and the same hook to work on the collar). The next sc row I work on will be the button hole row, with 2 more rows of sc after it, which will give the collar an edging of 3 rows of sc to tidy it up.

As we were out and about today, my daughter wore a light coat that she has that I stopped and took a closer look at. The coat she's using now is, according to the label, a smaller size than what I'm making here. The front panels on her current coat, however, are MUCH wider than what I ended up with using the pattern. It makes no sense to me that the front panels of this coat at this size are so much narrower. It's not a matter of gauge - I took that into account when I chose the larger size pattern instructions. With my daughter's broad shoulders, the back panel at this size fits fine. Even if my daughter wasn't so much bustier than the model, I don't see how such narrow panels would've fit.

I'd hate to think how much worse it would've been if I hadn't blocked the pieces!

Wednesday, November 19, 2008

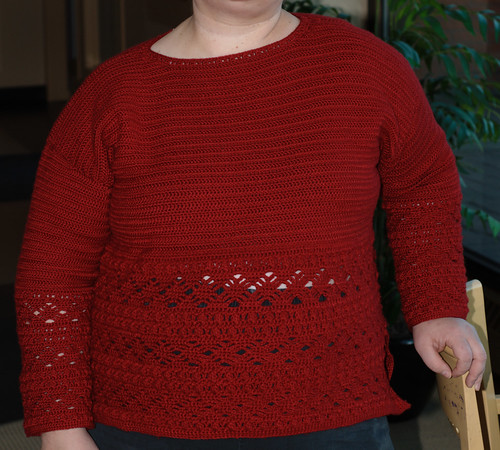
Tunic style sweater with lace borders

I finally snagged my husband to take some photos of a tunic style sweater I'd finished before I started on my daughter's coat. If you've visited our photo blog, you'll find some of the background that I'd posted there before I started this blog.

You can click on the photos for larger sizes, or you can visit here for access to bigger photos showing more detail


First off, a basic front view. Note the pasty white line showing through the red. That's my skin. :-P I have to both hike up the waist on my pants and pull down the sweater to avoid this. This is one of the things that didn't turn out the way they did in the photo on the pattern. The sweater worn by the model had the body panel reaching quite a lot lower. According to the instructions, the size I made (XL) had more rows than the one the model was wearing (which was either a S or M). There's no way the sweater she was wearing had fewer rows in the body than what I'm wearing here.


A basic back view.


Neckline. Before I tried that final blocking, I had to take off both my hair clip and my glasses to get it over my head, and it had a tendency to ride up tight against the neck. I no longer have to remove my glasses and hair clip to put it on, and it's a LOT more comfortable.


Detail of the neckline and shoulder seam. The neckline is done in the same smaller hook as the body.


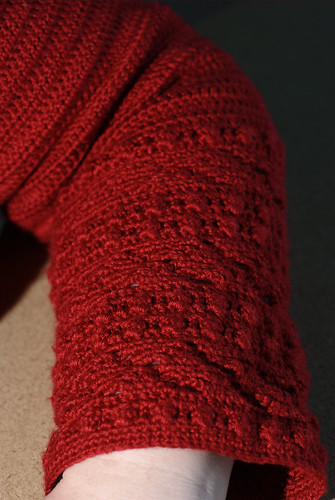
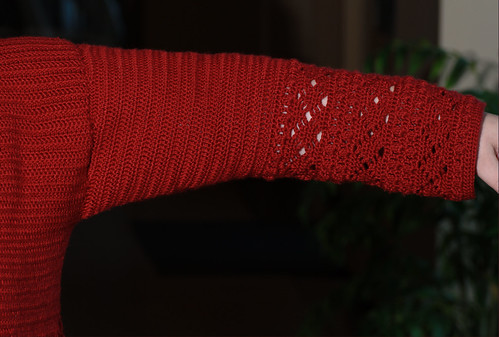
Arm detail. The decorative area in all the pieces were done in a larger hook than the body and trim.


Arm and shoulder seams. The biggest problem I had when I first tried it on after assembly was that the elbow area was so tight as to make it unwearable. That is no longer a problem at all.


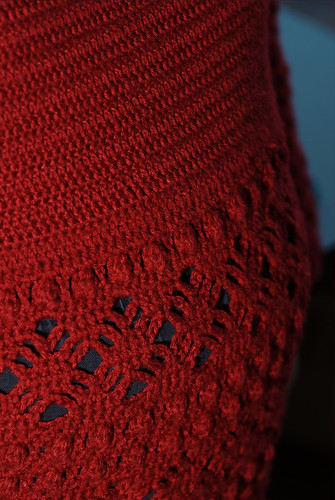
Transition area from panel to body. The last row of the decorative area is done in half-double crochet (hdc) and the body is done in a smaller hook in double crochet (dc).

No belly showing in this picture. ;-) When it does ride up, it gets a bit breezy. The dc area, however, is quite warm. So I have toasty upper body, with chilly spots at my waist. LOL


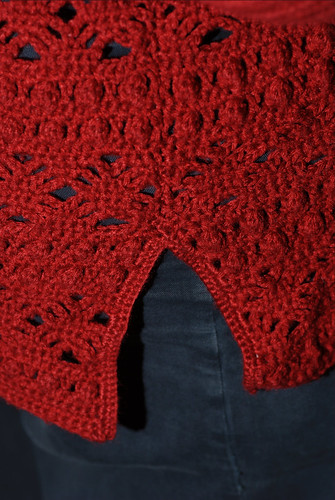
Side slit and decorative panel seam detail.

In following the instructions, the side slit started much higher than this - well above the height shown in this photo. The instructions also had the slit edged in 4 rows of sc, with a sc in the seam itself, with 2sctog (two single crochet together) on either side. Not only did the slit end up way too high, but the trim stuck out weirdly. I lowered the slit, then edged it in only 2 rows of sc, skipping the seam stitch completely and doing one 2sctog right at the top. I liked how it looked much better. The pattern did not have a photo of the side seam - in fact, I would never have thought there was a side slit at all, based on the photo.

The hem at the bottom was done from the start. The hem was done in the smaller hook, then the decorative area in the larger hook.


What I changed: Based on the measurements in the instructions, the XL should have fit me fine. Pattern instructions generally assume an hourglass figure, however, which I don't have. I also like my tops loose. Because of the decorative pattern, I couldn't just increase the numbers to the next size up - I would've had and extra 8 inches or so in the body panels and an extra 4 inches or so in the arm. I also couldn't find the type of yarn they used - Rowan 4 ply cotton. I did find out about a store that carries it, but the miser in me would never have been willing to pay that much for the 15 balls of yarn I would've needed. So I used a different, slightly chunkier yarn, and used larger hooks. The pattern recommended C/2.75mm and D/3.25mm hooks. I used an E/3.55 and an F/3.75.

What I would change: If I could change only one thing about this sweater, I would add an extra 6-8 inches of dc rows to the body panels. I would really prefer the extra length - and the lack of breeze.

If I'd known better ahead of time, I would've maimed (wet blocked) the pattern pieces right from the start, instead of pinning, then spraying them. I also would have bought the foam pieces I now have for a blocking surface earlier. I simply didn't have a good surface to pin such large pieces to.

I think I would also have used the same size hook - the smaller one - for the whole thing. I don't know why the decorative areas were done in a larger hook, but I liked the more compact stitches that resulted with the smaller hook better. When I did swatches to test blocking techniques, I used only the small hook, and I really liked the look of it better than with the larger hook.

Final judgement: I really like this sweater. I like the look of it and, now that it's properly blocked, it's comfortable to wear. Well, except for the beezy bits. ;-) I would definitely want to make it again, with the changes I mentioned above.

Tuesday, November 18, 2008

Assembly - lots of photos

I found myself with a much shorter shift tonight than usual, so I actually have a chance to post this today!

First off, I apologize for the crappy photos. I hate having to use flash! Ah, well. You can click on the photos to see them at a slightly larger size, or you can go to my crafts set on flickr to for larger, easier to see, sizes.

Ever since I started out with embroidery, some 2 decades ago, one of the things that irritated me about instructions for projects is that they'd have photos of the finished projects, and perhaps some of the specialty stitches, but never the nuts and bolts. The first thing I want to see with embroidery is the back of the piece. When it comes to assembling something like this coat, I want to see how the seams and joins look. You can learn so much more about a piece by looking at the back.


So that's what you'll find here. The very first thing I had to do with the coat is join the front and back panels at the shoulder seams. With right sides facing together, I matched the stitches and sewed them together. Because both sides were the tops of the individual panels, each ending in a row of single crochet (sc), I used a stitch that would let them lay flat against each other. I don't know how well you can see it in the photo, but I've got the needle joining the far sides of the individual loops, so that the sewing yarn runs through the middle of each stitch. Mattress stitch, I think it's called. The idea was that, once done, the tops of the sc stitches would face each other.


This is the finished shoulder seem from the inside of the coat.


And here's the seam as it looks from the outside, as it would sit while being worn.


The next step was to take a sleeve panel and find the top centre, then match the centre to the shoulder seam. In this photo, again with right sides together, the top of the sleeve is lying across the front and back panels at the shoulder.


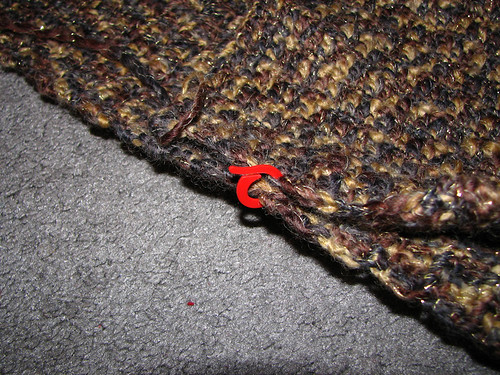
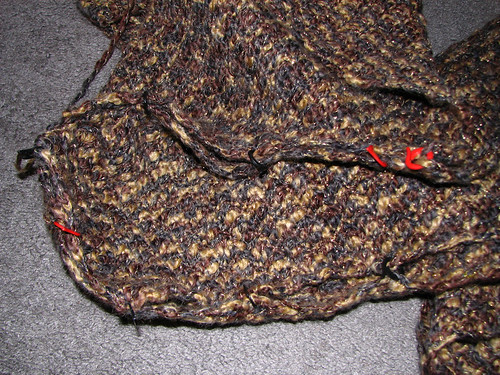
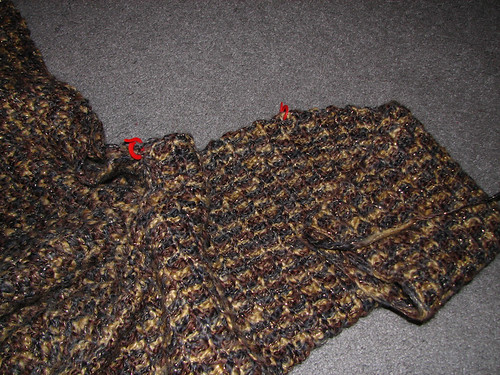
After matching the centre, I then had to line up the armpit edges (where you see two red stitch markers close together), then ease the rest of the edges together to fit.

I used stitch markers to hold the pieces together because I find pins just fall right out. The markers allow the panels to move more than is good, but at least they stay where I put them.


Since most of the edges that needed to be joined were the ends of rows, I just used a back and forth running stitch to sew them together, lining up the rows as much as possible on the curves.

Note that the arm panel is still wide open when joined to the front and back panels, leaving the sides open from wrist to the bottom of the coast.


Here is the finished arm seam from the inside of the coat. I immediately wondered about how much of a point had formed where the corner of the sleeve top joined with the body panels. There should've been more of a curve to the sleeve top.


Here's the arm seam from the outside. The shoulder seam is in my hand, and you can see how there's a sort of squared off top to the sleeve cap.


Once the sleeves were attached, it was time to do up the sides. I used stitch markers only to hold things together at the armpit, and to line up where the increase in the arm ended, and the rest of the panel continued in rows the same length. I sewed these together the same way as for the arm seams, throwing a few extra stitches into high stress areas, such as the arm pit and the edge of the cuff.


I managed to finish with 10 minutes to spare before I had to get ready for work. LOL I got my daughter to try it on to see what needed adjusting.

I'm really not sure of what to make of how it fits. Those "corners" at the shoulder really want to bunch up and stick out. The sleeves turned out longer than I expected - I think the shoulder is meant to sit higher up but, like me, my daughter has sloping shoulders. It was also clear that I'd have to add a few extra rows in the button band than the original pattern specified. It'll have to be done in pairs, so I'll add 2 extra rows before the button hole row, get her to try it on again and see if I need to make another extra pair or not. Better a bit loose than too snug.


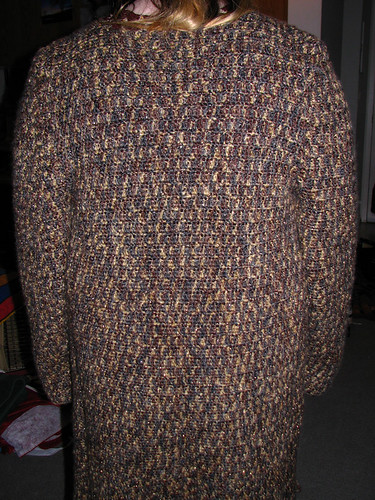
And finally, the view from the back, where it seems to fit rather well. The coat reaches to the backs of her knees. Nice and long, just like she wanted.

As for the collar she wanted, I had though about making and adding it first, but seeing how the neckline sits, I'll do the button band first, as it edges the neckline, too.

Monday, November 17, 2008

Finally!!


It took me most of the day, but I finally finished the last panel on my daughter's coat!

I'd already blocked the other finished panels. You can see them here. In this photo (which my husband insisted I not crop the toes out of. *L*) are the sleeves. They ended up wide enough to need 3 sheets of the foam. I wet blocked all the pieces.

This yarn dries rather quickly, so I should be able to assemble it tomorrow, though I don't think I'll start the finishing edges before I have to go to work.

The light really sucks in this pictures, but you can still see the sparkle in the yarn. I'm really looking forward to seeing it on my daughter! :-)

Sunday, November 16, 2008

Blast from the past - shisha embroidery

I've been trying to push on finishing my daughter's coat. I'd hoped to have it at least assembled by this weekend, but it didn't work out that way. I'm still working on that last sleeve. So for now, I'm posting some older samples of crafts I've tried.

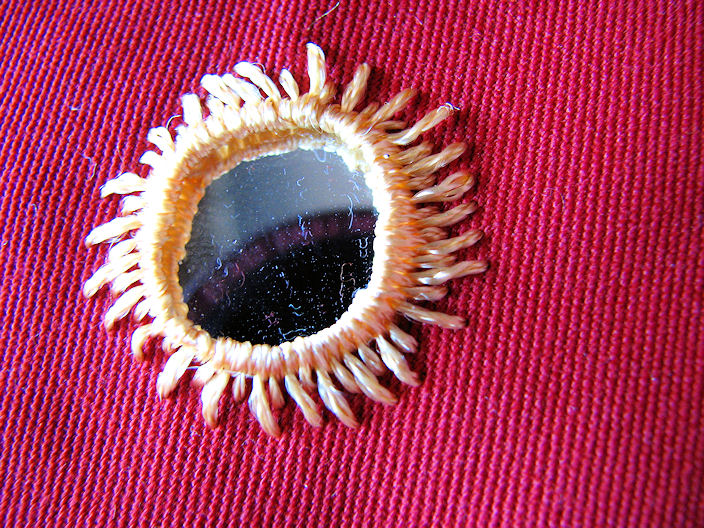
For quite a few years, I'd been looking for a reason to try shisha embroidery. Last year, I decided to make shisha mirror embroidery the focal point of that year's Christmas decorations.

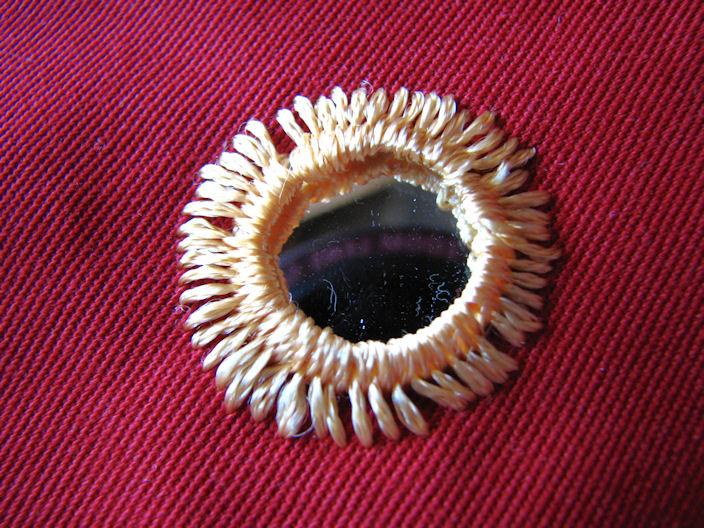
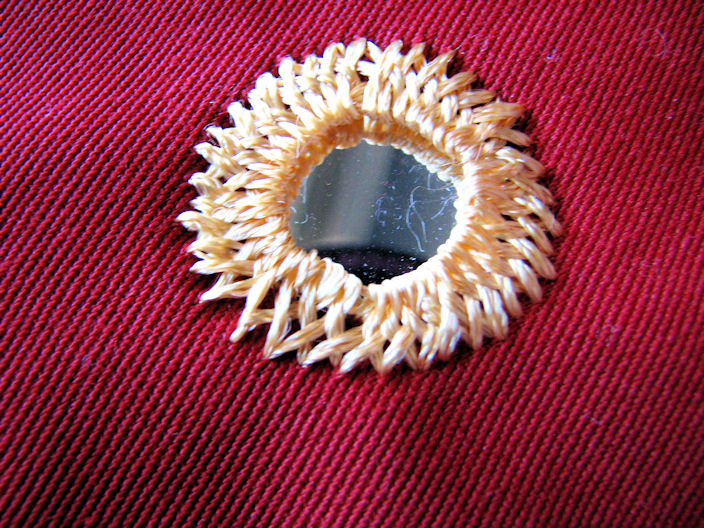
In this series of photos, the same stitch is used, but I changed the placement of the foundation threads, as well as the length of the surrounding stitches.


The mirrors are first held in place using foundation threads - pairs of them at 90 degree angles, forming a square opening around the middle. While working the ring of stitches, there's a tendency for the foundation threads to pull outwards. With this one, it pulled out way too far. As I worked the rest of the embroidery and embellishments, the mirror ended up falling right out. Fixing it wasn't too much trouble, though.


In this one, I over compensated and ended up making the opening much smaller than it should have been. I didn't mind, though, as I liked the effect of the threads that resulted.


This one was a little more open than I wanted, but it held fine. I also altered the stitch by bringing the needle up right next to the mirror at the start, then finishing the stitch by bringing the needle to be back farther out.


Changing the start and finish points of the stitches really changed the look of the pattern.


You can see the finished decorations here.

We don't have all of them anymore, as several were given away to friends.

Saturday, November 8, 2008

Stocked up.

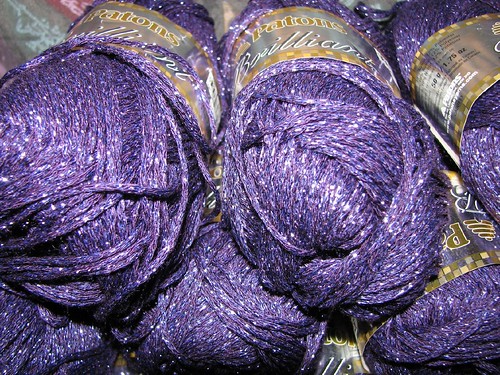
We made an unplanned stop at Michael's this evening. They've got a huge sale on yarns right now. I've been eyeballing this yarn for months! I just couldn't convince myself to pay the price. At $3 a skein, it's still higher than I would normally be willing to pay, but I figured I'd either get it now - or not have a chance again. At least not in any decent amount.

I cleared out their remaining stock. Sixteen skeins. It should be enough to make a nice top. I think I even know which pattern I'd like to use - I'll need to dig through my pattern folder again.

The photo doesn't really do the colour justice. It's a very deep purple. The photo certainly does pick up the sparkle, though. It's called Brilliance, by Patons; colour name Prettiest Plum. It's 69% acrylic, 19% nylon and 12% polyester, 166 yards/151 meters 50g/1.75 oz. Hand wash, lay flat to dry. It's also gorgeously soft and light. I really look forward to making something with it.

Thursday, November 6, 2008

Book Review: Cute Dolls

Title: Let's Make Cute Stuff by Aranzi Arono! Cute Dolls

The girls and I made our weekly library trip yesterday and I grabbed this for my elder daughter. I had just glanced through it and, while I wasn't sure she'd be interested in this style of doll making specifically, it has detailed instructional diagrams and patterns for every one, which I thought she might find useful.

The book features instructions for 18 different dolls ("jersey-cloth mascots" is how they're described in the book) with names like Sprite and Panda, as well as more interesting names like Mr. Tad and Mr. Pole (which count as one type of doll, even though there's 2 of them), Alien, and Bad Guy.

It wasn't until we were home and my daughter started reading the text for each doll that we discovered something. This book is completely surreal! LOL Each design has a prosaic description. The very first one, White Rabbit and Brown Bunny, reads:

White Rabbit and Brown Bunny
are girl bunnies and best friends.
They're fluffy girl bunnies
who can't live without cute stuff.
"Make us cute or we'll be angry!"


That was funny enough, but this one, for "Liar," has had us going for the past two days...

Liar lies. He tells woeful lies.
"Somebody, help me!
I'm stuck in a squid basket!"
Liar can only tell woeful lies.


In the photo, the doll is in, what I assume to be, a squid basket. Ever since we've discovered this one, we've been spontaneously calling out, "I'm stuck in a squid basket!" Or looking woefully at each other and saying, "woe" in long, drawn out voices.

'cause we're weird that way.

Then there's this one... Kidnapper.

Kidnapper is tall and trim.
He's always wearing a tight black suit.
It's so tight that it's like
a part of his body now.
Kidnapper is always wearing a black hat.
He doesn't have hair underneath his hat.
Kidnapper is always holding a white bag.
That's because his job is to kidnap kis.
He's off to work again today!


I mean... WTF?!??!? LOL

So for instructional value, the book is really great. The graphic instructions are quite clear and details, and the patterns are easy to copy to work with.
It's the prose, however, that sells it for me. What a hoot!

Tuesday, November 4, 2008

Third time's the charm!

I spent a lot of time working on a tunic style sweater, and was really looking forward to wearing it. Unfortunately, when I finally tried it on, it didn't fit right. I'd dry blocked, then sprayed, the pieces before assembly, as recommended for the type of yarn. When I put it on, however, I found it weirdly tight at the elbows. Too tight to be able to wear. It didn't feel comfortable in other areas, either. I like my tops loose. It should have been loose. I made it using the largest size the pattern came in. According to the measurements given, that was the right size for me, but I like my tops loose. With the lace pattern in the design, increasing it another size would've made it way too big, so I used slightly larger hooks than recommended to get a larger gauge. So it was a surprise to find it was still so snug.

At first, I was afraid the sweater would have to go to my daughters or something, but I decided to try wet blocking it. The only surface I had that was large enough was a futon mattress. It was partially successful. The pins kept coming loose from the mattress, so the shape wasn't maintained. Still, it was a lot better, even with one elbow slightly tighter than the other because of the loose pins. It was wearable, at least, but I still wasn't completely satisfied.

I needed to find some sort of surface to properly block such large items - especially with a coat being made right now! I decided to pick up a sheet of that foam house insulation that comes in pink or blue. I knew the pins would go into the foam easily, and that it would be hard enough to actually hold them in place.

So today, the girls and I headed to the hardware store. The insulation I was thinking of turned out to come in sheets much thinner than I expected. I also had no idea how I'd get it home. There was no way they'd fit in the car, and tying the 2 or 3 sheets I'd need to get to the roof wouldn't work, as the edges would get damaged.

Then I spotted large sheets of styrofoam type insulation. The size was ideal - great big sheets in different thicknesses. I'd have been able to block all the pieces for my daughter's coat at the same time with those. I still had the same problem, though. No way to get it home. These would be even harder to tie to the roof, and they'd never survive the drive home without damage.
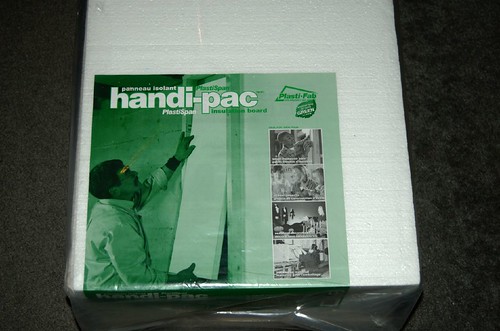
Then we spotted this.

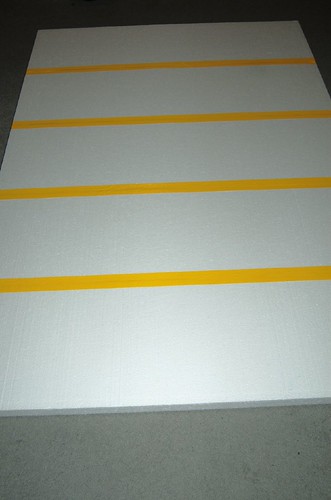
Smaller sheets of the same type of foam in packs of six, available in different thicknesses. Still too long to fit in the trunk, but we could just fit it in the back seat, with my younger daughter. *L*

I also picked up a roll of cloth tape, similar to duct tape, to hold the pieces together while blocking


Because of the arm length of the sweater, I ended up taping 5 sheets of the foam side by side. Buying several small sheets instead of one big one turned out to be the better choice.

Once my younger daughter and I taped the backs together, I flipped it over and covered the top with towels.


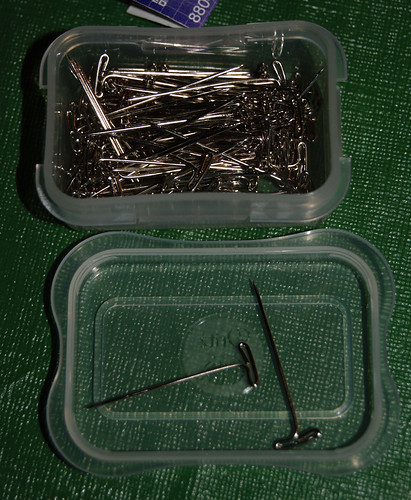
I used to use just regular pins with the round heads for blocking. Those worked fine for small items, for for larger items, I found the heads just slipped right through the fabric. One of the library books on crochet I'd borrowed mentioned T-pins - something I'd never heard of before. I found some at Micheal's. These are the smaller size they had available. They're fantastic! Much better for the job. I'm going to have to pick up a couple more packages so I'll have enough to block the pieces for the coat.


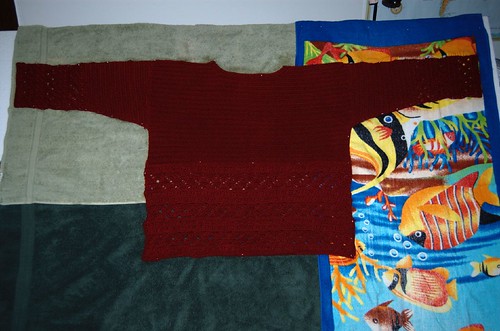
Here's the sweater, pinned inside out so the seams lie flat. I paid particular attention to pulling and stretching out the elbow area. I tried to focus a bit more on the neck opening, too, as I have to take off my glasses to put in on, but it wasn't as much of a priority.

The foam seems to be working well. The pins still slide out rather easily while stretching things out, but not enough to be a problem.

This should take about 2 days to dry. :-/