Pages

Thursday, November 24, 2011

Quick and Easy Garland

Here's a garland I made up using the new Martha Stewart yarn, Glitter Eyelash.

When I first saw the new line of Martha Stewart yarns, I have to admit I had low expectations for the eyelash yarn.  That's because I have low expectation for eyelash yarn in general.  I find them a major pain to work with, and heaven help you if you make a mistake and need to undo it!

I was impressed with this yarn, however.  First off, there's a nice range of colours with marvelous sparkle to them.  Then I actually picked up a ball.  I had expected it to be scratchy from the glitter strands, but it was surprisingly soft.  I was impressed.

So when I decided to make a last minute decoration for the staff decorated tree at the Michaels I teach at, I picked up a couple of balls in Blue Topaz.  I decided to make a garland similar to one I have made before, using glow in the dark yarn. 

Once actually working with the yarn, I was again impressed.  It was smooth to work with and there was no tangling of any kind.  Very nice.  

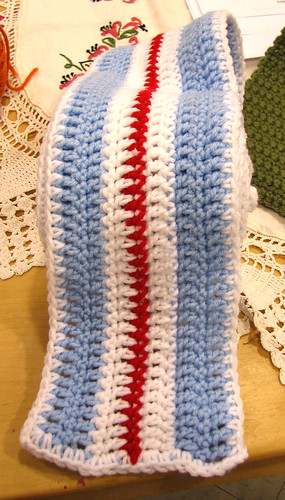
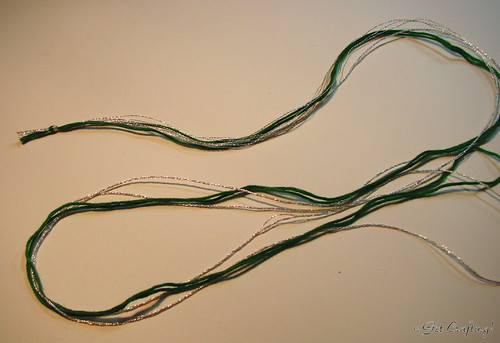
For the garland pictured below, I used a 5.00mm hook and some white yarn I had on hand (Loops and Threads Impeccable) along with the Glitter Eyelash.

To start, make a chain to the desired length.  I never measured the final length for this, but I'm guessing it was about 13-15 feet long.

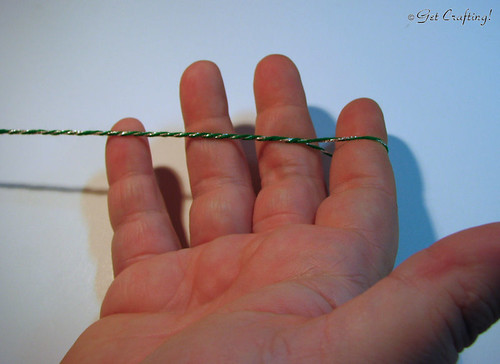
To make a gentle spiral, two stitches are worked into each chain in the foundation.

Start by making a loop by working a sc into the 6th chain from the hook, or whatever number of chains for the size of loop you want. Work 1 hdc in the next ch.

Place a stitch marker at the opposite end of the foundation chain, 7 ch from the end or the number of ch in your loop plus 2.

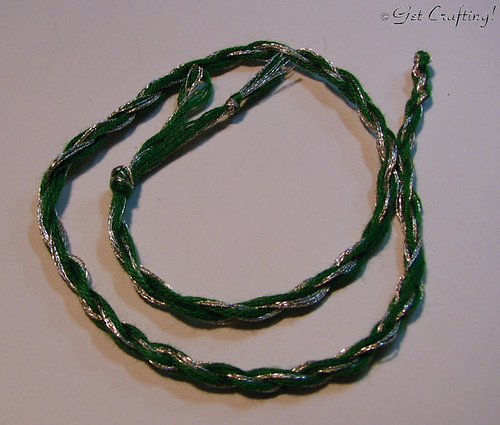
Work 2 dc into each ch to the marker.  Work 1 hdc into the ch the marker is in.  Create a loop by working a sc into the next ch and the last chain together.

Fasten off yarn.

Join with Glitter Eyelash into the hdc stitch at either end of the garland.  Work 1 sc into each stitch to the hdc at the opposite end.

Fasten off yarn.


Quick and easy garland

When I first started this, I had intended to make a denser glitter row by working 1 ch in between each sc.  It was looking great, but used far more yarn than I had.  Unfortunately, I had already worked about 1 3/4 balls of Glitter Eyelash before I realized there was no way I had enough to finish the entire garland.  I would have needed almost 4 balls to finish it that way (which, by the way, I recommend as a variation.  Just make sure you have lots of Glitter Eyelash).

I had to do the one thing I dreaded most with an eyelash yarn.  I would need to undo nearly two balls worth. 

Much to my surprise, it came undone as smoothly as any basic yarn!  There were no tangles at all, no catches, no twisting.  It was beautiful! 

Quick and easy garland

To store the garland, wrap it around a core of some kind.  I used the thick cardboard tube from a package of extra wide aluminum foil.  There's a couple of spots of sticky glue where the foil was attached to the tube, which I covered with tape.  Just hook the loop around one end of the tube, then wind the garland around it.  To fit this garland onto the tube, I had to jam it together pretty tightly.  The tube also makes it easier to place the garland on your tree.  Just hook a loop onto your tree, then unwind it as you go.

This garland took me about 3 hours to do, including the time it took to rip all the eyelash yarn and work it back up again.  This can easily be worked up in a single evening.

As for the Glitter Eyelash yarn from Martha Stewart, I definitely recommend it!  It's got great colours, lovely sparkle, a soft texture, is lovely to work with, and is even a delight to undo if you make a mistake.  Fantastic stuff!


Sunday, November 20, 2011

At the RAM

Been doing a lot of dashing around in between projects, which has left me wth lots to post about, but little time to actually do the the posting.  So I am taking a moment to write this from the Royal Alberta museum, while we pause at the Museum Cafe before heading out.

One of my favourite sections of the museum is in the First Nations area.  Specifically, the area showcasing exquisite bead, quill and embroidry            work. It's the silk embroidery that really blows me away.  The stitchery alone is amazing, with the incredibly perfect technique, design balance and use of colour.  That such fine, miniscule stitchery also happens to be stitched directly on thick leather or suede makes me appreciate the skills of the unknown artists even more. It never ceases to blow me away when I look at them!

If you ever find yourself in Edmonton, I highly recommend checking out the RAM and seeing this display.  I look forward to seeing how the rework this section when they're new building is built, hopefully to open in 2015.

Happy crafting!

Wednesday, November 16, 2011

Am I in your way?

This month has been particularly hectic for me.  Aside from trying to get various craft projects finished, taking on NaNoWriMo and the usual errands, I've found myself running around and aweful lot these days and falling behind.

Oh, and then there's this.


I was working on a custom hat when the kitten we've taken in decided I didn't really need to use my arm after all.

More adoreable kitten pictures here.


Sunday, November 6, 2011

Special Olympics Canada scarf and pattern


Special Olympics Canada, Vertical Stripe Scarf

 Special Olympics Canada striped scarf

This is an easy scarf design worked in Special OlympicsCanada colours.  Donated scarves are given to all the athletes, their families, coaches and volunteers.  Extra scarves are donated to those in need.  This scarf is done in just single and double crochet stitches and can be worked up quickly.  Make a few and donate them to worthy cause!

Yarn: Medium (4) weight acrylic yarn in any blue similar to the Special Olympics Canada logo, white and maple leaf red.

Hook: 5.00mm

Foundation chain in blue: work a chain about 6 feet in length (about 250 stitches; I worked mine in 270 stitches for a longer scarf) + 2 for turning chain.

Turning chains are not counted as a stitches in this pattern.

Row 1: Work dc in third chain from the hook.  Continue working Dc to end of foundation chain.  Ch 1.  Turn.

Row 2: Sc in each Dc to end.  Ch 2 loosely.  Turn.

Row 3: Dc in each Sc to end changing colour to white at last stitch.  Ch 1.  Turn.

Row 4: In white, Sc in each Dc to end.  Ch 2 loosely.  Turn

Row 5: Dc in each Sc to end, changing colour to red at the last stitch.  Ch 1.  Turn.

Row 6: In Red, Sc in each Dc to end, changing to white at the last stitch. Ch 2 loosely.  Turn.

Row 7: In white, Dc in each Sc to end.  Ch 1.  Turn.

Row 8: In white, Sc in each Dc to end, changing to blue in last stitch.  Ch 2 loosely.  Turn.

Row 9: In blue, Dc in each Sc to end.  Ch 1.  Turn.

Row 10: Sc in each Dc to end.  Ch 2 loosely.  Turn.

Row 11: Dc in each Sc to end.  Finish off and weave in end.

Join white into a right hand corner of either narrow end, in between the last two Dc on the long side.  Sc into same spot as join.  Ch 2 to turn corner.  Work 2 Sc around Dc post on the short edge.  Continue working evenly along edge with 1 Sc into an Sc row and 2 Sc around Dc posts (including any turning chains) to next corner.  There will be 2 Sc worked around the last Dc post.  Ch 2 to turn corner and work 1 more Sc in the space between the last Dc post worked around and the next Dc stitch on the long side.  There should be 17 Sc between the Ch 2 spaces, plus one Sc worked on the long side of each corner.

Work Sc in between the Dc stitches to the end of the scarf.  At the end, Ch 2 to turn corner.  Work 17 Sc across the end in the same manner as at the beginning.  Ch 2 to turn corner and work Sc into the space between the last Dc post worked around and the next Dc.  Continue working Sc in between the Dc stitches to the end, slip stitching into the beginning Sc.

Finish off yarn and weave in ends.

Special Olympics Canada - Tunisian scarf

It took me a while, but I finally finished the scarf I was making for Special Olympics Canada Winter Games, and here it is!

Special Olympics Canada scarf in Tunisian

I was able to use my Denise Interchangable Crochet Hooks for the first time for this project.  It's the first time I've ever seen an 8mm hook, so that's the size I chose to make this.  I worked it using a Tunisian double crochet, however I worked the hook as with the Tunisian Stockinette stitch, in between the vertical bars from front to back instead of the front only.  Between the size of the hook and the stitch, it made for a very open fabric.

Tunisian stitch naturally tends to go on the diagonal, which can be blocked straight.  I used that tendancy as part of the design, instead. 

I'm really happy with how it turns out, but would never do a scarf like this again!  With all the colour changes, there were so many ends to work in; two for every band of colour for a scarf that ended up being more than 6 feet long!  Not an easy thing to hide and anchor all those ends in such an open design.

I'm happy with how it turned out, though, and I hope whoever recieves it enjoys it. :-)

I was able to finish a second scarf before I finished stitching this one.  I will be writing that one up as a free pattern in another post.

Michaels and Blankets for Canada

What a terrific afternoon we had today!

Blankets for Canada display

I was able to set up a display at a table near the door, happy to use the embroidered and crocheted cloth I inherited as part of the display.  I picked up some variegated yarn to work with and set out 4 of the 5 panels I've done so far, with extra hooks and yarn at the ready.  I was joined by three lovely ladies and would have loved to go longer than the time I was allotted.  We got so busy crocheting and chatting, I completely forgot to try and get the group photo I had planned on!

Remember, 8"x8" panels for Blankets for Canada can be dropped off at any Michaels.  I will be organizing a joining party for the end of Jan/start of Feb at the Clareview branch to help piece the donated squares together into blankets.

Have fun stitching!


Saturday, November 5, 2011

Blankets for Canada

Just a quick reminder that Michaels, Discover Knit and Crochet and Blankets for Canada have their event this Sunday, from 1-3pm.  Stop by the Edmonton, Clareview location and join me, making panels for Blankets for Canada.  We'll be using medium (4) weight yarn and 5.00 mm hooks and needles.  I hope to see you there!

Wednesday, November 2, 2011

Temari - finishing the 16 point star

Now that the initial 8 pointed star is worked, it's time to start the overlapping star, then add more colours.

Temari - finishing the 16 point star

For the overlapping star, I chose to use white and a pale beige.  The needle is brought up next to one of the pins in the inner ring, to the left of the guideline, then brought down to the next guideline's pin in the outer ring.

Temari - finishing the 16 point star

Continue working around the mari, removing the pins as you go.

Temari - finishing the 16 point star

After working 1 round, finish off the thread.  Repeat on the other side of the mari.

Temari - finishing the 16 point star

Go back to the first, elongated star and add a round in the next colour; in this case a darker blue.  After one round, finish off the thread and repeat on the other side.

Temari - finishing the 16 point star

Work a second round of colour in the shorter overlapping star.

Temari - finishing the 16 point star

Continue working the pattern by adding another round of floss in the light blue to the elongated star, then another round in white in the overlapping star.  Complete these rounds on both hemispheres.

Temari - finishing the 16 point star

Switch to the metallic thread (3 strands on the needle) and work around all 16 points in both hemispheres to finish the temari.

Temari - finishing the 16 point star

Here's a look at the point overlapping at the equator.

Temari - finishing the 16 point star

Another view of the finished temari.

This one got a hanger as well.  I chose to braid lengths of the dark blue, white and cold threads to make a cord to tie into a loop.

Temari - finishing the 16 point star

The loop got sewn in place at the equator, between a pair of points.

Temari - finishing the 16 point star

With the knotted end trimmed and fringed.

Temari - finishing the 16 point star

The two finished temari.

The interesting thing about temari is that it doesn't take much to get completely different looks.  These two patterns are basically the same thing; a pair of overlapping stars.  Changes in colour and the location of the inner and outer points can change the finished result dramatically, even though they are essentially worked the same way.

I hope these photos will be useful for you to make your own temari.  Later on, I will be doing versions with more centres. 


Temari - starting the 16 point star

So our first temari, with 8 divisions and two centres, is now done.  Time to move on to the 16 division mari.

For this one, I decided to change up the two overlapping stars so that, instead of one 16 point star, there are two distinct 8 point stars.  I also decided to extend the points beyond the equator on one of them, which means there will be no obi.  I chose two colours per star, plus the metallic thread outline.

The first step was to mark out one of the 8 point stars.   

Temari - 16 point star

Here you can see me marking the pins for the South hemisphere, having already done the North.  I marked my strip of paper at 1 1/2 inches and 2 1/4 inches.  The distances are marked on alternating lines, as indicated by the arrows.  This pins are placed in the OPPOSITE positions from the North side.  The guidelines where you see the green outer pins in the photo had inner pins on the North side, while the yellow inner pins in the photo above are on lines with outer pins on the North side.  This is important, since the points of one star on the North side will extend into the South side of the equator and vice versa.

Temari - 16 point star

Here's what the fully pinned hedgehog looks like from the North pin.

Temari - 16 point star

For the first 8 point star, I chose two blues.  The stitching is started the same as usual, bringing the needle up as close to the North pin as possible, and to the left of a guideline.  Make sure that the needle is brought up on a guideline that has an outer ring of pins alongside it.

Temari - 16 point star

From there I worked the point below the pin marking the next guideline at the equator, working the needle from right to left as usual, in the South side of the equator.  Note the pin marking the outer ring in the South hemisphere is a short distance away.

Temari - 16 point star

Here's what the first couple of points looks like.  The equator pins can be removed once the points are stitched.

Temari - 16 point star

Continue working the points around the mari.

Temari - 16 point star

After one round, finish off the thread by burying it in the padding.

 Temari - 16 point star


Repeat on the South side of the mari.

Temari - 16 point star

When done, you will have your two elongated stars with their points slightly overlapping the equator's guideline position.

In the next post, we'll work the overlapping star in contrasting colours.


Tuesday, November 1, 2011

Temari - making a twisted cord hanger

To add a hanger to my first temari, I decided to go with a simple twisted cord.

Temari - making a twisted cord hanger

Twisted cords start off needing strands a lot longer than the final length will be.  I used some of the dark green and silver metallic thread used in the temari.  To make the short cord I needed for the hanger, I cut roughly 5 feet of floss (I losely measured by taking the strands and stretching my arms out as wide as I can reach).  Fold the strands in half and tie a knot at the ends.

Temari - making a twisted cord hanger

Holding the knot in one hand, loop the folded end over a finger and start twisting while keeping the strands taut.  Keep twisting until, when slightly releasing the tension, the strands start to twist around themselves.  The more you twist, the tighter the finished cord will be.

Temari - making a twisted cord hanger

When twisted tightly enough, carefully fold the cord in half, maintaining tension until the ends are together, then allowing the cord to twist around itself.  This might require some manipulation to get it even. Tie the ends together to prevent untwisting.

To make the loop, fold the cord in half again.  Determine how large you want the loop and tie another knot.

Temari - adding the hanger

Attach the loop at the spot in the obi where all the strands start and end.  Use matching floss to sew the centre of the loop to the temari.

Temari - adding the hanger

Trim the cord a short distance from the knot and fringe the ends.

This temari is now ready to hang on a tree!

The next temari posts will show you how to work a 16 point polystar pattern.


Temari - making the obi

Preparing the core
Measuring for guidelines
Placing the guidelines
Starting and 8 point star (kiku)
Finishing the 8 point star (kiku)

Temari - making the obi

Now that we are done working two kiku at the poles of your temari, it's time to turn our attention to the equator.  This is where the obi - named for the wide sash worn with kimonos - will be worked.

Temari - making the obi

For this, I chose to start with the pale green instead of the yellow, as I had with the kiku.  As previously, I worked with all 6 strands of floss.  To start, I anchored the floss without tying a knot, first by drawing the end into the padding (you can just barely see the pale green showing through the sewing thread under the needle), then making a small back stitch into the end so that there would be no chance of it pulling through by accident.  I also worked close to the metallic guideline, so that it will be hidden by the strands.

Draw your needle up on the left and close to any longitudinal guideline, above the equator guideline.

Temari - making the obi

Wrap the strand to the right, closely following alongside the metallic guideline.

Temari - making the obi

Maintaining the tension with your thumb, slip the strand of floss on the right of the guideline and bring it up again below the equator guideline, to the left of the longitudinal guideline.  Draw the thread through and pull it snug.

Temari - making the obi

Wrap the strand around the equator again, closely aligned under the metallic strand.  Again maintaining tension, finish the strand by splitting the floss to the right of the longitudinal guideline.  Draw your needle out some distance away to bury the end in the padding.  Trim the excess thread closely.

Temari - making the obi

Repeat with the remaining colours, starting all the colours in the same location (which you can see on the left of the above photo) and working your way outwards.

The obi now needs to be anchored.

Temari - making the obi

Switching to the metallic thread with three strands on the needle, this time tie a knot to anchor your thread.  Insert the needle some distance from your star, slightly under the previous strands so that it will be hidden after the knot is trimmed.  As with the embroidery floss, bring your needle up to the left of the longitudinal guideline, above the obi.


Temari - making the obi

Rotating the temari slightly clockwise, work a stitch from right to left around the next longitudinal guideline, below the obi.

Temari - making the obi

Continue rotating clockwise, alternating stitches at the guidelines above and below the obi.

Temari - making the obi

On reaching the beginning, insert the needle to the right of the beginning guideline, working under the strands, exiting below the obi and to the left of the guideline.

Temari - making the obi

Continue working stitches around the guidelines to form a crossed pattern (note that I've trimmed the knot away by this point).  After working completely around the equator, pass the needle through the padding to anchor the end.  Trim excess thread.

Temari - making the obi

Here is the finished obi.

At this point, the temari is finished! 

These temari, however, were being made to hang on a Christmas tree, so there's still one more step.  Making and attaching a hanger, coming up next!


Temari - finishing the 8 point star

Preparing the core
Measuring for guidelines
Placing the guidelines
Starting and 8 point star (kiku)

Alrighty. then!  At this point, we've got the first colour in the 8 pointed kiku laid down.  Time to add the next colour.  I chose to use 3 colours of embroidery floss for this, but feel free to change it up.

Temari - finishing the 8 point star

Thread your second colour, tie a knot at the end, and pass it through the padding a couple of times to anchor it.  Not that I've done this in areas that will be covered by stitching, so that any stray threads peaking through the sewing thread is covered.

Remember that to make an 8 point star, you have actually stitched 2 overlapping 4 point stars.  When bringing up the new colour, you can start at any inner point that is part of the first, or underlying, 4 point star.  If you look closely at the photo, you can see that the yellow strands at the point I'm bringing the needle up at run under the last round of threads.

Bring the needle with the new colour up just below the last round of stitches.  The strands are fairly close together, which makes it a bit challenging to bring it up without catching it on other strands.  This is where you might find yourself being downright brutal with pushing strands out of the way.

Oh, and remember that thimble recommendation?  It's not necessarily, but it's a really good idea.  Having the back and of a needle pushed into your finger is not very fun.  It bleeds like the dickens, and getting blood out of the strands of floss is not easy.

I'm just saying.

*ahem*

Temari - finishing the 8 point star

Continue stitching in the same pattern as before, bringing the thread down and rotating slightly clockwise to the next point, placing your stitch slightly below the previous strands, then back up again to the next point near the North pin. Though it seems like you will quickly run out of space in the centre, each layer of strands pulls the previous strands in slightly, making more space.

Temari - finishing the 8 point star

Continue working around the overlapping stars for two rounds, in the same manner the yellow was worked.   Finish your thread by passing it through the padding a couple of times, snipping away the knot and excess thread when done.  Repeat on the South hemisphere.

Temari - finishing the 8 point star

Join with your third colour, again taking care to start at an inner point of the underlying 4 point star.

Temari - finishing the 8 point star

Continue working around the points as with the other colours.

Temari - finishing the 8 point star

When done, repeat the process on the South hemisphere.

For the next round, take up your contrasting metallic thread.  As with the guidelines, I worked in silver with 3 strands on the needle.

Temari - finishing the 8 point star

Start the metallic thread in the same manner as the embroidery floss, starting from an inner point of an underlying 4 point star.

Temari - finishing the 8 point star

Work around the points as with the embroidery floss.

Temari - finishing the 8 point star

Working with metallic thread is very different than with the cotton floss.  The strands don't always pull through as evenly, and you might find yourself dealing with what you see here fairly frequently.  To fix it,  you'll need to gently pull the loose strands through one at a time until they are all equally snug, then run your fingers down the strands to even them out for the entire length.  Also, adjust your needle position on the strands frequently to prevent breakage at the eye.

Temari - finishing the 8 point star

Oh, and... cat.

I think she was cold, since she kept insisting on placing herself directly under my lamp while I worked.

Temari - finishing the 8 point star

Do one round of metallic thread around all 8 points of the kiku.

Repeat the process on the other side to finish.

At this point I realize I somehow managed to miss processing photos for the next step.  This will be working the obi, which wraps around the equator of the temari.  Off to do that, then I'll do another post.