Pages

Wednesday, September 28, 2011

Serendipity

This was one of those evenings where everything just seemed to fall into place.

A little while ago I found myself perusing the Meetup site, just checking out what was in the Edmonton area.  There I found a knit and crochet group called the Wandering Woolies and thought, what the heck.  They sound interesting.  So I joined.

They meet on Wednesdays in different places around the city.  Tonight it was at a location not far from where we live, and a place I had to have driven past many times, but never saw.  The down side of being the driver rather than a passenger! *L*  It turned out to be a fascinating place called The Carrot, and I'm definitely going back there again with the girls.   

While there, I met the creator of the Wandering Woolies group, Barb, and it ended up being just the two of us.  I'm good with that!  As we were chatting and getting to know each other, she mentioned that someone had approached the group recently, talking about the upcoming Special Olympics, which will be held in nearby St. Albert in 2012.  I thought it was a great idea and planned on getting the word out about it when I got home, since it's open to anyone who wants to make scarves and send them in.

Well, who should show up but Karen Manchak, Director of Events and Hospitality, and the person who had approached Barb about the project.  She was just a great, bubbling effervescence of excitement!  It was great to meet and chat with her, and find out more about the project.  Barb also had 4 finished scarves for her to take as well, and I must say, they looked fabulous!


Karen was able to leave me with this poster (click on the image to see a larger, readable, size).  The goal is to collect 2500 hand made scarves. From the poster:

To begin
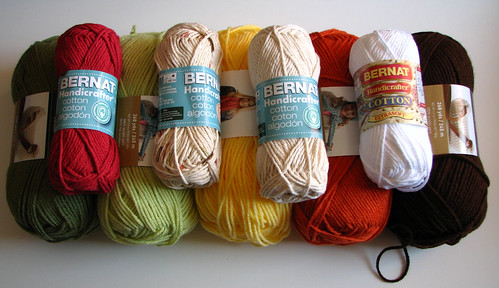
1. Pick up your yarn in wool, wool- or acrylic- blands at a local retailer or online store.
2. Knit or crochet one or more scarves in white and a shade of blue as in our logo to a size of 7 inches wide and 6 feet long.  Consider accenting with a splash of "maple leaf" red!
3. Mail or deliver with your name and address before February 1, 2012 to:
2012 Special Olympics Canada Winter Games
25 Sir Winston Churchill Avenue
St. Albera, AB T5K 2S7
And feel free to attach a note of encouragement to athletes.
                         
Karen has been getting a lot of positive responses to this!  For those who live in Edmonton, both locations of River City Yarns are willing to be depots to accept scarf donations.

It was fantastic chatting with Barb and Karen, and so funny to find out the serendipitous series of events and connections that seemed to bring all three of us together tonight.  It was awesome!

Anyone interested in making a scarf or two is welcome; there are no geographical limits.  If they exceed their goal of 2500 scarves, the extras will be donated to local charities in need.  A worthwhile project! 

Have fun!


Monday, September 26, 2011

Waiting room project

So, all you crafers out there, do you have projects you bring along to work on while waiting for various things? That's one of the things I like about crochet. It's so portable!

This is my current waiting room project. A basic triangle shawl in crocodile stitch. It's taking a fairly long time since I have only been working on it while my daughter is having her guitar lesson. I am pretty happy with it so far, though have found myself cursing my choice of yarn while undoing it to correct an error. Fuzzy yarn and frogging are not a good combination.

Well, back to work. My daughter's lesson is only half an hour long.

Friday, September 23, 2011

For display - part three

Part One
Part Two

For the next section of my display, I wanted to have a tree branch with leaves hanging down from one corner.

IMG_5241-50%

I started off with a simple sketch to decide where and when to place side branches and twigs.  The thicker branch portions would be shaped in with the foundation chain, represented by the line in the middle of the branch, then the twigs would be added while working the width of the branches.

IMG_5243-50%crop

Which turned out like this.  The foundation is done by working a chain, then working the back of it in single crochet.  The first section of chain (follow along the top of the branch, starting from the hook) was worked the length of the main part of the branch, plus the length of the first side branch.  I then worked down the other side of the first side branch in single crochet for the length I wanted, then continued working a chain for then next length of the main branch, plus the second side branch.  Single crochet was then worked down the other side of the second side branch for the length I wanted.  To do the tip of the branch I continued chaining to the length I wanted, then turned to work the other side in single crochet. (In the photo, the tip of the branch is curled on top of the tape measure.)  I continued working single crochet into the back of the chain, past the second side branch, until I reached where I wanted to add the one last side branch.  For that, I made a chain for the length I wanted, then worked single crochet along the back, then continued on with single crochet to the end.

The whole thing was a twisted, confused mass by then.  I straighting it out as much as I could for the photo.  Having that sketch to help me keep track of what I was doing really helped.  It was very easy to get lost on where I was.

IMG_5245-50%crop

For the branch width, I worked another round of single crochet into the branch, adding twigs by making a few chains, then single crocheting down the backs to rejoin the branches.  At the tips of each main branch, I did [1 slip stitch, 1 single crochet with picot, 1 slip stitch] to keep the tips pointed.  When reaching the area where the inside of a side branch joined the main branch, I worked a decrease to ensure the side branches pointed towards the end of the main branch.  The branch is now complete.

Time for leaves!

IMG_5248-50%crop

I decided to make leaves using the two greens I'd bought.  I had considered using the yellow and orange to make fall colours, but decided they would look too much like the flowers in the vase.

Each leaf is made by working on both sides of a foundation chain, changing the heights of the stitches to create the shapes, starting with a chain the length I wanted for a leaf, plus stem.  The first few stitches in single crochet make the stem, triple crochet was used for the widest part of the leaves (to reach the height of the first triple crochet, I changed up between doing a hdc first in some leaves, chaining 3 in others), then doing double, half-double and single crochet to taper to a point.  The tips of the leaves, which are worked into the first stitch of the foundation chain, are [1 slip stitch, 1 sc with picot, 1 slip stitch].  The stitches on the other side mirrored the first.

For the smallest leaves, the foundation chain wasn't long enough to do only one stitch on each side per chain stitch. Instead, I did several stitches in one chain, changing up the stitches to get the shape I wanted, though I did the tips the same as for the larger leaves.

IMG_5250-50%crop

At first I had thought to sew the leaves onto the branch, but decided against it.  The various parts and pieces will be pinned to a backing, and by leaving them lose, they can be adjusted and arranged to whatever is most aesthetically pleasing.

I've dropped off all the parts with my manger at the store I'm teaching at, along with some fibre fill for the vase, and showing her more or less how it was all supposed to go together.  She and another co-worker were to put it all into the frame that evening, so it should be up on display already.  I'll be bringing my camera when I come in for a class to get a photo of the finished result.


For display - part two

Okay, here is my second attempt to finish this post.  I started this a few days ago but, after technical difficulties with blogger, I lost almost the whole thing and haven't been able to get back to it since!

After finishing the vase for my display, it was time to make some flowers to fill it. 

First up were the leaves.  I wanted a long tapered shape, and these are about as simple as it gets.  I used the Impeccable yarn with a 5.00mm hook.

IMG_5220-50%

These are started with chains of varying lengths for the foundation, worked on both sides.  The start of the foundation chain is in the tips of each leaf.  To get the tapered shape I started with double crochet stitches, then half-double, then single.  In the final stitch (the first chain of the foundation) I did [1 slip stitch, 1 single crochet with a picot, 1 slip stitch].  The stitches on the other side of the leaf mirrored the first side. 

Next up, the stems.  These were a bit of a pain!

IMG_5227-50%

These were done in the round to make long tubes, but they're only 5 stitches around.  I started them by working 2 single crochet, then working 5 single crochet into the second stitch from the hook.  From there, I worked in a spiral in the front loops only.  The first couple of rounds are rather awkward to do, but once past that first bit, the rest went rather smoothly.

Next up, the centres.

IMG_5225-50%

Here you can see the two stages of the centres.  I started with a ring of 5 ch and worked 10 double crochet around it, making sure to catch the tail end in the stitches.  After slip stitching the round of dc closed, I pulled on the beginning tail to close up the ring.  I sewed in the end of the yarn, but left the beginning tail in case I needed it for later.

To make the two rounds of foundation loops for the petals, rejoin the yarn around the post of one of the dc stitches, from the back, then a sc around the same post (back post single crochet - bpsc).  Chain 3 for the loop, skip the next dc, then work a bpsc around the second dc from the start.  I kept working that pattern to make five 3 chain loops, finishing by slip stitching into the first bpsc.  Chain 1, then bpsc around the first skipped dc.  Chain 4 for the loop, then bpsc into the next skipped dc.  Continue around, finishing with five 4 chain loops, slip stitching into the first bpsc.  After cutting the yarn, I secured the ends but left them long for later sewing.

I wasn't able to get photos of the in between stages of working the petals. I had originally intended to make the petals the same was as in the thread crochet flowers I'd made for a friend.  I changed my mind because those used a technique not covered in the classes. Instead, I made shells for each petal.

IMG_5229-50%

As you can see in the photo, I also added a third later of petals in the back.

To start, the new colour was joined around a chain 3 loop.  Each petal in the front layer is made up of [1sc, 1hdc, 1dc, 1 hdc, 1sc] around each 3 chain loop, finishing with a slip stitch into the first sc.  Two chains were made to reach the next layer of loops.  Those were made with [1 sc, 1 hdc, 3 dc, 1 hdc, 1 sc] around each 4 chain loop, finishing with a slip stitch into the first sc.

The next step was to make a new round of foundation loops for the third later of petals.  After chaining 2 to reach, a bpsc was worked around the same dc post as the first layer of foundation loops.  Ch 5 for the loop, then bpsc around the next dc that was worked in the first round.  This pattern was continued until 5 loops were made, then finished with a slip stitch into the first bpsc, making sure the chain 2 was tucked under to hide it.

IMG_5231-50%

You can see where the stitches were worked somewhat better from behind.

For the petals, each loop had [1 sc, 1 hdc, 2 dc, 2 tdc, 2 dc, 1 hdc, 1 sc] worked around the 5 chain loop, slip stitching to finish, then the yarn ends were sewn in to finish.  Adding this third layer of petals made the flower size much more proportionate to the stems.

IMG_5235-50%

Using the tail ends from the flower centres, the stems were sewn into place.  I made sure to sew into loops on the underside of the stems, so that the stitches would be hidden.  The yarn ends were then finished by sewing them into the flower centres.

IMG_5233-50%

Next step, adding some leaves.

IMG_5237-50%

Using the yarn ends from the stems, I sewed a leaf to each stem, catching loops on the underside of the stem to hide the stitches.  I only attached the leaves for 2-3 inches, allowing most of the leaves to hang free.  In this photo you can see the front, side and back views of the stitched areas.

IMG_5238-50%

The finished flowers!

IMG_5239-50%

Here, I'm just checking out how they fit in the vase, along with the remaining leaves.  Fibre fill will be stuffed into the vase to help it hold its shape, as well as keeping the flowers and leaf ends in place.

Next section: a branch with leaves.


Sunday, September 18, 2011

For display - part one

One of the staff at the Clareview Michaels had the idea of getting all the class instructors to make a display to promote our classes.  They will be framed and put up in the appropriate sections of the store.  The space we'll have to fill is 11x14, minus a 4 inch square which she will use to put in text about the classes.

My first thought had been to do a flat display featuring the stitches taught in the classes.  It occurred to me, however, that while these will be framed, they aren't going to have any glass.  Which meant I could go with something three dimensional.

I decided to go with a "still life" idea, using stitches and techniques that students will learn if they've taken all four classes.

I started off with a general idea of colours and textures, then spent some time in the yarn section.  This is what I came home with.

IMG_5184-50%crop

The skeins on the bottom are all Loops & Threads, Impeccable, Worsted.  For the Bernat Handicrafter Cotton, I ended up going with just two colours, but I will be using all of the Impeccable colours.

Next, it was time to do some sketching.

IMG_5186-50%

The pencil is a little hard to see here.  The big X was to find the centre, while the box just above the centre is where the information would be.  I figured a vase done in the Handicrafter Cotton would be good to show off how structural crochet can be, as well as show off some of the textured stitches covered in one of the classes.  From the vase would be some flowers and long leaves, using the light green for the leaves and stems, burnt orange for the flower centres and pale yellow for the petals.  On the other side, hanging down, will be a branch in brown with leaves in the darker green, though I am considering using the yellow and burnt orange as well to make fall foliage.

IMG_5188-50%

Next, I wanted to work out more details for the vase and flowers.  I changed the flower petal shapes from what's in my sketch, as that would have used techniques not covered in the classes.  Since all of this is going to be pinned onto a backing, I wanted to have the vase flat on one side, which meant I would actually be making half a vase, vertically.

IMG_5191-50%

I started with the vase base by making a semi-circle in single crochet, then finishing the flat side with single crochet to tidy it up.  The "right side" of the semi-circle would be facing down, where it will be visible.  The rest of the vase is worked from the "wrong side" of this piece.

IMG_5193-50%

To keep a sharp turn between the vase and the sides, I made a foundation of slip stitches on the wrong side of the semi-circle, worked under the single crochet loops.  This photo is of the right side of the base, and you can see where the yarn is wrapped around each single crochet.  For some reason, I never got a photo fo the wrong side, showing the slip stitches.  Oops.

IMG_5194-50%

The first round of the vase's sides was worked through the loops of the slip stitches, leaving a crisp edge of single crochet loops facing out from the base. 

IMG_5195-50%

Here's the inside view of that first round.

IMG_5197-50%

As I built up the sides in single crochet, I worked increases on the curved side, spacing them in different places in each round so that I would not have increases worked one above the other.  I still kept the increases closer to the flat back, where possible, so that they would be less visible.  I changed colours after about 2 inches, dropping the first colour without finishing off the yarn.  I did not do any increases in the new colour.

IMG_5201-50%

After the 1 round of single crochet in the new colour, I worked a round doing double crochet in the back, then popcorn stitches separated by two double crochet around the front.  I did one more round of single crochet before changing back to the first colour, again just dropping the second colour without finishing it.

IMG_5203-50%

I hadn't made much effort to count stitches when I was doing the increases, so it wasn't until I switched back to the first colour and did a single round of single crochet that I stopped to count.  I found I had 32 stitches, which is perfect for this shell pattern using 5 double crochet shells separated by a single crochet.  I did two rounds of shell stitch, then another round of single crochet, then changed colours again.

IMG_5206-50%

Then it was another group of 1 round in single crochet, 1 round with popcorn stitch and 1 last round of single crochet.  This time, when I changed colours, I did finish off the yarn in the second colour and hid the yarn end under the next round in the first colour.

IMG_5212-50%

Here's an inside view before continuing on.  None of this will be visible in the display.  The rest of the vase was done in single crochet only.

IMG_5222-50%crop

Using the first colour, the next few rounds had evenly spaced decreases added to the curved front of the vase to close it up until it was about the same size as the base.  One round was done without any increases or decreases, then I started adding increases again to create the flare.  Finally, one last round was done in the second colour.

The shape is a bit wonky from handling, but it seems to have worked out rather well! When it comes time to mount the vase, the flowers stems and leaves will be filling it, along with enough fibre fill to maintain its shape.  The smaller hook size (I used a 3.75mm hook) makes for a stronger structure, but it'll still need a bit of help to keep it from getting squished.

Next up, the flowers.

Wednesday, September 14, 2011

Space

Well, I finally had to break down and do it.  I had to do some furniture rearranging and partial dismantling and set myself up a work space for my crochet.  Upstairs.  Due to permanent damage to my knees and feet, I tend to avoid the stairs as much as possible, but I really needed to get a dedicated space set up.  There's just too much noise and traffic downstairs.

This meant clearing out the old computer desk, including what used to be the girls' computer.  There had been some problems with it that we've never got around to trying to figure out how to fix. I don't think anyone has touched it in at least 6 months.  After all that time sitting and collecting dust, I finally moved it out.  There's a space at the end of our hallway between the wall to one bedroom and a support pillar. The desk was always too wide to fit into that space, since it had a small shelf on one side to hold a tower.  With no computer to put there, I simply took the shelf off, and now it fits perfectly.  There was a bunch of other stuff to move as well, and a while bunch of dusting. 

There's still a bit of work to do in the area, but I took the time to set up and work on a project to make sure the space was suitable.  I think it'll work out fine.  I will be able to bring up more of my supplies later, it's a good height to work at, I have good light to work under, and I have some space I can take photos in, too.  Lighting for photography isn't very good, but I can work that out in time.  The chair isn't the most comfortable, but it'll do for now.

The most important thing is that I now have a space I can keep my course and various projects on the go and not have to tuck things aside or worry about them getting knocked about.  Unless the cats jump unto the desk, of course.  They both seem to like the new space, too.  While setting it up, I kept having to move the younger one out of way, and she kept climbing into the lower shelves.  When I was working, I found both cats hanging around, keeping me company.  They like being nearby while I work. 

I'll be having more photos to post soon.  I'm working on a display that will be used to promote my classes, and I'll be doing a step-by-step of the process. 

So far, I'm liking how it's working out. 

Wee One

My younger daughter loves to crochet cute things, so it was no surprise to see her pick up a copy of Super-super Cute Crochet, by Brigitte Read.  I have been visiting the author's blog for a while now, and enjoyed her work.

My older daughter loves cute crochet things, but not actually doing crochet.  Not her thing.  Instead, she gets her sister to make things for her.  Watching the two of them going squee after the designs in this book is hilarious.

The design they settled on was the Owls pattern.  Of course, being their mother's daughters, no pattern goes without modification!  The pattern recommended using DK/light worsted yarn and a 3.5mm hook.  Well, the hook stayed the same, but after going through a stash of novelty yarn, they settled on rainbow coloured fun fur type yarn.  No labels in sight (it may have come from the ReUse Centre, for all I can remember), so I can't say exactly what it is.

This is the result.

IMG_5172-50%

While being worked, the long strands tended to remain on the wrong side of the stitches, so when it was ready for stuffing, my daughter flipped it inside out for finishing.  Her sister added brads for the eyes (we need to get a supply of safety eyes!).  That beak?  That's actually a clump of the fun fur that got caught up while the opening was sewn shut.  Fortuitous.

IMG_5174-50%

The guardian of wee little owls approves of this.

Saturday, September 10, 2011

An awesome afternoon!

It was a fun afternoon at the Micheals today!  I got to meet and chat with all sorts of great people.  I managed to get a co-worker to grab this shot before I finished setting up my display.  Having that take a long time because people were stopping to ask questions and sign up for classes is a good problem to have!

As I write this, the stores are still open, so there's still time to register for any of the available classes at half price. 

I got a lot of questions from people wondering which class to take, so here's a few thoughts.

Of the four crochet classes offered, you can take as many or as few as you want.  There is no required order to take them, however if you are new to crochet or haven't picked up a hook in a long time, I would recommend taking the Discover Single Crochet class first.  In this class, we'll cover the basics.  Get what's covered in this class down, and you've got a good foundation for any of the other classes.  Meanwhile, single crochet alone is a great stitch for a wide variety of projects.  Just in my photo here, there are several projects done using the basics covered in the Discover Single Crochet class.

If you've had a chance to take the Discover Single Crochet class, or already have some familiarity with crochet, you can go on to any of the other three classes.  There's always a brief review of stitches at the start to get you going.  Discover the Tall Stitches would be a good first choice if you're still kind of new and want to keep things basic.  Discover Textured Stitches and Discover Granny Squares are good if you're more confident in your skills and have worked with some of the taller stitches before. 

Each class offers two projects to choose from to work on and get some practise in.  They also make great gift ideas! Once you've learned the stitches and techniques offered in these for courses, you'll be able to do a remarkable range of projects, or even come up with  your own patterns. 

Whichever class you decide is right for you, I'm sure you'll enjoy picking up on the skills and using them for the amazing variety of things that can be done with crochet!

Meet the instructor

Setting up my display at the Clareview Michaels for meet the instructor day. Already signing students up for November! Remember, sign up for a class today for half the registration cost.

Friday, September 9, 2011

Upcoming events and class schedule

First, a couple of upcoming events to tell you about.

Saturday, Sept. 10: Michaels' Open House event. 
     Meet the instructors for all Michaels available classes from 1-3pm
     Register for any class throughout the day for 50% off the regular registration cost of (crochet classes are regularly priced at $25).

If you are in the Edmonton, AB area, I will be doing a demo and answering questions at the Clareview Michaels.  Come on over and say hello!

Sunday, Nov. 6: Warm Up America Demo Event
     From 1-3pm, Discover Knit and Crochet instructors will be doing swatches for Warm Up America.  More details nearer the date.


Also, my class schedule is now extended through to the end of December.  You can see September and October classes here.

November, all on Fridays

4th - Discover Single Crochet - 5:30pm - 8:00pm
11th - Discover Tall Stitches - 5:30pm - 8:00pm
18th - Discover Textured Stitches - 3:00pm - 5:30pm
25th - Discover Granny Squares - 3:00pm - 5:30pm

December, all on Fridays

2nd - Discover Single Crochet - 3:00pm - 5:30pm
9th - Discover Tall Stitches - 3:00pm - 5:30pm
16th - Discover Textured Stitches - 5:30pm - 8:00pm
23rd - Discover Granny Squares - 5:30pm - 8:00pm

Remember - sign up for any of these classes on September 10 and get 50% off the registration price!

See you there!

Thursday, September 8, 2011

Little pieces of history, part eight

This is the last piece in my series of fancywork that I inherited.

Hand made beauty

This piece is actually from Poland, and I have no idea as to its original source.  My mother explained to me that these were traditionally made to hang on walls.  You can see that this one spent some time on a wall somewhere, long enough to develop dots of rust from whatever was used to tack it up.

Hand made beauty

The central design is free style cross stitch with a bit of stem stitch for the arms and legs, and stem stitch and straight stitch for the facial details. Including the border, it measures about 29" x 21 3/4"

The border is a long strip of bobbin lace that has been back stitched to the hem.  You can see how it was folded to turn the corners in the above photo.  In one corner, there is a bit of repair to the back stitch - in a brown thread!

Aside from the dots of rust and a bit of wear, the embroidered cloth is in pretty good shape.  The lace, unfortunately, has quite a lot of damage. 

Personally, I find the design rather unattractive, and the skill it was worked in isn't very good.  The cross stitches are quite uneven, with some looking more like V's and Y's than X's.  At the back, you can see knots were tied at the start of the threads, while a lot of the ends don't seem to have been anchored at all.  I'm rather surprised they haven't come lose at the front, but I guess being a decorative wall hanging rather than something that saw use, like a table cloth, has saved it.

Though I don't particularly like it, I find it an interesting piece and imagine that whoever stitched it must still have been pretty proud to have it decorating their wall.


Wednesday, September 7, 2011

Little pieces of history, part seven

Just a couple of pieces left in the series of fancywork I've inherited.  Here, I have another thread crochet piece from my late great-aunt.

Hand made beauty

I actually hadn't noticed that it was made with two different blues until I'd uploaded the photos!  It's a lot less obvious in person.

This is a small table cloth made out of square motifs joined together with a chain mesh.  It's 6 squares by 7 squares, with a narrow border, and measures about 42" x 36".

I love how the square motifs together create a secondary diamond pattern. 

Hand made beauty

Here's a closer look at one of the corner squares.  The squares are basically filet crochet worked in the round.

Like the filet crochet runner I wrote about last time, this piece is in fantastic condition.  There is no damage of any kind that I can find.  There are a few loose threads visible on the back, where the sewn in tail ends have worked themselves loose.  It's remarkably soft and has an amazing drape to it.  I actually had a hard time using the piano bench to take the photos, as it kept slithering off the edge. *L*

This is another of my favorite pieces.


Tuesday, September 6, 2011

Little pieces of history, part six

Here we have another fantastic piece from my prolific and highly skilled great aunt.

Hand made beauty

This filet crochet runner is about 2 feet 10 inches long and about 15 inches wide.  The rose motif you see here is mirrored in the other half.


Hand made beauty

The simple edging matches the filet mesh very well.

I've looked over this piece thoroughly and there isn't a bit of damage of any kind on it.  It's in superb condition!  I know the piece must be quite old, but with the excellent condition and unfaded colour, it looks like it could have been finished last week!  I might want to give it a gentle cleaning and re-block it, just to straighten out the edges, but that's about it.

Monday, September 5, 2011

Little pieces of history, part five

I've got just a few pieces of fancywork to feature in this series.  This time, a ruffle edged doily.

Hand made beauty

This is another piece of thread crochet from my great aunt.  It had been starched and the ruffled edges are still quite stiffened.  It seems to have been packed away rather poorly over the years.  While the centre motif is in very good condition, with only a few stray wisps of thread coming loose where it appears a new thread had been started and the ends sewn in, the edging has quite a bit of damage.  Especially the white portion.  I would love to give this a thorough cleaning and get the starch out, but I don't know what would have been used.  Who knows how long ago it was starched in the first place?  About the only thing I can say for sure is that it was NOT stiffened with sugar.

Whatever it was, it gives the white threads an almost translucent quality.  I'm afraid that cleaning it might actually damage it even more.  There's no chance of repairing it, if it can be repaired at all, until the starch is removed.

I wonder if I should contact our local museum and see if there's someone there who can advise me.  They don't have a lot of stuff like this (their displays are mostly bead and leatherwork), but it wouldn't hurt to ask.  Or perhaps the Crochet Guild of America could give me some pointers.

Hmmm...

Saturday, September 3, 2011

My husband is awesome.

I am just a lucky woman!  I have such a sweetheart for a husband.

In working with the new rosewood needles he bought for himself, he discovered that... well, his hands sweat.  When they start sweating, that affects the wood.  So he decided to get himself a second set of needles so that he could switch between them, letting one pair dry while working with the second pair.

So off we went today to River City Yarns to see what they had.  At first he didn't see the rosewood needles and he was going to get a birch pair, but when he found the size he was after in rosewood, he got those instead.  They're quite a bit longer than his first pair, but that's okay.  As long as they're the same size (he's using 5.50mm).  I think the birch would have been lovely, too.  He did 10 inches of scarf yesterday and is now at 20 inches.  He's really loving the wooden needles.  Much nicer to work with than the plastic and metal ones we already had.  (Earlier today we were sitting in a coffee shop, him with his needles, me with my hook.  Some guy ended up sitting with us as we chatted about sharing knowledge of crafts and skills.  It was great!) 

While at River City Yarns, we looked at quite a few other things.  Including yarn that my younger daughter described as feeling like kittens.  Soooo soft!!

Looking through the tools, I was thrilled when I asked about hairpin lace tools and they actually had some!

IMG_5112crop50%

I am now the proud owner of a Prim Universal Netting Fork.  The woman at the shop told me that hairpin lace tools are very hard to come by, so when she finds them, she takes what she can!

IMG_5114-50%

The packaging opens up and gives some pretty decent instructions.  This is the only tool I was missing for my course, so I'm pretty happy.  If that was all I got today, I would have been quite pleased.

Then after paying, my darling husband shooed me and our daughter away so he could buy what he was hiding behind his back.

Uh oh... ;-D

While waiting in the hall, I was actually able to guess what he bought.  You see, in the process of helping someone else, one of the staff opened up a kit that really caught my attention.  I told my husband that this was what I wanted for Christmas.  I could have happily waited that long, but he's a generous sort, and this is what he bought me.

IMG_5110crop50%

This is a set of Denise Interchangeable Crochet Hooks.  It's got 12 heads, 7 cords, 2 extenders and 4 end buttons.

First awesome thing about this kit.  The hooks can fit on either end of the cords.   There are no duplicate hook sizes, but spares can be purchases separately.  This gives me the option for a flexible double ended hook, which is something I was wanting.  Also...

IMG_5111crop50%

See this?  See the openings at the ends?

Yup.  I can thread cord through those and turn them into knooks!!  Though I think I could actually just use the cords in the kit, and not add an end button.

Which means that, in one kit, I now have not only several tools I was wanting - flexible Tunisian hook, flexible double ended hook and a knook - but I have them in a selection of 12 sizes.

I am so thrilled!!!!  I can't wait to get started with them.  I must resist, though.  After I'm finished my course, then I can start playing!

Though I will be able to use some of these for my course later one. :-D

Did I mention I have an awesome husband?  Let me say it again.

My husband is awesome.
:-D

Oh, and...

IMG_5108crop50%

Cat.

Just because.


Friday, September 2, 2011

For his birthday.


One of our birthday traditions is that the birthday person gets to choose any restaurant they'd like to go to for their birthday dinner.  Today is my husband's birthday, and he chose to go to The Keg.  We haven't been there in ages.  Which might be why we forgot that the place doesn't open until 4 pm.

Wanting to miss the supper crowd, we took my husband there straight from work, finding ourselves with more than an hour before the doors opened.  No problem.  There's a Michaels nearby!

What does my husband get himself for his birthday?  A gorgeous pair of 5.50mm rosewood knitting needles, and two skeins of Bernat Mosaic in Calypso.  It's been a while since he's knitted, and he wanted to pick it up again. I had been to the Michaels I teach at earlier, picking up a couple more balls of yarn that were still in the van.  They were out of stock for the hook side I wanted to buy a spare of.  We found one at this location. Sweetheart that he is, he bought me a Soft Touch crochet hook.

We still had lots of time before the restaurant opened.  So what did we do?

Start knitting and crocheting in the van, of course.


Our daughter was kind enough to take a cell phone picture of us. 

Are we addicted, or what? LOL

Almost there.

I have officially completed all the swatches and samples for the first level of my Crochet Instructors course. I just need to finish the written portion, then I can send it out for evaluation.