Pages

Wednesday, April 29, 2009

Product review: The Crochet Lite (TM)

Today I finally filled the 4.0mm gap in my crochet hooks. I would have preferred an aluminum hook like I usually use, but after looking in several stores, I just couldn't find any in this size. I'd been looking for a while and the only ones I could find were cheap plastic hooks that didn't have nicely rounded necks on the hooks. They had almost sharp edges.


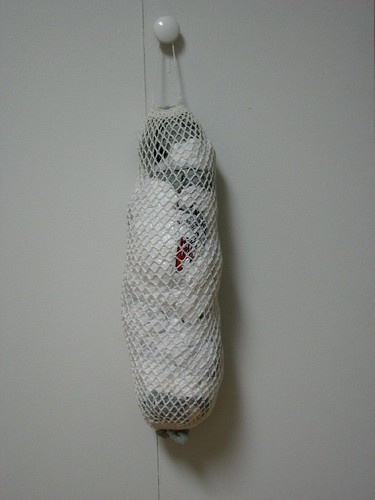
I'm cheap, but I'm not that cheap, so I broke down and spent a bit extra to buy this. (click on photo for full size image. Other images available here.) It cost $5.47 at Walmart.

It's a novelty hook by Widget Products Inc. They make all sorts of items with lights in them, though in the stores locally I've only seen the knitting needles and crochet hooks.

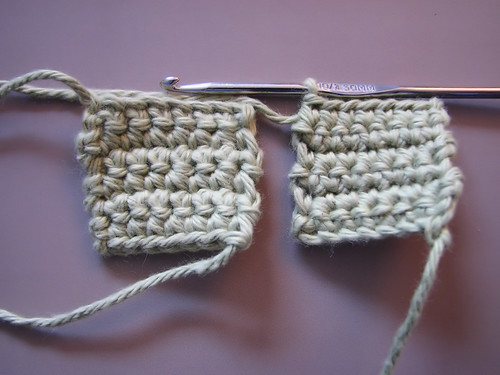
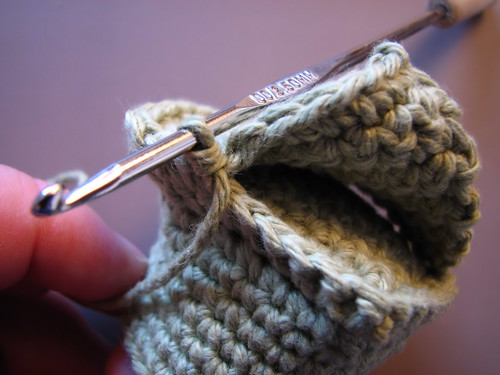
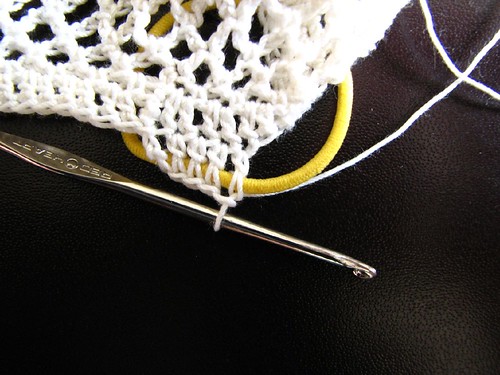
As you can see in the photo, this is labeled as an F 4.0mm hook. In the pattern instructions I've been looking at that I bought this for, they called the 4.0mm hook a G. What I have at home in my aluminum hooks are an F/5 - 3.75mm and a G/6 - 4.25mm.

Which probably explains why I can't find the 4.0mm in an aluminum hook.

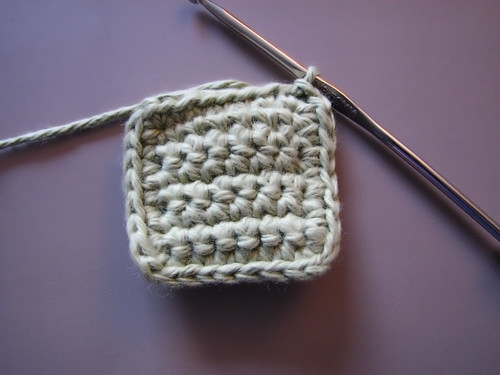
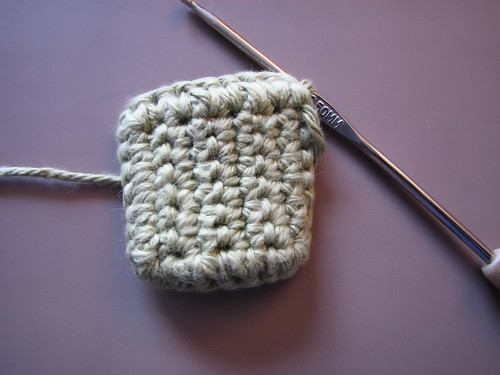
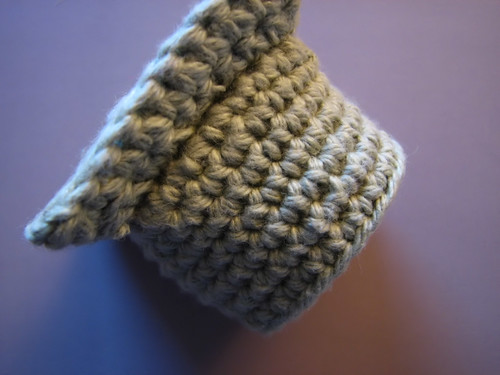
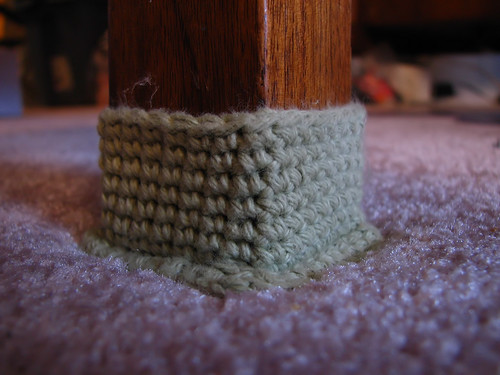
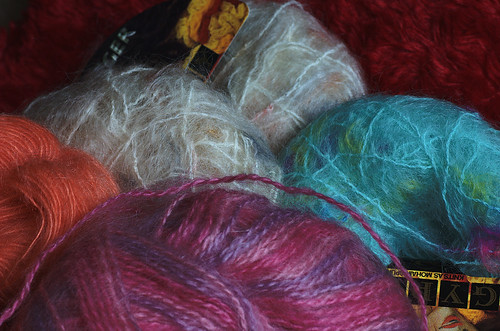
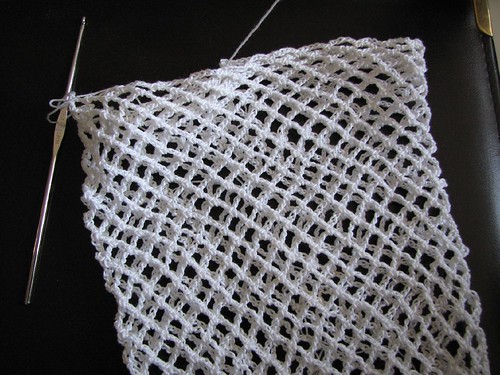
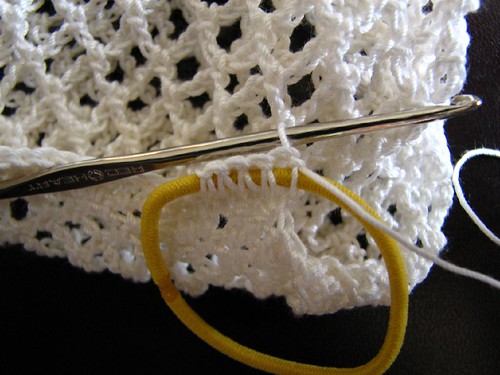
I've started up a project just to try it out, and I really like it. The yarn I'm using is a mohair blend with lots of loose hairs sticking out that could be easy to get hung up on. It hasn't been a problem so far. The hook feels comfortable in my hand, and it's smooth to work with. The only potential problem I see is that the switch for the light rubs against the palm near the outside of my hand. It's not a big deal for short stints with the hook, but I can imagine that spot getting rubbed raw after a while.

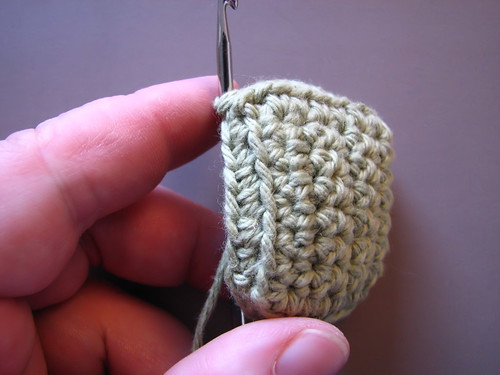
As for the light - it's cute and all, but it's not much use to actually work with, though the package says "Crochet anywhere ... Even in the Dark!" There's a bright light in the loops being worked on, which gets a bit harsh on the eyes, but it doesn't light up enough of the project to see the next loops that need to be worked into. It does look really cool in the dark, though. *L*

My conclusion: Although I didn't like paying extra to get the size I wanted (did I mention I'm cheap? *L*), I would say it was worth it. As cute as the light is, gimmicks like this are normally a reason for me NOT to buy something. The hook itself, however, is well made and comfortable to use. The design is quite ergonomic, though the cost is a little more than half the price of the ergonomic hooks I've seen.

I would definitely be willing to buy these in other sizes.

Saturday, April 25, 2009

Desk leg carpet protectors.

Since the success of the carpet protectors on our coffee table legs, I've been slowly working on similar protectors for our desk. They're done much the same way, except I've added extra padding to the bases. I've done two for the back of the desk already, but made some changes for the front. The front legs of our desk has some parts missing at the bottom that makes the front lower than that back. As a result, the bottom drawers have a tendency to open on their own.

2644

I started off by making two squares the same size as the desk leg. With the second one, I didn't finish off the yarn, so that I could just continue on and join the two squares together.

2645

I did a round of sc to join them. At each corner I did 1sc, 1ch, 1sc to turn to make sure the square lay flat. This is the "front" of the square, which will be the bottom of the piece.


2646

This is the other side, which will be the inside of the piece.


2649

For the next round, I worked 1sc into the back of each loop. I did 2sc together in the 1ch and first sc of each corner to snug it up nicely.

2651

After that, each round was just 1sc into each sc of the previous row. This view shows where each round was joined by a ss at one corner.

2653

Next, I made another square slightly larger than the original squares.


2655

This larger square was then joined to the base using the front loops left after doing the first round.

2656

Here, the square is completely attached. This is where I finished when making the ones for the back of the desk.

2659

Since I wanted the front to have extra padding to add a bit of height, I made another square, again slightly larger than the previous square, and joined it to the base with sc to finish.

2663

All done.

2665

Unfortunately, once I got it on the desk, it still didn't raise the front high enough to prevent the drawers from opening. I'm hoping that getting the last one on the other leg will make the difference. If not, than the drawers are opening for another reason. :-P

At least the carpet is being protected more, which is the reason I'm making these.

A bit of yarn p*rn

My elder daughter and I had a wonderful afternoon out today. We visited a yarn shop, had tea and went to the museum. That's our idea of a great time. :-D

I've discovered it's dangerous for me to go into a yarn shop, but I think that's a common problem. ;-) My daughter had something specific in mind, but I ended up indulging as well.

Splurge

The yarn in the back and on the left are my daughter's choices. The Noro yarn is 45% silk, 45% Kid Mohair and 10% lamb's wool. It's a 50gr ball at 100 meters. 4.5 - 5.1mm is the recommended needle size. She's asked her sister to crochet fingerless gloves out of it for her. They've had their heads together, working out the design, for some time now.

I don't know what she has in mind for the Grignasco Savana yarn. I was so tempted to get some of that for myself! The jewel tone colours in all of them are fabulous. This is an Italian yarn, 50gr, 65 meters, 41% polyamide, 30% virgin wool and 29% acrylic.

Instead, however, I got two balls of the Chiara yarn. The owner showed me a scarf knitted with it, and I couldn't resist. Even at the sale price ($9.99 instead of $14.99), it was far more than I intended to spend per ball. I just love the silvery dual-colour effect of it, and it's so incredibly light! A 50gr ball is 190 meters - which is 100 meters longer than the 50gr balls of silky soft bamboo yarn I've been stocking up on. It's 70% rayon, 20% superkid mohair and 10% plyamide, so it's also very durable.

I have no idea what to make with it. Even at 190 meters, two balls won't go very far. I'd like to do something more original than a scarf or hat. With such glorious feel, I'd like to make something wearable - but what?

I'll have to think on that. Ideas and suggestions would be appreciated. :-D

A Great Deal

And since I'm posting a bit of yarn p*rn, I figured I'd add these, too. These are actually a Goodwill find. There were 8 balls of the light coloured yarn in back, with 1 1/2 balls of the same yarn in aqua. They are Jaeger, Gypsy, 71% mohair, 13% will, 9% nylon and 7% acrylic. The balls are 25gr, but I don't see the length anywhere on the label.

The pink variegated yarn (1 ball only) in front is Les Fils Marnel yarns, Rainbow. It's 50 gr, 150 meters, 70% acrylic, 20% mohair and 10% wool. I have no idea what the peachy coloured yarn is - it's a partial skein with no label.

The whole bag of 9 full balls and 2 partials cost $4.99.

Quite a deal!

Sunday, April 12, 2009

3Deggs finally up!


3Deggs-hung
Originally uploaded by amkb

The papercut eggs now hang from a light fixture above our dining table, gently spinning in any breezes, adding colour and cheerfulness to the room.

Special feature - embroidered linen


Embroidery detail
Originally uploaded by amkb

First off, I did NOT make this! It's almost 50 years older than I am.

When my elder daughter was just a baby (she's now 16!), we lived in Victoria, BC. She and I had gone to a nearby mall, which had some sort of event going on. The mall was filled with tables of people selling goods of all kinds. There was on woman who was selling hand embroidered antique linens she picked up from all over.

I fell in love with this piece. Linen embroidery on linen cloth, now almost 90 years old. The embroidery includes cutwork and pulled thread embroidery and has a scalloped edge. It's one of the most incredible pieces of workmanship I own.

I have different set I bought from this same woman - a small tablecloth with 8 matching napkins. The last time I saw her, shortly before we moved, I saw the most incredible huge tablecloth with 12 matching napkins, also in linen, that matches this one in skill and quality, but blew it away with the variety of techniques. It was so tempting to buy it. I even had a check in my pocket, waiting to be cashed, that could have paid for it.

We bought a car, instead. The car is long gone, but the linens I bought from this woman remain.

I wonder if she's still in business?

Friday, April 10, 2009

3D papercut eggs, coloured

My elder daughter finished colouring my 3D papercut eggs today. These are done using the inks she usually paints with. I love the bright colours and speckles.

For now, they're under some heavy books, and will hopefully be a bit flatter tomorrow. Then I'll figure out how to string them for hanging.

papercut2499

papercut2501

papercut2500

Monday, April 6, 2009

Crochet bag holder - step by step, finishing

My arm was feeling better, so I made a point of finishing the bag holder quickly. I really wanted to get rid of the pile of bags growing under my counter. ;-)

end2447

I finished off the rows of 5 ch loops shorter than I'd originally intended, but it was pretty close to what I was aiming for.

end2449

To reduce the tube, I repeated rows 5, 4, and 3, in that order, working each row of smaller loops into the loops of the previoius row. I then did a row of 1ch, 1 sc into each 2ch loop, slip stitching to finish the row.

end2450

Next, I chained 3, then did 1 dc into each 1sc and 1ch space to the end, slip stitching to finish.

end2453

Now the fun part. To work the elastic in, I first put the ball of thread through it, so that the thread ran through the elastic while the hook remained on the outside. Next I chained 2, then did a third ch around the elastic.

end2454

To do the dc, I worked the first half under the elastic first. This is how it looks from the front...

end2455

...and from the back.

end2456

Then the second half of the dc was done above the elastic, encasing it in the top half of the stitch. Here's a front view...

end2457

...and the back.

end2458

Continue on with one dc in each dc in the previous row, covering the elastic completely and finishing with a slip stitch into the first ch stitch inclosing the elastic. Give the elastic a few stretches to spread the stitches around evenly.

end2460

Make a chain long enough to hook over whatever you plan to hang the bag off of, then slip stitch the end to the top of an opposite dc.

Finish off ends at top and bottom.

end2463

Here it is. The finished bag.

Friday, April 3, 2009

Paper cut 3D Easter egg, scales


scalesegg
Originally uploaded by amkb

You can see the step-by-step instructions herea.

It took me a long time to decide on this design, and I rejected several attempts before I settled on this one. I wanted something more open and lacey, but I still wanted to keep it somewhat simple.

My elder daughter is going to be adding colour to these for me. I asked her to avoid getting the paper too while painting, as the paper will buckle and warp as it dries. She's thinking that using her inks instead of watercolours might do the trick. I'll post the final result after she's done with them.

Crochet bag holder - step by step, in progress

Although I usually use cloth bags for groceries, I find plastic grocery bags useful and sometimes make a point of leaving the cloth bags at home when I start running low. What I no longer have since moving is an out-of-the-way place to store them. So I decided to make a bag holder. I could've made a cloth one, but after looking at various patterns online, I decided to raid my basket of yarns and threads and see what I could work with.

I settled on a thread I got from The Reuse Centre and a 2.35mm hook. I don't know what the thread is, as it has no label, but it actually looks more like a pearl cotton embroidery thread than a crochet thread. The bag can be done in any strong material, though. Most of the instructions I've seen use what looks like worsted weight yarn. The pattern I've come up with can be adjusted for any type of strong yarn.

Along with the yarn or thread and appropriately sized hook, the pattern needs 2 hair elastics. The kind that's about 2 inches across.

Start by attaching your thread or yarn to your hook around the elastic, then chain three. This counts as your first dc.

row1

First row: Work dc around the elastic until it's thoroughly covered. How many will depend on your thread or yarn. Just make sure that the total number of dc, counting the ch3 start, is an even number. Slip stitch last dc to top of ch3.

Chain 3. This counts as the first dc in the second row.

row2

Second row: Do one dc into each dc of the previous row. Ss into top of ch3. Second row will have the same number of stitches as the first row.


row3

Third row: Ch3. This counts as the first sc and ch2 of the round. Skip 1 dc of previous row, sc into top of second dc from start. Ch 2. Repeat this pattern to the end. Finish the round by doing 1 hdc into the first chain of the ch3.


row4

Fourth row: Ch3, 1sc into ch2 space. Repeat to end. Finish round by doing 1 ch, then 1 hdc into the base of the first loop, which is the top of the hdc in the previous row.

row5

Fifth row: Ch4, 1sc into ch3 space. Repeat to end. Finish the round by doing 2 ch, then 1 dc into the base of the first ch4 loop, which is the top of the hdc of the previous row.


row6

Sixth row: Ch5, 1sc into ch4 space. Repeat to end, finishing the round by doing 2ch, then 1dc into the base of the first ch5 loops, which is the top of the dc of the previous row.

Repeat row six until the bag is as long as you want it to be.

Right now, I've reached about 2/3 of the length I want, but I've had to stop as my elbow has started to bother me again. My plan to finish is to reverse the above rows, bringing it back to the two rows of dc, incorporating the second hair elastic into the final row. If that works out, I'll then make a length of ch for a hanger. I'm not sure about using the second elastic, though, as I want the top to be easier to get into than the bottom. I might use a larger elastic, or none at all. I could just leave it, then make a separate chain that could be woven into the second last row, then tied off, to act as both a hanger and a drawstring.

Unfortunately, it might be a while before I can work it out. Dang elbow.

These instructions make for a fairly wide tube using the thread that I have. If you want something thinner, I'd recommend skipping the 6th row and doing the body in just ch4 loops. Or adjusting however you see fit based on the width of the yarn you decide to go with. Whatever works to get a tube shape for the body in the size you want.

If anyone tries this and finishes is before my arm stops giving me grief, let me know how you did it. :-D

Paper cut 3D Easter egg, Sunburst


sunburstegg
Originally uploaded by amkb

This is the second paper cut egg I've made. You can see the step-by-step instructions herea. I still wanted to keep things simple. It worked up very quickly.