Pages

Wednesday, June 30, 2010

Artist special feature: Silk Arts Embroidery

Normally, I would have put this off for my Feature Friday, but I really don't want to wait.  Today, I had a chance to see one of my favorite artists.

We're in festival season here in Edmonton.  At the moment, it's The Works Art and Design Festival.  Along with the usual merchant and food kiosks, throughout the downtown core there are various venues featuring artists' paintings, sculptures and more.  Artists are also working on pieces as the festival progresses, so people visiting can watch how the installations develop over the twelve or so days it runs.  This year, this includes someone filling old vehicles with dirt and planting things in it, and a large number of sidewalk chalk artists - they're having a doozy of a time with the rain we've been having lately.

My favorite artist, however, isn't one of these at all. She is, in fact, one of the merchants.


artist9743

This is Marie of Marie's Hand-Made Embroidery.  She does custom Chinese silk embroidery, and I was happy to find out she's opening a store in West Edmonton Mall called Silk Arts Embroidery (main level, near the Zellers).

I first saw her at one festival or another several years ago and was totally smitten.  While she also does oil painting, most of what you see in this photo is embroidery.  Yes, that includes the large pieces behind her.  She imports her silk from China and works on a frame set up that allows her to use both hands.  She told me she can do one of the smaller pieces that are displayed on the table in just a couple of days!  Her pieces are incredibly detailed, and her embroidered portraits are fabulously accurate.  I remember seeing her work a portrait of a dog from a photograph, and she captured the image beautifully.  Her skills and talent are amazing.  She can even do double sided pieces - there is no "wrong" or "working" side; both sides are equally perfect and suitable for display.

There are a lot of talented artists featured in the festival, but as far as I'm concerned, Marie blows most of them away, and gives the rest a serious run for their money.

Friday, June 25, 2010

Feature Friday: Tatting

My introduction to tatting goes back quite a few years, to my mother's aunt.  No, she didn't teach me to tatt.  In fact, as far as I can remember, I only met her once.  My great-aunt lived on the family home stead several hours drive away, and the one trip I remember my parents taking me along to visit her, I was too young for much of it to stick with me.  I remember parts of the drive.  I remember her showing me her spinning wheel and demonstrating how to use it, then coming back to it later on my own and giving it a try.  It stopped working for some reason and, afraid that I'd broken it, I quickly left!  I have only the vaguest memories of what she looked like.

When my great-aunt died, my mother found herself with a number of items her aunt had made, as well as some of her materials.  I had taken up embroidery by then, so when my mother found a couple of small boxes of embroidery floss, she gave them to me. I greatly appreciated the gift, and used some of the silk threads to embrioder a vest for my daughters.  I still have it, along with another I'd made.  Who knows - maybe some day, they'll be passed on to my future grandchildren, and they'll be wearing tiny vests embroidered with threads that belonged to their great-great-great-aunt!

Mixed in the the skeins of floss were two strange looking tools I'd never seen before.

Tatting shuttles

Looking through my craft books, I discovered they were tatting shuttles. Being the curious sort, I tried my hand at it.  The bit of tatting you can see at the top of the photo is about as far as I got! *L*


Tatting shuttles

Although the silver shuttle was quite lovely, it was the plastic one that I found the most useable.  The longer, upturned point made it easier to work the thread around itself and could be used to join loops in picots instead of a crochet hook.


I made many attempts to tatt.  The only knot I was able to master was the half knot.  For those who embroider, a half knot is a lot like doing a buttonhole stitch around a loop of thread.  I was able to do a double knot well enough, but I kept loosing track of which one I was supposed to be making in the pattern!

One of the difficulties with the old shuttles was loading them with thread.  Modern shuttles have solved that problem.

Tatting shuttles

I picked up this shuttle with a spare bobbin and built in hook at a Walmart, I think.  I actually broke it out of its packaging for the first time today and gave it a try.  I was able to do one loop well enough, but am totally mixed up on doing the next one.  I definitly need to practise it more.  The new shuttle is certainly easier to work with than the old shuttles my great-aunt used.

Somehow, though, it's not quite as satisfying.

Thursday, June 24, 2010

Making scary cute

A friend of mine directed me to this adorable amigurumi necromorph and asked me if I could recreate something like it for him.  I had many stops and starts, and have body pieces lying all over, trying to work it out.  This is my finished product - just in time to pass it on to him before he moves!


Amigurumi Necromorph

I suppose I should have added something to give a size perspective.  Ah, well.  The body is about 5 inches from nose to hind end.


Amigurumi Necromorph

The height is just under 9 inches, from feet to the tip of one of those thingies coming out of its back.  Those, by the way, have pipe cleaners in them to make them pose-able.

Without the back thingies, it's about 3 1/2 inches tall.


Amigurumi Necromorph

I just love that face!

Amigurumi Necromorph

A detail of one of the thingie tips.  I worked them starting from the pink tips rather than from the white base.


Amigurumi Necromorph

This part had me scratching my head to work out.  I could think of several ways to do it.  In the end, I just made a white tube of a few rows of sc, then did a pink ruffle by working 2 dc into each white sc.


Amigurumi Necromorph

When I got to the bases of the thingies, I worked a few stitches of the second one into the first, then worked the third one into both the first and second, in sc, then sewed in all the tail ends.  Those are about as secure as they come. *L*

I'm going to have to do more amigurumi.  I need to practise assembling pieces.  I'm pretty happy with how it turned out, but not as happy with my own skills in making it.

I hope he likes it! :-D

Wednesday, June 16, 2010

Step-by-step: Making a journal cover, part five (last one!)

Part One
Part Two
Part Three
Part Four

I like keeping things flexible and giving people options.  For that reason, I decided to make the final decorations removable.

First, the flower motif.


finishing-1

For this, I went digging through my books and found a motif I thought would work well, then did a variation of it that suited the chunky yarn I'd chosen. 

For this motif, start by working 12 sc into a magic ring.  ss to finish.  ch 1
2nd round, work 12 sc into each sc *from behind* and working around the posts (back post stitches).  ss to finish. ch 1
3rd round, work a sc into the same space as the ss. ch 2  [skip 1 sc, 1 sc in next stitch, ch 2] around. ss to finish.  There will be six chain 2 loops.
4th round, ss into first chain 2 space.  [1 sc, 4 dc, 1sc] into each chain 2 space.  ss into first sc of this round. ch 1  There will be 6 petals.
5th round, Working into the skipped sc of round 3, work 1 sc into first skipped stitch.  ch 3  [1 sc into next skipped sc, ch 3] to end of round.ss in first sc. 
6th round; ss into first ch 3 space.  ch 1. [1 sc, 2 dc, 2 tr, 2 dc, 1 sc] into each ch 3 space.  ss into first sc.  Finish off yarn  There should now be a second round of 6 petals.

Change to contrasting yarn (change hook sizes, if needed).  Work the contrasting yarn evenly around the edges of the second round of petals in sc.  Finish off yarn.  Sew in all loose ends.

finishing-2

To make the flower motif removable, I went into the brads I bought and tried a couple different ones to see which I liked for a centre.  I settled on the fake white pearl, as it meshed well with the button I'd chosen.   I then used the brad to fix the motif in position on the front of the book cover.  This was a bit of a challenge with the chunky yarn, as the brad was just barely long enough to go through the layers and still be able to push out the ends and secure them.  This would have been much easier with a thinner yarn.  I then chose a variety of brads and attached them to the front cover wherever I felt they looked good.

finishing-3

All done!  The now completed journal cover.  If a plainer cover is desired, or it needs to be cleaned, the flower motif and brads can be easily removed.

Strangely, it feels like it took longer to write all this out than it took to actually make it!  Not counting the drying time while blocking, of course.

Step-by-step: Making a journal cover, part four

Part One
Part Two
Part Three

A couple of extras I decided to do, besides decorating the front, was to add a pocket on the spine to hold a pen, plus a button closure.  First up, the pen pocket.

penpocket-1

The pocket itself is just a rectangular piece worked in rows of sc.  It needs to be about 3/4 the length of a pen - shorter, and the pen might catch on things and get yanked out.  For the width, make it slightly wider than the spine.  With the chunky yarn I used, I worked 4 rows of sc, then turned the corner at the end to continue a sc border around 3 sides.  Finish off the yarn end.

penpocket-3

penpocket-2

With the cover on the book, pin the pocket in place with one end near the bottom edge of the spine.  There should be some space above the top of the pocket where the top of the pen will show.  How much depends on the size of your book.  Once the pocket is pinned securely in place, remove the cover from the book.  Using matching yarn and a tapestry needle, sew the pocket in place to match the width of the spine.  With the pocket worked up to be slightly wider than the spine, this will create a slight space for the pen to fit into. I used a double running stitch around the sides, and buttonhole stitch across the top of the pocket.

penpocket-4

The finished pocket.

The body of the botton closure is made similar to the pocket.  After digging through our buttons and finding one I liked, I worked up another rectangular strip in rows of sc.  For the length, first decide where the button will go (it can be sewn into place at this time).  The strip needs to be able to extend slightly past the button, wrap around the book's edge, then extend a matching distance on the back.  For the width, it needs to be slightly wider than the button itself.  For the button hole, work out how many stitches to skip based on the size of the button.  For the chunky yarn I used, the strip is 4 rows of sc wide, and the button hole is 3 sc long.  Two sc were worked at the end to secure the button hole.  I worked the button hole in the 3rd row.  Five stitches before the end of the row I did 3 foundation sc, skipped 3 sc in the previous row, then worked 2 sc at the end.  If your strip needs an uneven number of rows to be wider than the button, the button hole will need to fall in a row instead of between row.  In that case, just do regular chain stitches instead of foundation sc.  It leaves a larger hole, which can be outlined in buttonhole stitch later on, if needed.

Once the strip was worked up, I finished off the yarn, then edged the strip in the faux fur yarn to match the edging of the cover.

buttonclose-2

To affix the button closure strap, put the cover with the secured button on the book, then button the strip in place.


buttonclose-3

Take the loose end around to the back and pin it in place.  Once it is positioned properly and securely pinned, unbutton the strip, remove the cover and sew the end securely with matching yarn. 

Once again, the cover can be considered done at this point. In one last part, I've got a removable flower motif and decorative brads finishing the cover.

Step-by-step: Making a book cover, part three

Part One
Part Two

Now it's time to close up the flaps and work the edges.

Remember those long tails I said to leave behind in part one?  Time to use them.  If you haven't left long enough tails for the sewing, weave them into the piece, then use some fresh yarn.

edge-1

If needed, figure out which side of the piece is the inside and which is the outside.  Folding a flap to the inside at the dc row, tack the edges closed with a few stitches.  If you're using a contrast edging, you just need to make sure the edges stay in place.  Loose yarn ends can be covered in the edging.  If you're not doing an edging, whip stitch it securely and weave the ends in.

Close up other side of the flap, then repeat on the other end.  You should now have a rectangular piece with two "pockets" for the book's cover to fit into.

edge-2

Start the contrast edging at a corner, working from the front.  When working the flap area, make sure the edging is worked into both layers, catching in any loose yarn ends and securing the edges of the flaps to the main body.

For the yarn I chose for my edging, I switched to a much smaller hook and worked sc all around the edge, keeping the stitches fairly close together for denser furriness.

edge-3

When reaching the end, do a few extra stitches to turn the corner, then work the edging around the posts of the folded dc row.

edge-4

Work around all sides and fasten off yarn.  Here, the journal is wearing its cozy new outfit.

edge-5

Here's a few of one of the inside flaps.

edge-6

And finally, a few of the edge.

At this point, the book cover can be considered done.  The following parts are all optional extras I did, just for fun.

Step-by-step: Making a journal cover, part two

Part One

Alrighty, then... back to it! :-)

With the book cover worked up, it's time to block it to the size of the book.  I've got a cut down piece of foam insulation for smaller pieces like this. 

blocking-1

The first step is to mark off the exact dimensions I need to block to, and the easiest to do that is to use the book itself.  After tracing the back cover, carefully flip it over to mark the front cover.

blocking-2

For this piece, I wet blocked it, soaking it in water before pinning.  Blocking method will depend on the type of  yarn used.  When pinning the corners, I made sure to line up the first row of sc inside the dc folding row with the corners marked out.  The dc folding row and flap portions will be outside the marked edge.  Once those were lined up, the long sides were pinned to the lines (I put one pin for each sc row), then I moved to the short sides.

After removing the curious cat, that is.

blocking-3

The first sc row inside the folding dc row was lined up with the markings and pinned, then the flap pieces were pinned straight.  They don't need as much attention as the main body for the cover.

Once pinned, the whole thing was set aside to dry.  With the yarn I used, it took about 18 hours to fully dry.

blocking-4

Here is the blocked piece wrapped around the book again.  As you can see, the cover now completely covers the book.

It's now ready for assembly and the finishing touches.  On to part three! :-)

Step-by-step: Making a journal cover - part one

Our local crafters group did an exchange I was able to take part in this time: embellished journal covers.  For my partner, I decided to make an embellished crochet journal cover that could be removed and used again.

I took photos of the step-by-step process and will be splitting it up into several parts.  Partly because of the number of photos, and partly because I don't have time to do the whole thing at once. ;-)

For the first part, I'll cover how I worked it out to fit the specific journal I had.  If I do it right, you should be able to follow along to make a cover to fit pretty much any hard cover book.  If something isn't clear, feel free to ask me questions in the comments.

First up, the materials.

1-materials

I decided to keep it quick and simple.  I stuck with black to match the book's cover and chose a bulky yarn for the body of the cover, which would work up quickly, and a faux fur yarn for contrast and a bit of silly fun.  I also picked up some brads meant for scrapbooking as extra embellishments.  At the time I chose them, I wasn't quite decided on if I'd use one or both styles.

In choosing yarn for the body of the cover, anything sturdy will do the job.  If you don't mind taking a bit longer, choose a thinner yarn for a less bulky cover.  I wouldn't recommend going thicker, though.  If you wanted to, an unusually textured yarn could be used, and no other embellishment would be needed.

The journal itself is plain and practical, found in the stationary section of a Walmart, with blank lined pages and stickers to mark them.  Any hard cover book you want to protect can be used.


cover-1

The first part worked is the inner flap, which will be used to form a pocket the book's cover will fit into.  I started out by making a single crochet foundation, rather than working stitches into a foundation chain.  Leave a fairly long tail of yarn for sewing with, later.  I didn't bother counting stitches, and just made it as long as the book's edge.  I then turned and worked sc into the sc foundation.  The sc foundation counts as the first row.

cover-2

I continued doing rows of sc until the flap portion was about 2-3 inches wide.  Depending on the size of the book, you might want to go wider.  This portion of the cover needs a bit more strength and stability, and since it won't be seen unless the book is opened, plain sc stitches do the job admirably.

cover-3

The next row will be the row that bends around the edge of the book.  For this, I changed to double crochet for its flexibility.  Unless your book has an unusually thick cover, one row of dc should be enough for any thickness of yarn.  If using crochet thread, I might do a treble stitch instead.

cover-4

The first row after the folding dc row is done in sc.  Because I was planning to embellish the finished cover, I chose a stitch pattern that would be both plain and sturdy, yet still quite flexible.  I decided to alternate sc and dc rows.  If I'd wanted something sturdier, I would have gone with just sc.  If I weren't planning to embellish the cover further, I would have chosen a more decorative pattern, or used colour changes to add more interest.  Of course there's nothing wrong with a plain cover, either.

In this photo, the large hook is woven into the folding dc row to show where it is.

I worked the alternating sc and dc rows until the body of the cover was long enough to wrap around the book, measuring from the folding dc row and finishing on an sc row slightly short of the edge - I wanted the cover to stretch snugly over the book.  Then I worked another dc row for the fold around the edge, and finished with the same number of sc rows, including the sc foundation, as the first flap.

cover-5

Here I've placed the finished rectangle around the book, with the flaps tucked under the covers as they will be when closed up.

As you can see, the width of the cover doesn't match the width of the book itself.  The next step will be blocking the piece to the right size.

Friday, June 11, 2010

Feature Friday: Bargello

Many, many seasons ago, I discovered an embroidery style called Bargello.  This is a type of straight stitch embroidery done usually in wools on a mesh canvas.  There are different theories as to where the style originated, but wherever it came from, it remained popular for a couple of centuries.  It was frequently used for very large pieces, such as bed curtains and upholstery, as well as for pillows and so on.  For a time, when people ordered furniture the maker would send the upholstery fabric to the lady of the house for her to embroider in whatever Bargello pattern she wanted, which would then be used to cover the chair or whatever was being made.  We can still see the influence of Bargello in modern upholstery designs.

At the time I discovered Bargello, I had some troubles finding appropriate materials.  I was able to find embroidery wools (yarn for knitting or crochet tends to be too elastic), but not the blank canvas.  I ended up doing this sampler of Bargello patterns for myself on 14 count Aida cross stitch cloth.


IMG_3595cropped

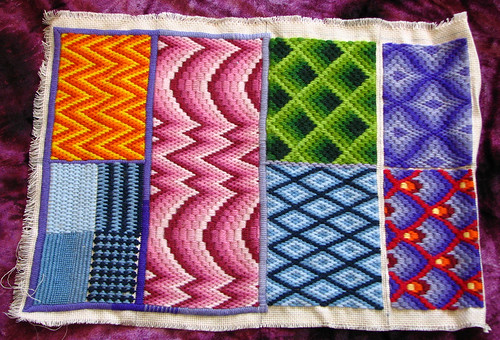
I chose these patterns partly because I really liked them, but also because they can be the basis of almost any other pattern variations I might want to try.

IMG_3596cropped

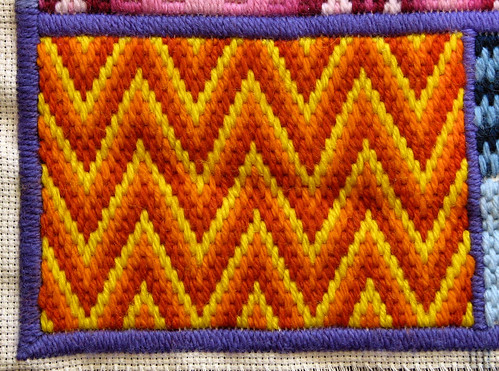
This Flame Stitch pattern is about as basic as it gets.  Hungarian Point and Florentine stitch are some of the variations.


IMG_3597cropped

I also did a variety of stitches that can be used with the Bargello patterns, such as long and short stitch, satin stitch, and tent stitch.

IMG_3598cropped

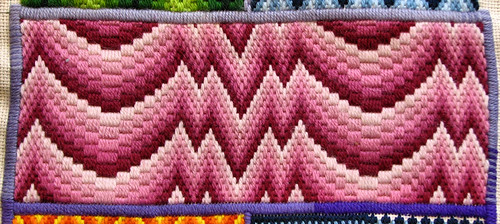
This is my favorite pattern - a unbroken line pattern combining points and ribbons.

IMG_3599detail

This detailed shot shows the pattern repeat that is mirrored across the piece.

IMG_3602cropped

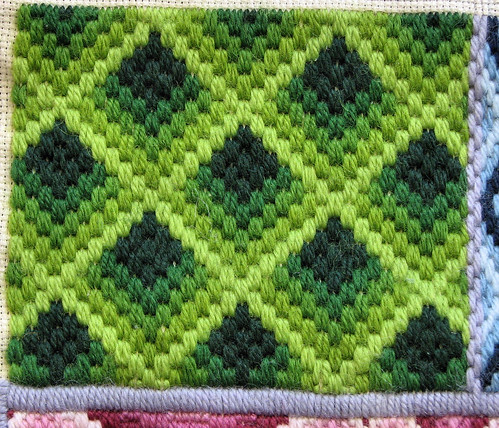
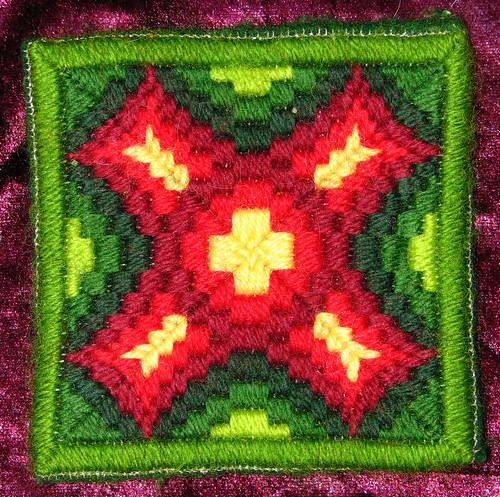
Another favourite of mine, this box pattern is an example of an interval repeat - the diamond outline is stitched first, then filled in with the other colours.  Using a monochromatic colour scheme (5 shades of green, in this sample) gives the illusion of three dimensional cubes.  Changing the colours can change the effect quite dramatically.

IMG_3605cropped

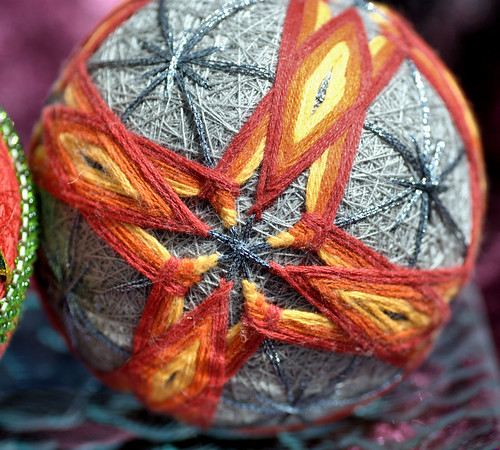
Another interval repeat pattern.  I chose a colour scheme and sequence to great dramatic diamond shapes.  One of the books on Bargello I have, Bargello Magic; How to Design Your Own (published in 1972) has 10 variations of this pattern.  Changing the colour sequence makes them look so different, it's hard to believe they're the same pattern.

IMG_3607cropped

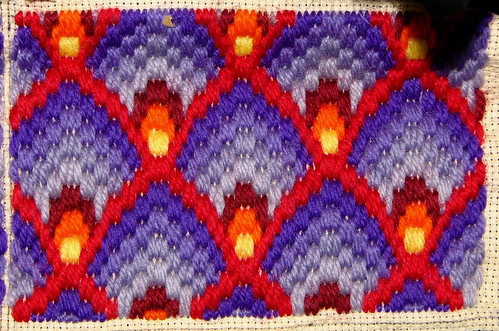
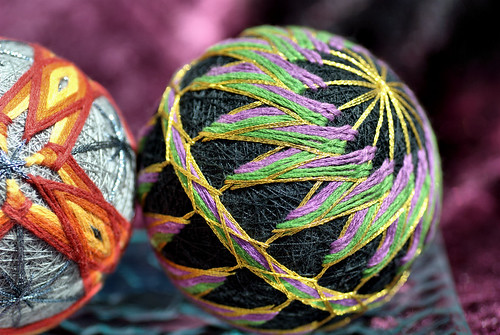
This interval repeat pattern (minus the cat's ear in the corner...) is sometimes called a peacock pattern.

IMG_3610cropped

While this one is sometimes called a pomegranate pattern.

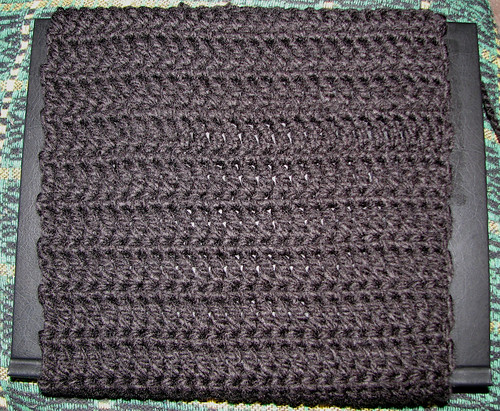
Although Bargello stitches are always worked up and down, they don't have to be all done in the same direction.  A wonderful variation is Four Way Bargello.

IMG_3613fourwaycoaster

This is the last of a set of 3 four way patterns I'd tried, doing two of each, in Christmas colours.  I gave one away, but have no idea what happened to the others!  How unfortunate that the only one I have left is the one with the pattern I liked least.  Oh, well.

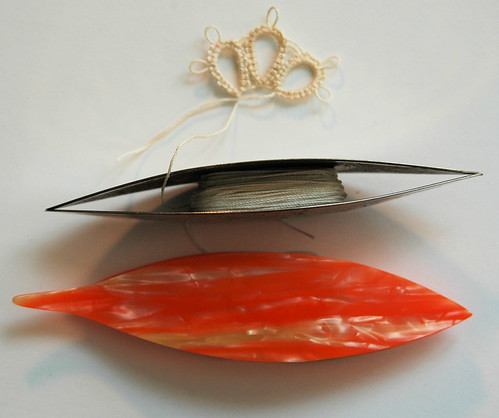
I'd managed to find some blank canvas and worked it on an embroidery frame in one long strip.  My older daughter was about nine months old when we made them together (she's now 17).  The stitches are worked using large, blunt ended tapestry needles, so there was little concern that she would hurt herself.  She would work the stitches from the front, placing them where I told her to for the pattern, and I would work it from underneath, passing the back needle to her.  She absolutely loved helping out!

After the sections were stitched, I cut them out with a half inch seam allowance, then used felt for a backing, stitching the right sides together around 3 1/2 sides, then flipping them right side out and slip stitching the opening.  I finished with an edge of button hole stitch in silver metallic thread.

Virtually any straight pattern can be converted to a four way pattern.  Similarly, turning patterns at corners can be done to create a Bargello stitched frame.

There aren't as many resources for Bargello as there is for other forms of embroidery, but there are some good ones out there.  The aforementioned Bargello Magic is well worth finding.  Along with the basics of what materials to use and patterns, it guides the reader through the creative process of making their own designs.

Another excellent book is Beautiful Bargello; 26 Charted Bargello and Needlepoint Designs by Joyce Petschek.  I'm not a big fan of books that wax poetic about how things are supposed to make us feel.  Sorry, but "the deep intensity of a topaz jewel" does not bring about "profound feelings of contentment" in me.  Nor does "the splendor of gold" entice me "to the realms ruled by the imagination."  Actually, yellows generally make me feel tense and hurt my eyes.  Besides, it's a pillow.  The only thing I want a pillow to inspire me to do is lay my head on it because it looks so comfortable. *L*  Still, her projects are gorgeously worked and very inspiring. I can only dream of being able to find - and afford! - the gorgeous materials she uses.

I would highly recommend giving Bargello embroidery a try, if you can get ahold of the materials.  Because it is worked on low count mesh with thick strands and large needles, pieces get worked up with satisfying speed.  The most basic knowledge of embroidery (a straight stitch) is all that's needed, and simple changes in colour can make for dramatically different looks with the same patterns.

Friday, June 4, 2010

Feature Friday: Temari

This week's feature is the beautiful craft of Japanese temari.  The word literally means hand (te) ball (mari).  These are colourful, often very intricate, embroidered thread balls.  There are some excellent examples and instructions available online.  The Temari Book by Anna Diamond is an excellent resource I was able to pick up a few years ago.  There don't seem to be a lot of temari resources available, compared to other crafts, but they're well worth seeking out.

Here are a few I've made in the past.

Mixed Media

A basic temari is a round core, such as the foam balls found in the craft departments of many stores, wrapped in a thick layer of sewing thread.  There can be a layer of quilt batting wrapped around, first.  It's important for the thread to be wrapped randomly, so that the embroidered threads are properly gripped.  This ball was divided into 2 poles and 8 segments.  I call this one Mixed Media because, instead of the usual embroidered obi (design around the equator of the mari), I did a peyote stitch band.  The threads are DMC cotton embroidery thread, with metallic embroidery thread marking the segments and outlining the star pattern.

The embroidery is really quite simple, involving little more than tacking the thread into the sewing thread base at specified points.


Mardis Gras

I call this one Mardis Gras because of the colour combinations.  Although this is done much the same way as any other star pattern, this one was divided into an odd number of segments - 15 in this case - which gives it that swirled appearance.

Overlapping stars

Along with the "north" and "south" poles, the mari can have extra centres added.  This one has 6 centres.  Six, four pointed, overlapping stars created this pattern.

Star patterns can also be worked on egg shaped cores.  They're quite a bit more challenging to wrap!  Here are a couple of eggs I made.

egg-cotton

This is the top (narrow end) and obi of an all cotton embroidery thread egg I made.

egg-cotton-bottom

The bottom was done the same was the top, but the width changes the appearance considerably.


egg-rayon

I tried it with rayon thread, as well.  I don't recommend it unless you have a lot of patience!  The thread is very slippery, which the egg shape made even more difficult to work with.  The final result is really quite beautiful, though.

The round balls in the above photos were done on three inch foam cores.  I would definitely recommend that as a starting size.  The first ones I did were 1 1/2 and 2 inch balls.  The smaller sizes are more of a challenge to wrap the sewing thread around - I frequently lost my grip and had to go chasing after it - compared to the larger size.  They're also easier to divide, mark and stitch.  I find wrapping the cores to be the biggest job, as it takes quite a while to fully cover the core with a good, deep layer of thread.  A strip of paper and pins is used to mark the poles, equator and pattern.  Even simple patterns look delightfully complex when they're done. 

The first temari I made were my yearly Christmas craft, and I liked it so much, I did it for two years in a row.  It's a beautiful craft, and well worth giving a try.