Pages

Wednesday, December 23, 2009

Merry Christmas!

I haven't been posting for the last while, but my hooks have been very busy of late. Photos of my most recent projects will have to wait until they have reached their intended recipients. :-D

Meanwhile, we are busily getting ready to celebrate our modified, not very traditional version of Wigilia tomorrow evening. Posts will resume after Christmas.

Until then, I wish you all a happy, safe Christmas, and success, health and wealth in the coming New Year!


Thursday, December 10, 2009

This year's Christmas decorations: finishing them up.

After several days of drying, the cinnamon dough decorations are ready to finish. I'd transfered the decorations to wire racks after a couple of hours so that they could get some air ciruclation around them, but weren't so soft that the racks would leave lined imprints on the back.

DSC_7866-50%

Here, I've got everything all set up and ready to go. I bought fake gems in a variety of shapes and colours. The ones in the flat packages along the bottom of the photo are the adhesive backed type used in scrapbooking, along with one package of larger gems that required glue. There are some metallic pipe cleaners, mini-bows, glitter glue and some narrow ribbon for hangers.

DSC_7869-50%

I decided to use a small crochet hook (a 1.75mm I'd just picked up for another purpose) to draw the ribbon through the holes. I'd originally planned to use a tapestry needle, but the holes were too narrow and I didn't want to take of chance of breaking the decorations. I actually ran out of the green and gold ribbon I had, and finished using a super sparkley crochet thread. I started the actual decorating after all the hangers were on. Of all the dough cut out, I lost only 1, and that was pretty much a lost cause from the start. I'd cut a large heart shape with a small heart shape cut out of the middle. The result was too narrow. When I put the toothpick through to make the hanger hole, it broke. I tried sticking it back together, but it just wasn't worth keeping. One loss out of the bunch is actually really good, I think! I half expected to loose a couple of others, but they survived.

DSC_7880crop

The first decorations I did were the smallest - just big enough for the larger craft gems that needed to be glued on.

DSC_7883crop

Some of the decorations used little to no glitter glue at all. I had some concern that the adhesive backed gems wouldn't stick well with the glitter powder we'd worked into the dough while it was still wet. That was actually an issue for a couple of them, but for the most part, they stuck to the dough really well. The adhesive is surprisingly strong - good for sticking to the decorations, but not good when a tiny gem flips and gets stuck to my finger, instead! *L*

I've got photos of all the decorations on my flickr account. Check them out here. Some of the photos were taken while the glue was still very wet. By tomorrow, they'll be ready for hanging, or giving away to friends.

Monday, December 7, 2009

This year's decorations - a step by step

After much deliberation, I finally settled on a decoration for this year. To explain for any new visitors, every year I make new decorations for our tree. When I was living near family, I gave them out for their trees, too. We have no family living nearby now, so I give them out to friends.

My criteria for making these include that they be a challenging and, preferably, new craft and that they be relatively inexpensive to make. The materials need to be easy to aquire, and it can't take a rediculously long time to do. This year's decoration kinda skims the edge of that last requirement, as they will take several days to make.


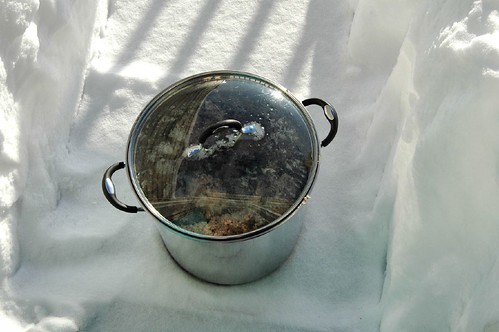
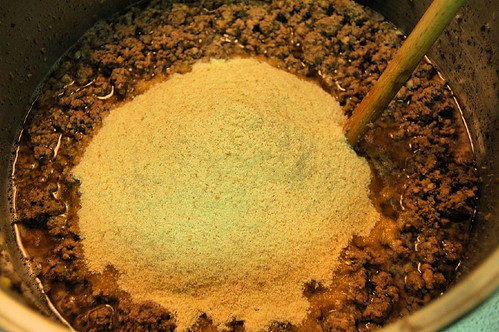
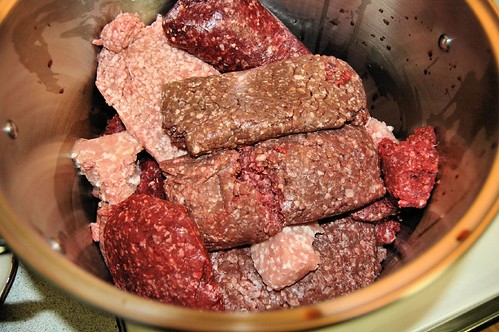
After someone sent me a link with a lot of ideas, I settled on doing something with cinnamon dough. Here's the start of it.

DSC_7812-50%

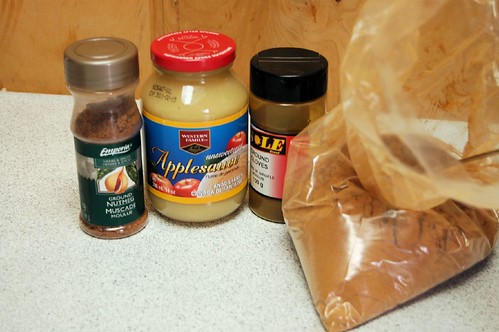
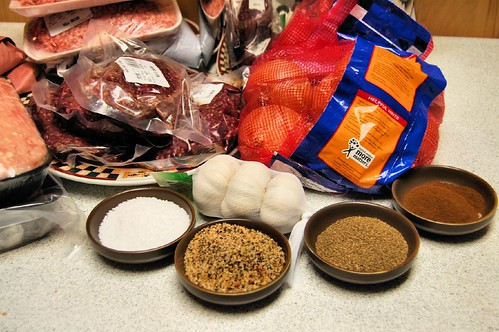
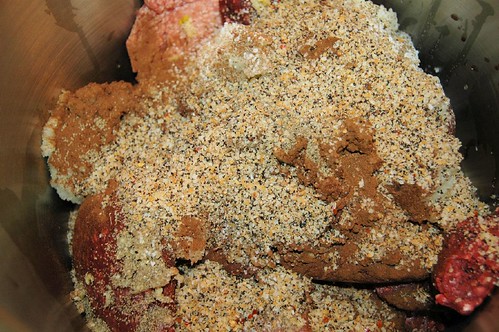
The basic ingredients are equal parts cinnamon and applesauce, with extra cinnamon if the applesauce is particularly liquidy. I added ground cloves and nutmeg for extra scent.

DSC_7813-50%

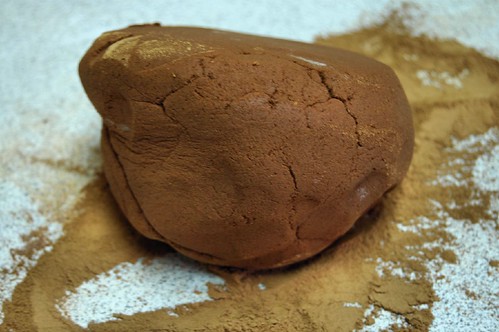
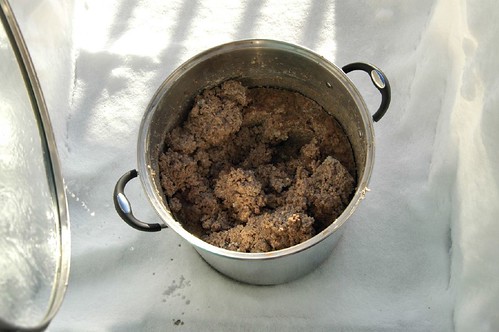
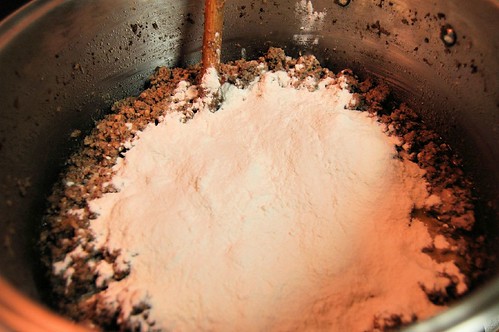
The resulting dough ended up needing a LOT more cinnamon, and was a very sticky mess. The instructions I'd read mentioned potential problems with cracking. As I kept adding more and more cinnamon, I decided to start adding white flour, thinking that the gluten might help a bit.

Only later did I remember that the intructions also suggested adding craft glue to the dough.

DSC_7818-50%

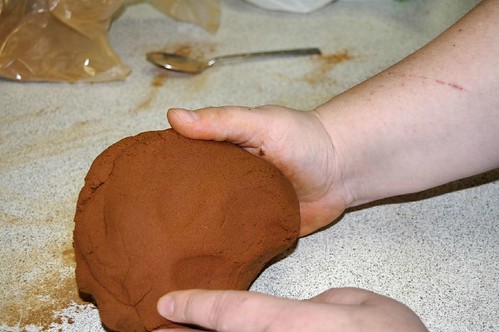
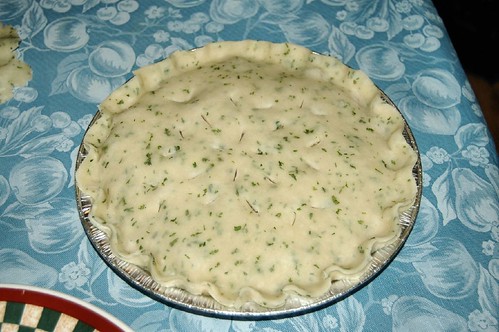
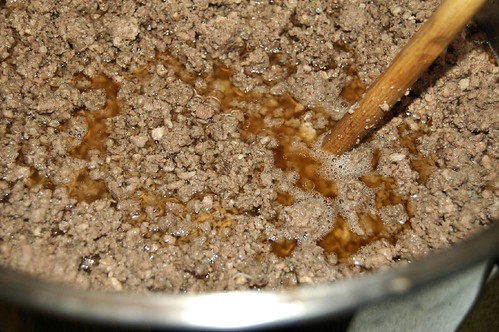
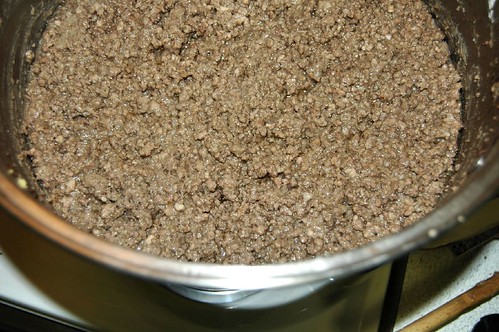
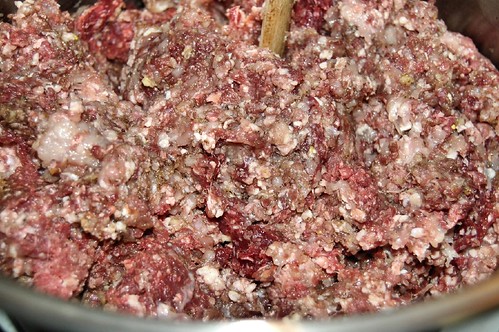
Since I added flour to the dough, I gave it some time to rest before I continued working with it. This is the dough after it had sit for about 10 minutes, and I'd kneaded it for a bit.

DSC_7820-50%

It rolled out quite nicely.

DSC_7823-50%

We decided to jazz things up a bit by sprinkling sparkles over the top and gently pressing them in with the rolling pin.

DSC_7828-50%

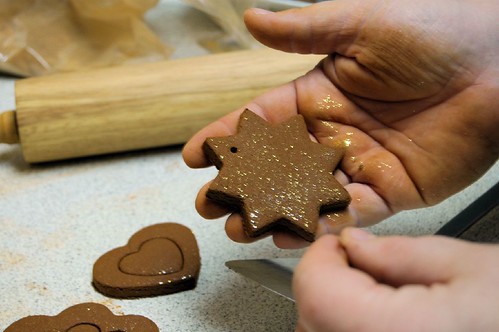
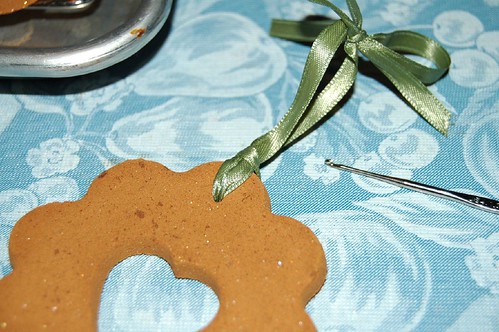
I don't have a lot of cookie cutters - when I bake cookies, they tend to be the drop kind. I've got a Tupperware set with different sizes and took advantage of the fact that some fit inside others. After cutting, I used a toothpick to make a hole for hanging.

DSC_7829-50%

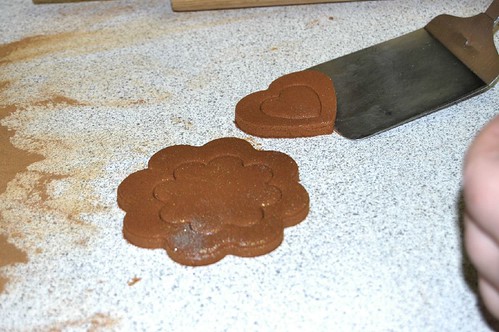
Although the dough didn't really stick to surfaces much, a spatula was still needed to avoid destroying the shape while picking them up.

DSC_7832-50%

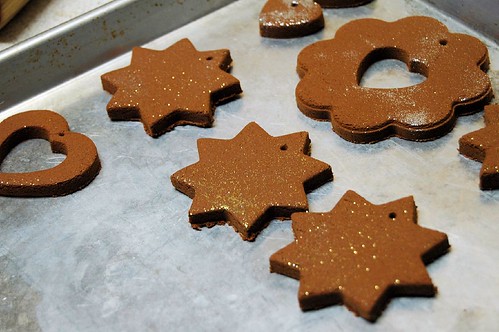
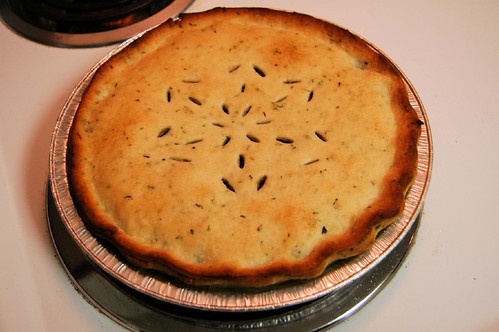
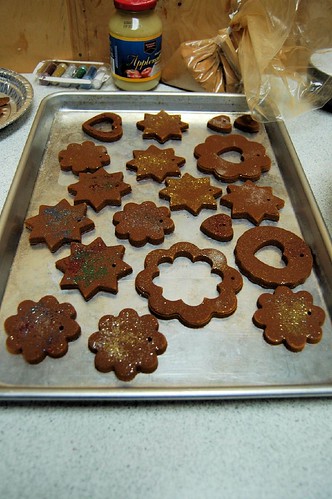
Once the holes were put in, the shapes were put onto a cookie sheet for drying.

DSC_7842-50%

My daughter added more sparkles in other colours to some of them.

DSC_7838-50%

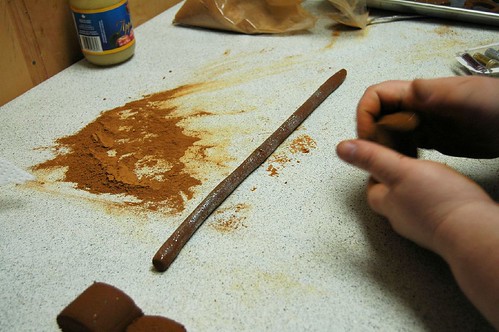
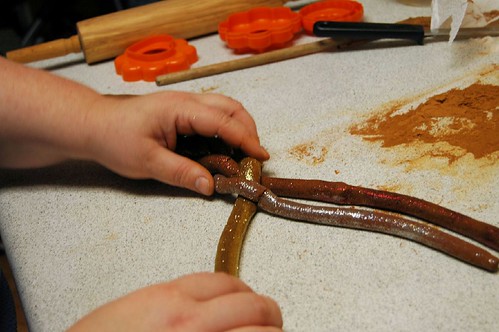
After filling the tray, I was going to use the last of the dough to make a braided wreath. After dividing it into a small piece for the bow and 3 equal pieces for the braid, I started making dough ropes. After I reached the length I wanted, I added sparkles to the surface and rolled the rope into them to coat it.

DSC_7848-50%

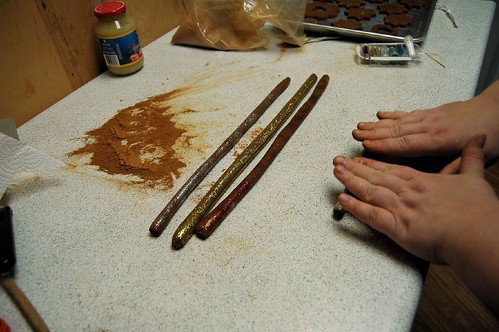
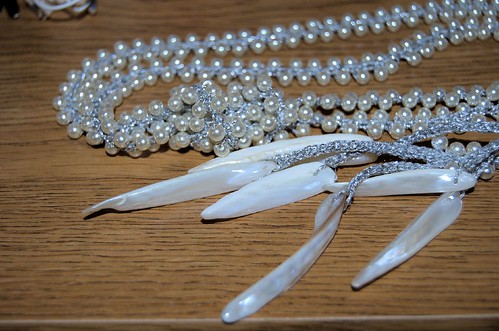
I covered the long ropes in silver, gold and red sparkles. The short rope for the bow was rolled in white/pearlescent sparkles (all these came together as part of a set, which you can see in the back, by the tray).

DSC_7851-50%

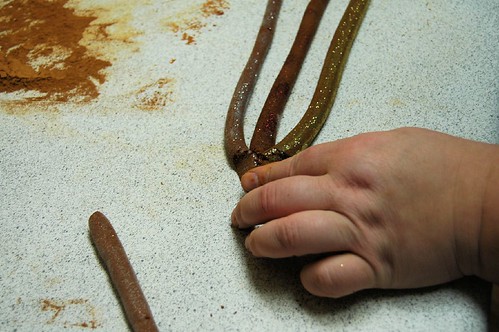
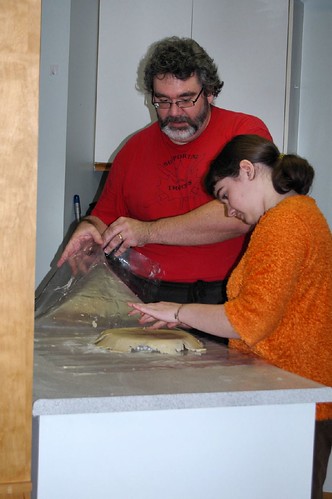
I squeezed the ends of the rope together to start braiding. They didn't want to stick together very well.

DSC_7852-50%

I tried holding the ends together with one hand while manipulating the ropes.

DSC_7855-50%

Problems started right away, as the ropes began to crack.

DSC_7856-50%

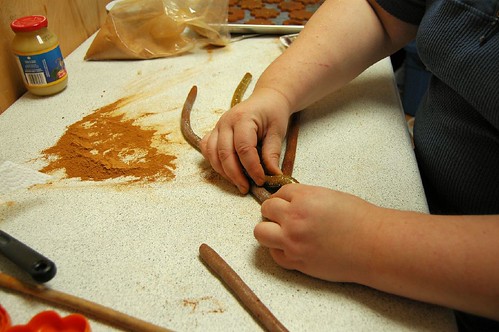
I tried repairing the cracks, but it just didn't work.

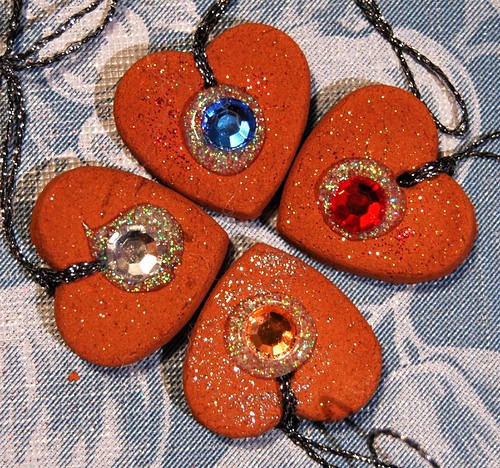
About here is when I remembered the glue suggestion. I undid the braid and tried kneading glue into the dough of each rope seperately, then rolled them out again, but it still didn't work. I ended up just rolling them flat and making more shapes out of them.
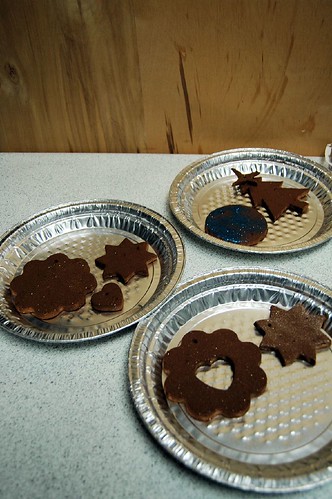
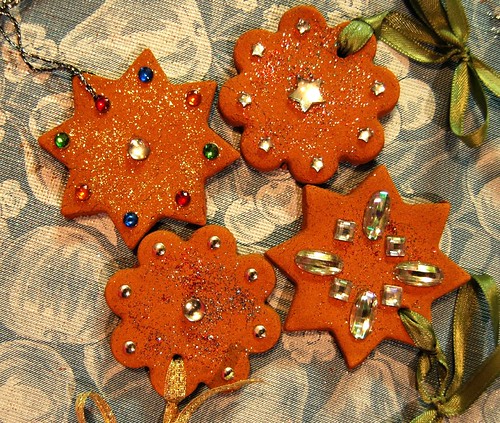
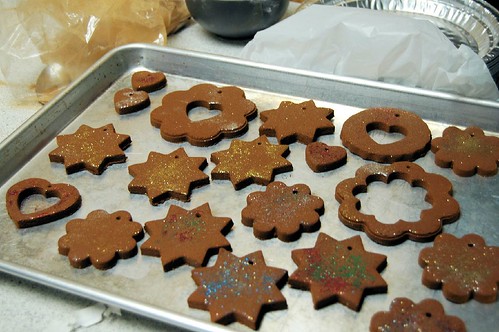
DSC_7858-50%

Like these.

DSC_7860-50%

And these are all the ones that were made before I tried making the wreath.

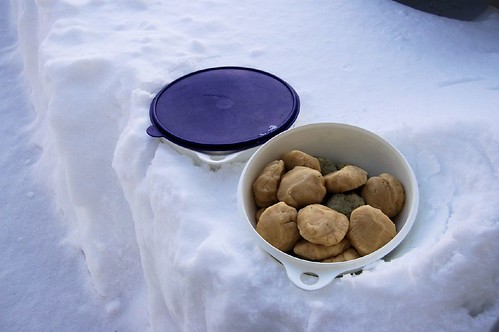
From what I've read, they will need a few days to try thoroughly. I will put them in the oven with just the light on for even drying. Hopefully, they won't take too long to dry. Once they are dry, I will add things to them for decoration and put on ribbon loops for hangers.

Sunday, December 6, 2009

Get cooking, day two, part two

We're not done yet, but we've run out of space for the prepared pies and have to stop for a break. :-D

tourtierre7772-50%

Here's the dough I made earlier: 8 triple batches, chilling in the snow at -18C. I'd run out of parsley part way through, so the last couple of batches were plain dough. :-D

tourtierre7773-50%

I couldn't resist getting a shot of the meat again, too. The frost made a really neat pattern in the lid.

tourtierre7774-50%

I finally took the meat inside at about 5pm, and this photo was taken about an hour later. Despite being outside for 14 hours, the meat hadn't froze even along the edges. It was a touch difficult to stir, though.

tourtierre7787-50%

In fact, I broke my favourite slotted spoon. *sniff*

tourtierre7776-50%

The chilled dough gets rolled out between a couple of sheets of heavy duty vinyl to make transferring to the pie plates easier. My husband is my dough rolling hero.

tourtierre7783-50%

Our first pie, ready for baking! We did 6 before we started putting them in the oven. This is the first time we've baked tourtierre in our new place and we've got LOTS of room to prepare the pies, but not a lot for setting aside or cooling them, and only 2 fit in our oven at once.

tourtierre7785-50%

One of our first pair of baked pies! The house smells soooo good right now! Our oven is very cool on one side and doesn't seem to like to hit the higher temps, so we have to reverse the pies after 15 minutes, then bake them for another 15 minutes, at about 400F. Our oven is actually set at 450F but has yet to reach that temp.

tourtierre7794-50%

Danielle has been great helping out this year! My job has been to fill the pies, crimp the edges and cut in the steam vents while my husband and daughter do all the rolling and tending of the oven.

tourtierre7796-50%

The ironing board and the top of our stove are the only cat-safe places we have to leave the pies to cool.

tourtierre7797-50%

To freeze them, my darling husband shoveled the snow away from our patio swing so I could lay them out...

tourtierre7798-50%

... and cover them up to freeze.

It is SO hard not to dig in to a pie right now! When we're done baking, we'll have one. I can hardly wait!!

Get cook, day two

We're now into day two of making our Christmas tourtierre! Here's where we're at so far...


tourtierre7770-50%

I wasn't able to put the meat outside until something past 3 am, and the pot was still quite warm. This photo was taken about 8 hours later.


tourtierre7771-50%

The edges are pretty frosty, so I mixed it up so the middle will chill even more. It's no where near frozen, even after 8 hours in temperatures closing in on -20C. The meat will stay out in the cold until shortly before we're ready to start the pies. The dough will be set outside to chill, too, as there's no way we'll be able to fit it all in the fridge.

tourtierre7765-50%

Prepping for the dough. We'll be doing 8 triple batches of hot water dough. (Not in the photo is the flour and water.) I've got more shortening then I need, in case we want to make extra. The left over dough is great with some shredded cheese kneaded in, shaped into sticks and baked. Yum.

toutierre7769-50%

The best tools I never paid for! There's my KitchenAide Artisan mixer, which I got for free using grocery store points, and a food processor my wonderful in-laws gave us for Christmas a few years back (I'm one of those women that LOVES getting kitchen appliances as gifts).

It occurs to me that I won't need to use the processor. Typically, I'd do the boiling water, shortening and egg in the processor, then pour it into the flour in the mixer for kneading with the dough hook (at triple recipes, the heavy duty mixer is a must). Now that I think of it, though, I can just do the hot water mix with the beater, then switch to a dough hook and add the dry ingredients. That'll save on clean up later on.

Doing the dough is a VERY messy job. I might be able to get my husband to take photos for me, but I won't be handling the camera myself.

Saturday, December 5, 2009

Get cooking, part two

It's been about 6 hours since I past posted, with the tourtierre filling cooking away. I frequently stirred the meat, breaking up any bigger pieces as it cooked. My husband was never able to find a longer wooden spoon for me - I think we'll have to go to a restaurant supply store for that - but it worked out in the end. The meat shrinks as it cooks, so by the end of it, it was fairly easy to mix.

tourtierre7738-50%

Here's a meat and juices, fully cooked. At this point, the pot is taken off the heat for cooling.

tourtierre7745-50%

To thicken the filling, I first add some breadcrumbs and stir it in. This amount is no where near enough needed to thicken the filling properly. Once it's stirred in, the meat's allowed to sit for about 10 minutes for the crumbs to absorb as much liquid as it can, and for any remaining liquid to rise to the top.

tourtierre7750-50%

The next time I add flour for thickener. This time, it was enough.

tourtierre7757-50%

Here's how it looks, after resting for another 10 minutes or so. If there had still been any liquid showing, I'd have added more flour.

For now, the post is still sitting and cooling for a while. Before I turn in for the night, I'll put the lid on and pop it onto the balcony. We're at -13C with a windchill of -23C right now, so the outside is probably going to freeze a bit. There's too much there for it to freeze solid overnight.

Tomorrow, we make the dough and assemble the pies. As the dough needs a few hours to chill in the fridge, this is going to be an all day job.

It's going to be fun!

Get cooking!

Cooking is a craft, too, isn't it? :-D

Tonight, I've started on this year's Christmas tourtierre. We're planning on two dozen pies, though how much we actually end up with doesn't always stay on plan. *L* With our recipe, we calculate based on 1 pound of meat per pie, but we just fill the shells to our preference, so it doesn't always match up. Not that we have the exact weight of meat to start with, as the butcher doesn't have control over the weights of meats they don't process themselves.


tourtierre7716-50%

Here I've got all my ingredients ready and waiting. Well, except the water. I didn't think I needed to include that in the photo. ;-)

tourtierre7723-50%

Happily, all 24-27 pounds of ground meat fit into my new pot, with room for the other ingredients and stirring.

tourtierre7725-50%

Next, it was time to add the onions, garlic, salt and spices.

tourtierre7730-50%

And finally, mixing it all together. Fortunately, I have a very strong wooden spoon. Unfortunately, it's not quite long enough. I probably would have done better with just my hands. *L* After this, the water was added and I've started the cooking. I've also called my husband, who is out shopping with our older daughter, to find me a really long spoon!

I'll take more photos when it's time to thicken the filling before it's time to set it on the balcony to cool overnight. :-D

Darn. My husband just called. No luck finding a longer spoon. They're going to try someplace else on the way home (if it's still open). I can get away with using my current one, but it'd be a lot easier with a longer one!

Thursday, December 3, 2009

Lariat

Here is a lariat I made, modifying a pattern from Hooked on Jewelry; 40+ Designs to Crochet, from Pat Harste. Some very lovely designs in this book!

The original pattern is called Jet Set, and was made using black silk thread and black beads and a 2.25mm hook.

lariat

I used the same metallic yarn I used for the Dazzling Dahlia, and a 1.50mm hook. I chose pearls and shells for the beads. The pearls were 4mm beads that came in strung packages of 290. The pattern called for 416 beads to be pre-strung onto the thread. The glass teardrops of the original pattern were replaced with seashell pieces, also purchased in strings. I was intending to make the matching earrings, but couldn't find my silver earring hooks. Of course, I found it after the sale. *L*

The finished lariat was about 4 ft long. It's a lot narrower than the silk lariat in the photo. The instructions said to iron the finished lariat on a towel, which wouldn't have worked with these materials. As the ends tended to twist quite a bit, I used my ironing board to wet block it, instead. The lariat was quite a bit longer than the board, but since just the ends needed to be straightened out, I just lay it out with a flat curve to "fold" it in half, pinning down the rest, then spraying it with water.

Although this one sold, now that I've found the earring hooks I was after, I think I'm still going to make the earrings. The beads are already pre-strung, so I may as well. ;-)

My first customer orders

Today I delivered my first customer ordered items. Felt kinda good. :-D

Custom ordered potholders

During the craft sale, one customer asked if I did potholders. I asked her what she had in mind and she ended up just bringing over the older potholder she was wanting to replace (handily enough, she lives pretty much across the hall from the room the sale was in). When I said I could and after talking colours with her, she insisted on paying me in advance, and more than the amount I'd said. Pretty much double. So I made her two.

The larger one, done in dc stitches worked between the stitches of the previous rows, is how the one she showed me was made. This one is a touch larger than her original. The smaller one was worked up with dc stitches worked into the tops of the previous stitches, then bordered in sc, with a loop of foundation ch sc (the foundation chain and row of sc are worked at the same time) added to the last corner.


Custom ordered earwarmers

For the earwarmers, the customer wanted a pair in brown, which I didn't have during the sale. For her, I was a little more concerned with how they fit on her head. She's in a wheelchair with headrest and mentioned it was a problem with hats. As she moves her head, hats tend to be pushed up in the back by the headrest, uncovering her ears. She doesn't have enough mobility in her arms to fix it. I just delivered it to her and helped her try it on. She thinks it will work fine. I hope so. Until she actually uses it for a while with the headrest that was giving her problems (she had a different one on her chair at the time I visited), I won't feel confident that it's right. We shall see.

Now I just need to talk to another potential customer who was interested in a hat and scarf set. :-D