Pages

Showing posts with label free pattern. Show all posts

Monday, March 24, 2014

My First Ever Get Crafting Challenge!

One thing about living in a Northern climate is that spring can be pretty darn ugly.  Everywhere, there are great piles of snow that, as they melt, become increasingly black with street grit.  The melting snow reveals all sorts of garbage and oddities in the process.  Even the trees are dull from dirt and dust. 

We need some cheer.  We need some colour.

So I've decided on an experiment.

I have just put up another free pattern on my squidoo pages.  It's another photo how-to with a basic pattern for making crochet Easter Eggs.

My challenge is this.

Make lots and lots of these eggs.  Then, take them with you as you go out and about during your day.  Strew them here and there for others to find.  Hang them from trees or tuck them into planters.  Leave them on benches or at your favourite coffee shop.  If you wish, add a little tag to them, inviting whoever finds them to take part in the Get Crafting! Easter Egg Challenge.

After finding a place for your egg, feel free to take a photo.  If you wish, email photos to me at gottagetcrafting @ gmail.com (minus the spaces), along with the name I should credit it to and general location, I and will post them here.  Or, post them on my facebook page.  If you have a bunch of photos online, send me a link and I'll post that.  Or leave a link in the comments.

Not a crocheter?  No problem!  Make eggs with whatever materials or methods you wish (just make sure it's nothing that will harm anyone or anything when left outdoors).  Send me an email or leave a comment telling me about your crafting method.

I hope you have fun with this challenge!  Share this post, leave comments and otherwise let me know how it's going.  If you have any ideas for my next challenge, please let me know!

Happy Crafting!

Tuesday, November 19, 2013

Free Pattern - a 3 Hour Cowl

Things have been pretty quiet on my blog lately, which means things have been really busy in real life!  Hoping to be able to post more often soon.

Meanwhile, here is a new free pattern with step-by-step photos for you to enjoy. 


It's a simple moebius cowl that can be made up in a single evening, making it a great, quick gift.  You can print out the instructions at this link, too.  It's just a two row repeat of basic stitches, so it's a great pattern to let your yarn selection steal the show.  I've made this using 2 skeins of Lion Brand Tweed, but feel free to experiment! 

Tuesday, June 4, 2013

Free Crochet Pattern Book link

I just found a great looking pattern book available for free online.  It's 300 patterns, with photos of the patterns stitched, plus an International Stitch diagram.  There are no text descriptions at all. 

Enjoy! :-)


Friday, May 10, 2013

Simple Lap Blanket - free crochet pattern

I just finished writing up a pattern for a very simple seed stitch lap blanket, which is available here.


I made this using the new Luxury Wool yarn from Loops & Threads that Michaels has started to carry.  An excellent price for 100% wool!  Also, it took me quite a long time before my very mild wool allergy started to act up. 

I have three more balls of this yarn in blue and haven't decided what to do with it yet. 

Any suggestions?

Once again, here's the link for the free pattern.


Saturday, December 8, 2012

Free pattern now up

Well, I really need to get to bed, but before I do, I have a couple of links to share.

First, I've just posted a new lens on Squidoo with a free pattern for the ornaments I made for the Christmas Market my daughter and I just took part in.


Click here for the pattern.  Permission is given to use the pattern to make and sell these yourself, with credit given to Get Crafting! but not to sell the pattern as your own. 
Though I have written about our tradition of hand made decorations for our tree here before, I've put it all together in another Squidoo lens as well, which you can visit by clicking here.


I still have to make our decorations for this year, too!  I have to finish a custom order first, though, then I will work on them and post a step-by-step when they're done.  Hopefully, I won't be cutting it too close to Christmas day!
Thursday, November 24, 2011

Quick and Easy Garland

Here's a garland I made up using the new Martha Stewart yarn, Glitter Eyelash.

When I first saw the new line of Martha Stewart yarns, I have to admit I had low expectations for the eyelash yarn.  That's because I have low expectation for eyelash yarn in general.  I find them a major pain to work with, and heaven help you if you make a mistake and need to undo it!

I was impressed with this yarn, however.  First off, there's a nice range of colours with marvelous sparkle to them.  Then I actually picked up a ball.  I had expected it to be scratchy from the glitter strands, but it was surprisingly soft.  I was impressed.

So when I decided to make a last minute decoration for the staff decorated tree at the Michaels I teach at, I picked up a couple of balls in Blue Topaz.  I decided to make a garland similar to one I have made before, using glow in the dark yarn. 

Once actually working with the yarn, I was again impressed.  It was smooth to work with and there was no tangling of any kind.  Very nice.  

For the garland pictured below, I used a 5.00mm hook and some white yarn I had on hand (Loops and Threads Impeccable) along with the Glitter Eyelash.

To start, make a chain to the desired length.  I never measured the final length for this, but I'm guessing it was about 13-15 feet long.

To make a gentle spiral, two stitches are worked into each chain in the foundation.

Start by making a loop by working a sc into the 6th chain from the hook, or whatever number of chains for the size of loop you want. Work 1 hdc in the next ch.

Place a stitch marker at the opposite end of the foundation chain, 7 ch from the end or the number of ch in your loop plus 2.

Work 2 dc into each ch to the marker.  Work 1 hdc into the ch the marker is in.  Create a loop by working a sc into the next ch and the last chain together.

Fasten off yarn.

Join with Glitter Eyelash into the hdc stitch at either end of the garland.  Work 1 sc into each stitch to the hdc at the opposite end.

Fasten off yarn.


Quick and easy garland

When I first started this, I had intended to make a denser glitter row by working 1 ch in between each sc.  It was looking great, but used far more yarn than I had.  Unfortunately, I had already worked about 1 3/4 balls of Glitter Eyelash before I realized there was no way I had enough to finish the entire garland.  I would have needed almost 4 balls to finish it that way (which, by the way, I recommend as a variation.  Just make sure you have lots of Glitter Eyelash).

I had to do the one thing I dreaded most with an eyelash yarn.  I would need to undo nearly two balls worth. 

Much to my surprise, it came undone as smoothly as any basic yarn!  There were no tangles at all, no catches, no twisting.  It was beautiful! 

Quick and easy garland

To store the garland, wrap it around a core of some kind.  I used the thick cardboard tube from a package of extra wide aluminum foil.  There's a couple of spots of sticky glue where the foil was attached to the tube, which I covered with tape.  Just hook the loop around one end of the tube, then wind the garland around it.  To fit this garland onto the tube, I had to jam it together pretty tightly.  The tube also makes it easier to place the garland on your tree.  Just hook a loop onto your tree, then unwind it as you go.

This garland took me about 3 hours to do, including the time it took to rip all the eyelash yarn and work it back up again.  This can easily be worked up in a single evening.

As for the Glitter Eyelash yarn from Martha Stewart, I definitely recommend it!  It's got great colours, lovely sparkle, a soft texture, is lovely to work with, and is even a delight to undo if you make a mistake.  Fantastic stuff!


Sunday, November 6, 2011

Special Olympics Canada scarf and pattern


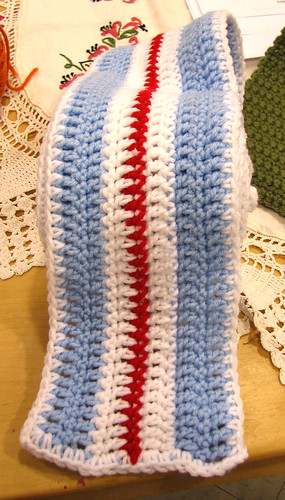
Special Olympics Canada, Vertical Stripe Scarf

 Special Olympics Canada striped scarf

This is an easy scarf design worked in Special OlympicsCanada colours.  Donated scarves are given to all the athletes, their families, coaches and volunteers.  Extra scarves are donated to those in need.  This scarf is done in just single and double crochet stitches and can be worked up quickly.  Make a few and donate them to worthy cause!

Yarn: Medium (4) weight acrylic yarn in any blue similar to the Special Olympics Canada logo, white and maple leaf red.

Hook: 5.00mm

Foundation chain in blue: work a chain about 6 feet in length (about 250 stitches; I worked mine in 270 stitches for a longer scarf) + 2 for turning chain.

Turning chains are not counted as a stitches in this pattern.

Row 1: Work dc in third chain from the hook.  Continue working Dc to end of foundation chain.  Ch 1.  Turn.

Row 2: Sc in each Dc to end.  Ch 2 loosely.  Turn.

Row 3: Dc in each Sc to end changing colour to white at last stitch.  Ch 1.  Turn.

Row 4: In white, Sc in each Dc to end.  Ch 2 loosely.  Turn

Row 5: Dc in each Sc to end, changing colour to red at the last stitch.  Ch 1.  Turn.

Row 6: In Red, Sc in each Dc to end, changing to white at the last stitch. Ch 2 loosely.  Turn.

Row 7: In white, Dc in each Sc to end.  Ch 1.  Turn.

Row 8: In white, Sc in each Dc to end, changing to blue in last stitch.  Ch 2 loosely.  Turn.

Row 9: In blue, Dc in each Sc to end.  Ch 1.  Turn.

Row 10: Sc in each Dc to end.  Ch 2 loosely.  Turn.

Row 11: Dc in each Sc to end.  Finish off and weave in end.

Join white into a right hand corner of either narrow end, in between the last two Dc on the long side.  Sc into same spot as join.  Ch 2 to turn corner.  Work 2 Sc around Dc post on the short edge.  Continue working evenly along edge with 1 Sc into an Sc row and 2 Sc around Dc posts (including any turning chains) to next corner.  There will be 2 Sc worked around the last Dc post.  Ch 2 to turn corner and work 1 more Sc in the space between the last Dc post worked around and the next Dc stitch on the long side.  There should be 17 Sc between the Ch 2 spaces, plus one Sc worked on the long side of each corner.

Work Sc in between the Dc stitches to the end of the scarf.  At the end, Ch 2 to turn corner.  Work 17 Sc across the end in the same manner as at the beginning.  Ch 2 to turn corner and work Sc into the space between the last Dc post worked around and the next Dc.  Continue working Sc in between the Dc stitches to the end, slip stitching into the beginning Sc.

Finish off yarn and weave in ends.

Saturday, January 22, 2011

Red and black scoodie - part three

Part One
Part Two

Here is the pattern for the scoodie.  If anyone tries it out, please let me know if there were any errors I missed.
(note: I forgot to mention in part one that I ended up changing the hook size, too).


Yarn: Phentex or Bernat Chunky, one 400g ball in red or colour of choice
hook: 9.00mm

optional edging
Yarn: Red Heart Foxy, in black or contrasting colour of choice
hook: 3.50mm

Beginning panel
note: unless otherwise noted, the turning chain is NOT counted as a stitch, and is skipped after turning or starting a new round.

chain 8, plus 2 for turning (total 10 ch).  Turn

1)  Skip 2 ch; work 1 hdc into the back bar of remaining 8 ch.  Ch 1, turn
2)  Work 1 hdc into each stitch across, ch 1, turn
3)  2 hdc in first stitch, 6 hdc across, 2 hdc in last stitch.  Ch 1, turn
4)  10 hdc across, ch 1, turn
5)  2 hdc in first stitch, 8 hdc across, 2 hdc in last stitch, ch 1, turn
6) 12 hdc across, ch 1, turn
7) 2 hdc in first stitch, 10 hdc across, 2 hdc in last stitch, ch 1, turn
8-15) 14 hdc across, ch 1, turn.  For row 15, turn to side.

Side and back

1) Work hdc evenly around 3 sides, working 20 hdc on each side and 8 hdc at the back for a total of 48 hdc.  ch 1.  Turn
2-9) Work 48 hdc around.  Ch 1 and turn

Adding the scarf:

10) 48 hdc around.  Chain 101, turn
11) skip first chain stitch, 148 hdc across to opposite end of hood.  Work 100 foundation hdc for second half of the scarf.  Ch 1, turn.
12-14) 248 hdc to end, ch 1, turn

Row 15 becomes round 1.

round 1) 247 hdc across.  In last stitch work [1 hdc, 1 ch, 1 hdc] to turn corner
     work 5 hdc across edge, [1 hdc, 1 ch, 1 hdc] to turn corner
     work 97 hdc across
     In the scarf/hood corner, work 2 hdctog (half double crochet together) using last stitch of the scarf and 1st stitch on the side of the hood.
     Work 12 hdc along the side, 14 hdc across the top and 12 hdc along the other side
     Work 2 hdctog in last stitch of hood and first stitch of scarf
     97 hdc to end
     In last stitch, [1 hdc, 1 ch, ss (slip stitch) into first hdc]  Do not turn.
2) ch 1, hdc into same stitch as ss.  hdc to end.  [1 hdc, 1 ch, 1 hdc] in ch 1 space, 7 hdc across end, [1 hdc, 1 ch, 1 hdc] in ch 1 space, 97 hdc across to hood, 2 hdctog, 11 hdc up side, 2 hdctog, 11 hdc across top, 2 hdctog, 11 hdc down other side, 2 hdctog, 97 hdc to corner, [1 hdc, 1 ch, 1 hdc] in ch 1 sp, 7 hdc, [1 hdc, 1 ch, 1 hdc] in ch 1 sp, ss into first hdc.  Do not turn.
3) Ch 1, hdc into ss space, hdc to end, [1 hdc, 1 ch, 1 hdc] in ch 1 sp, hdc to next corner, [1 hdc, 1 ch, 1 hdc] in ch 1 sp, 98 hdc to hood, 2 hdctog, 11 hdc, 2 hdctog, 8 hdc, 2 hdctog, 11 hdc, 2 hdctog, hdc to end, [1 hdc, 1 ch, 1 hdc] in ch 1 sp, 8 hdc, [1 hdc, 1 ch, 1 hdc] in ch 1 sp, 1 hdc, ss to first hdc.  Finish off yarn.

Optional edging.

Join contrasting yarn.  Work 2 sc into each stitch, including ch spaces, around entire scoodie.  ss and finish off end.

Thursday, August 12, 2010

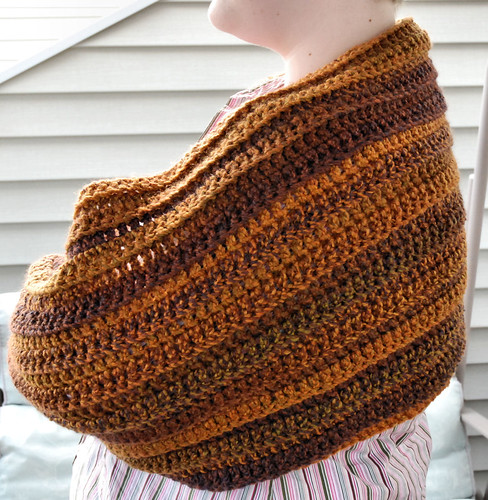
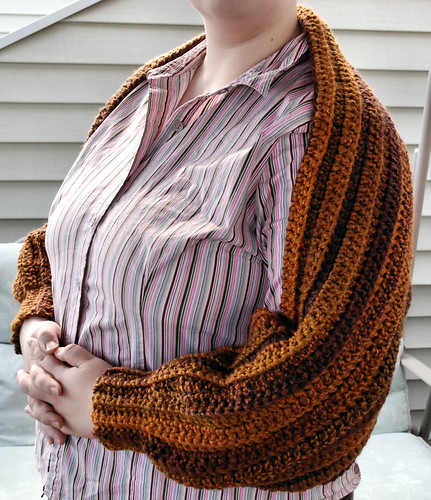
Simplicity Itself Reading Jacket

A number of years ago I was talking to my mother in law about crafting, crochet and some of the different things that were popular over the years. She described to me a garment called a reading jacket that was like a shawl or stole, but extended to a cuff at the wrists. Not too long ago I found a pattern that was very much like she described and I made it for her. I don't have a photo of it, but it consisted of making a rectangular stole, then closing up the short sides with a cuff worked in rounds. I finished it with a ruffled edge. Getting the cuff the right size was a pain in the butt, and I figured there was an easier way to do it.

The result was simplicity itself.

First off, the yarn.

I went with James C. Brett Marble Chunky in Adobe. It took about 1 1/2 balls (200g) to complete the piece. It's a 100% acrylic, machine washable yarn with a wonderful feel. Absolutely gorgeous to work with. I choked a bit at the price of $15.99 per ball (what can I say... I'm a miser. ;-) ), but it was totally worth it!

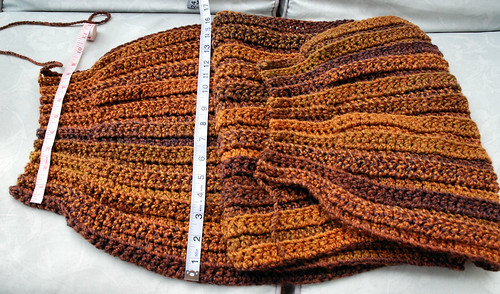
Being a chunky yarn, I went with a size N/9.00 mm hook and started with a foundation chain of 60 inches. For the first row, I worked 10 sc for the cuff, then switched to dc until the last 10 stitches, where I switched back to sc.

The remaining rows were worked into the back loops only, sc into sc and dc into dc, until the cuff measured about 8 inches. It was more important to finish with an even number of rows than get an exact measurement. This is how it came out.


Reading Jacket

Like I said, simplicity itself.

Reading Jacket

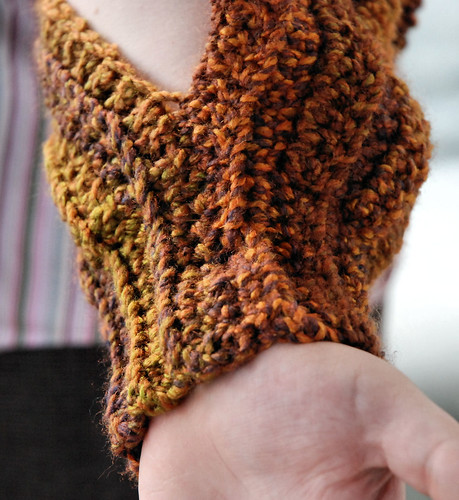
The seam of the cuff was worked so that it would be hidden in a "valley" on the right side. I lined up the stitches and whip stitched the sc area, plus 3 dc stitches.

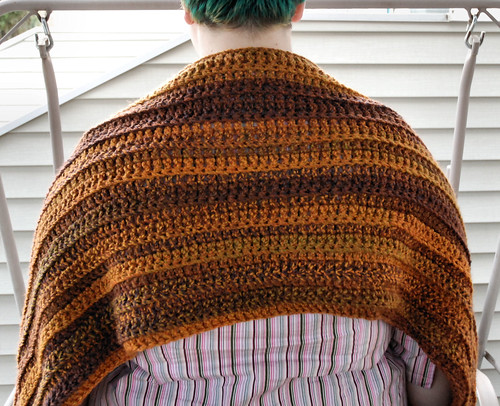
I had considered working a contrasting row of stitches around the edges, but as we looked at it, we all thought it was just fine the way it was. Here are some different views of it.

Reading Jacket


Reading Jacket


Reading Jacket


Reading Jacket

At this size, it would fit most adults, however it would be easy to customize for size, width and different yarns.

To customize the length, drape a tape measure over the shoulders where the wrap will rest and measure from wrist to wrist. Work the foundation chain to that length. Likewise, measure around the wrist to adjust the cuff size. Adjust the number of sc stitches to whatever width you'd like the cuff to be.

If you'd like it wider over the shoulder, use a smaller hook when working the cuff than the body.

Once the cuff is sewn closed, try working a contrasting colour around the edge in sc, working 2 sctog at the seams.

For a simple ruffle, start with a round of sc along the edge, starting near the cuff seam and working sctog at the seams. In the second round, work a few sc close to the seam (remembering to do 2 sctog at the seam), then a few hdc, making sure the number and type of stitches match on either side of the cuffs. Part way up the arm (wherever you'd like), switch to [dc, ch 1 dc] into each sc of the previous round.

Wednesday, June 16, 2010

Step-by-step: Making a journal cover, part five (last one!)

Part One
Part Two
Part Three
Part Four

I like keeping things flexible and giving people options.  For that reason, I decided to make the final decorations removable.

First, the flower motif.


finishing-1

For this, I went digging through my books and found a motif I thought would work well, then did a variation of it that suited the chunky yarn I'd chosen. 

For this motif, start by working 12 sc into a magic ring.  ss to finish.  ch 1
2nd round, work 12 sc into each sc *from behind* and working around the posts (back post stitches).  ss to finish. ch 1
3rd round, work a sc into the same space as the ss. ch 2  [skip 1 sc, 1 sc in next stitch, ch 2] around. ss to finish.  There will be six chain 2 loops.
4th round, ss into first chain 2 space.  [1 sc, 4 dc, 1sc] into each chain 2 space.  ss into first sc of this round. ch 1  There will be 6 petals.
5th round, Working into the skipped sc of round 3, work 1 sc into first skipped stitch.  ch 3  [1 sc into next skipped sc, ch 3] to end of round.ss in first sc. 
6th round; ss into first ch 3 space.  ch 1. [1 sc, 2 dc, 2 tr, 2 dc, 1 sc] into each ch 3 space.  ss into first sc.  Finish off yarn  There should now be a second round of 6 petals.

Change to contrasting yarn (change hook sizes, if needed).  Work the contrasting yarn evenly around the edges of the second round of petals in sc.  Finish off yarn.  Sew in all loose ends.

finishing-2

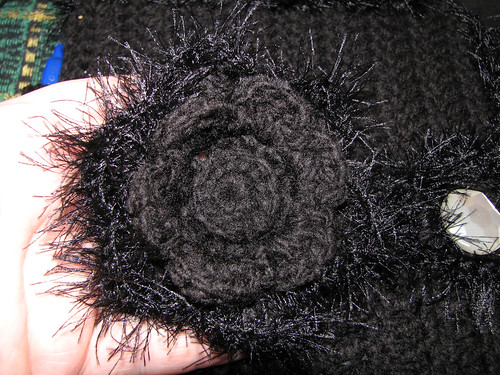
To make the flower motif removable, I went into the brads I bought and tried a couple different ones to see which I liked for a centre.  I settled on the fake white pearl, as it meshed well with the button I'd chosen.   I then used the brad to fix the motif in position on the front of the book cover.  This was a bit of a challenge with the chunky yarn, as the brad was just barely long enough to go through the layers and still be able to push out the ends and secure them.  This would have been much easier with a thinner yarn.  I then chose a variety of brads and attached them to the front cover wherever I felt they looked good.

finishing-3

All done!  The now completed journal cover.  If a plainer cover is desired, or it needs to be cleaned, the flower motif and brads can be easily removed.

Strangely, it feels like it took longer to write all this out than it took to actually make it!  Not counting the drying time while blocking, of course.

Step-by-step: Making a journal cover, part four

Part One
Part Two
Part Three

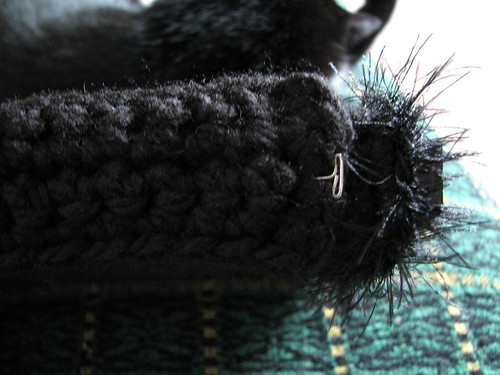
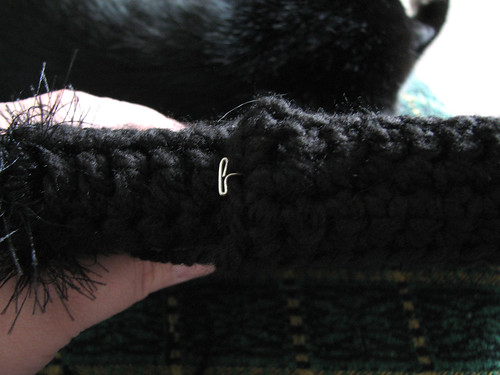
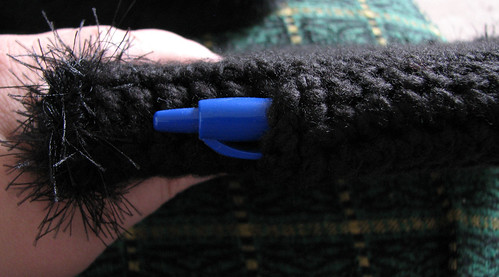
A couple of extras I decided to do, besides decorating the front, was to add a pocket on the spine to hold a pen, plus a button closure.  First up, the pen pocket.

penpocket-1

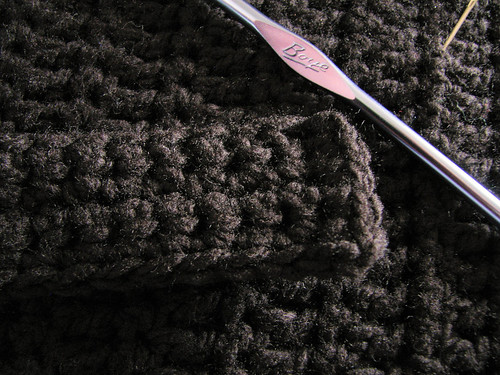
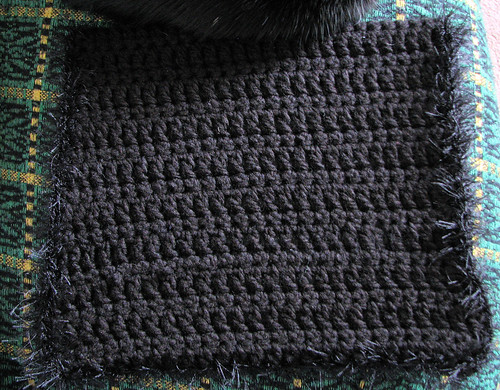
The pocket itself is just a rectangular piece worked in rows of sc.  It needs to be about 3/4 the length of a pen - shorter, and the pen might catch on things and get yanked out.  For the width, make it slightly wider than the spine.  With the chunky yarn I used, I worked 4 rows of sc, then turned the corner at the end to continue a sc border around 3 sides.  Finish off the yarn end.

penpocket-3

penpocket-2

With the cover on the book, pin the pocket in place with one end near the bottom edge of the spine.  There should be some space above the top of the pocket where the top of the pen will show.  How much depends on the size of your book.  Once the pocket is pinned securely in place, remove the cover from the book.  Using matching yarn and a tapestry needle, sew the pocket in place to match the width of the spine.  With the pocket worked up to be slightly wider than the spine, this will create a slight space for the pen to fit into. I used a double running stitch around the sides, and buttonhole stitch across the top of the pocket.

penpocket-4

The finished pocket.

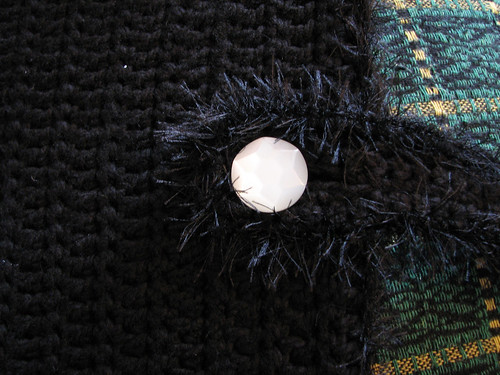
The body of the botton closure is made similar to the pocket.  After digging through our buttons and finding one I liked, I worked up another rectangular strip in rows of sc.  For the length, first decide where the button will go (it can be sewn into place at this time).  The strip needs to be able to extend slightly past the button, wrap around the book's edge, then extend a matching distance on the back.  For the width, it needs to be slightly wider than the button itself.  For the button hole, work out how many stitches to skip based on the size of the button.  For the chunky yarn I used, the strip is 4 rows of sc wide, and the button hole is 3 sc long.  Two sc were worked at the end to secure the button hole.  I worked the button hole in the 3rd row.  Five stitches before the end of the row I did 3 foundation sc, skipped 3 sc in the previous row, then worked 2 sc at the end.  If your strip needs an uneven number of rows to be wider than the button, the button hole will need to fall in a row instead of between row.  In that case, just do regular chain stitches instead of foundation sc.  It leaves a larger hole, which can be outlined in buttonhole stitch later on, if needed.

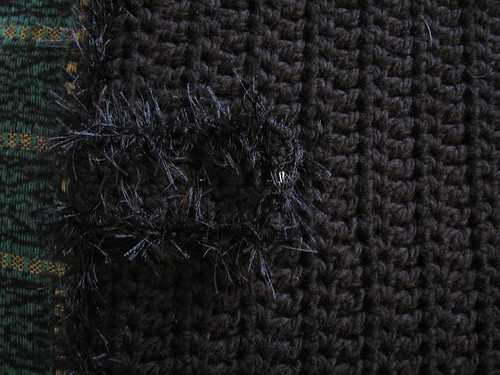
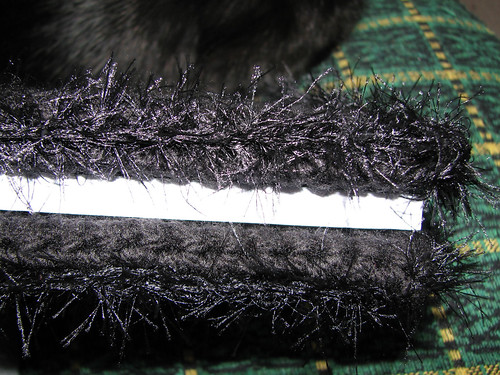
Once the strip was worked up, I finished off the yarn, then edged the strip in the faux fur yarn to match the edging of the cover.

buttonclose-2

To affix the button closure strap, put the cover with the secured button on the book, then button the strip in place.


buttonclose-3

Take the loose end around to the back and pin it in place.  Once it is positioned properly and securely pinned, unbutton the strip, remove the cover and sew the end securely with matching yarn. 

Once again, the cover can be considered done at this point. In one last part, I've got a removable flower motif and decorative brads finishing the cover.

Step-by-step: Making a book cover, part three

Part One
Part Two

Now it's time to close up the flaps and work the edges.

Remember those long tails I said to leave behind in part one?  Time to use them.  If you haven't left long enough tails for the sewing, weave them into the piece, then use some fresh yarn.

edge-1

If needed, figure out which side of the piece is the inside and which is the outside.  Folding a flap to the inside at the dc row, tack the edges closed with a few stitches.  If you're using a contrast edging, you just need to make sure the edges stay in place.  Loose yarn ends can be covered in the edging.  If you're not doing an edging, whip stitch it securely and weave the ends in.

Close up other side of the flap, then repeat on the other end.  You should now have a rectangular piece with two "pockets" for the book's cover to fit into.

edge-2

Start the contrast edging at a corner, working from the front.  When working the flap area, make sure the edging is worked into both layers, catching in any loose yarn ends and securing the edges of the flaps to the main body.

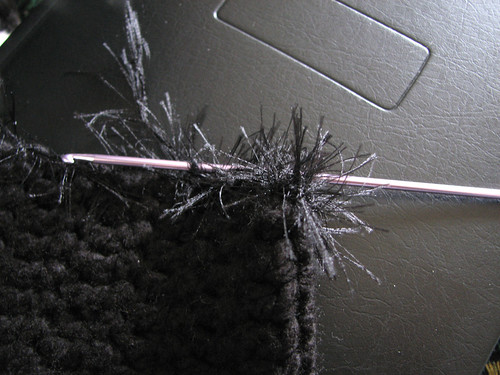
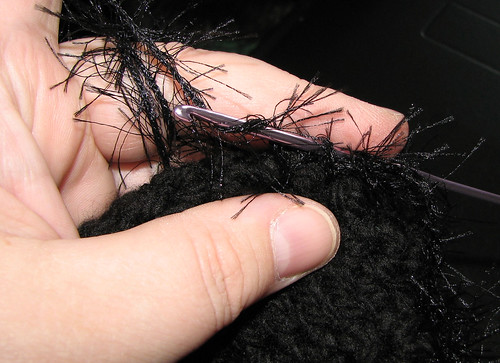
For the yarn I chose for my edging, I switched to a much smaller hook and worked sc all around the edge, keeping the stitches fairly close together for denser furriness.

edge-3

When reaching the end, do a few extra stitches to turn the corner, then work the edging around the posts of the folded dc row.

edge-4

Work around all sides and fasten off yarn.  Here, the journal is wearing its cozy new outfit.

edge-5

Here's a few of one of the inside flaps.

edge-6

And finally, a few of the edge.

At this point, the book cover can be considered done.  The following parts are all optional extras I did, just for fun.

Step-by-step: Making a journal cover, part two

Part One

Alrighty, then... back to it! :-)

With the book cover worked up, it's time to block it to the size of the book.  I've got a cut down piece of foam insulation for smaller pieces like this. 

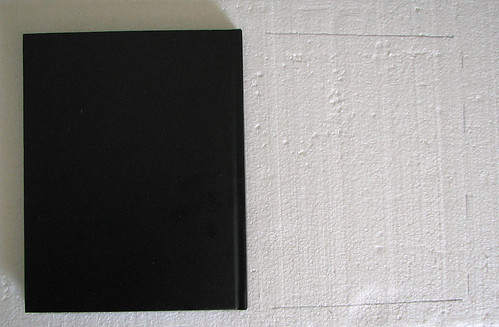
blocking-1

The first step is to mark off the exact dimensions I need to block to, and the easiest to do that is to use the book itself.  After tracing the back cover, carefully flip it over to mark the front cover.

blocking-2

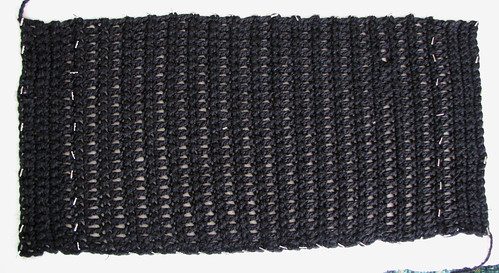
For this piece, I wet blocked it, soaking it in water before pinning.  Blocking method will depend on the type of  yarn used.  When pinning the corners, I made sure to line up the first row of sc inside the dc folding row with the corners marked out.  The dc folding row and flap portions will be outside the marked edge.  Once those were lined up, the long sides were pinned to the lines (I put one pin for each sc row), then I moved to the short sides.

After removing the curious cat, that is.

blocking-3

The first sc row inside the folding dc row was lined up with the markings and pinned, then the flap pieces were pinned straight.  They don't need as much attention as the main body for the cover.

Once pinned, the whole thing was set aside to dry.  With the yarn I used, it took about 18 hours to fully dry.

blocking-4

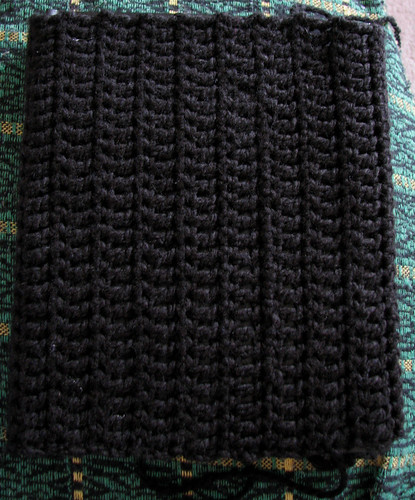
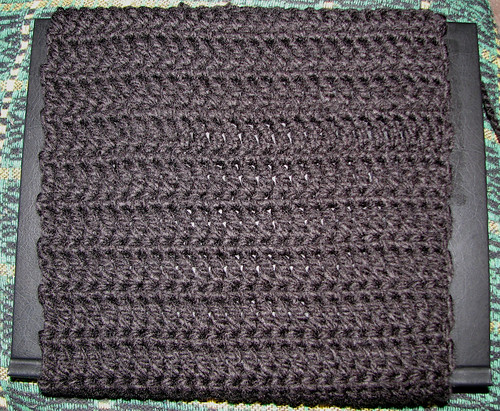
Here is the blocked piece wrapped around the book again.  As you can see, the cover now completely covers the book.

It's now ready for assembly and the finishing touches.  On to part three! :-)

Step-by-step: Making a journal cover - part one

Our local crafters group did an exchange I was able to take part in this time: embellished journal covers.  For my partner, I decided to make an embellished crochet journal cover that could be removed and used again.

I took photos of the step-by-step process and will be splitting it up into several parts.  Partly because of the number of photos, and partly because I don't have time to do the whole thing at once. ;-)

For the first part, I'll cover how I worked it out to fit the specific journal I had.  If I do it right, you should be able to follow along to make a cover to fit pretty much any hard cover book.  If something isn't clear, feel free to ask me questions in the comments.

First up, the materials.

1-materials

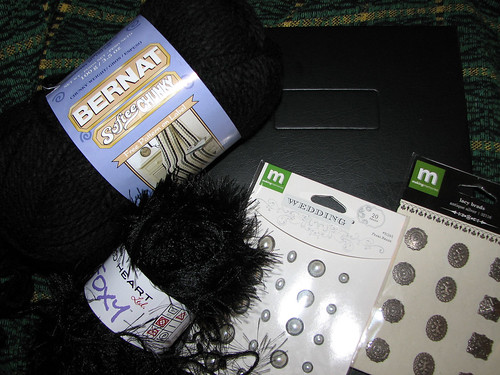
I decided to keep it quick and simple.  I stuck with black to match the book's cover and chose a bulky yarn for the body of the cover, which would work up quickly, and a faux fur yarn for contrast and a bit of silly fun.  I also picked up some brads meant for scrapbooking as extra embellishments.  At the time I chose them, I wasn't quite decided on if I'd use one or both styles.

In choosing yarn for the body of the cover, anything sturdy will do the job.  If you don't mind taking a bit longer, choose a thinner yarn for a less bulky cover.  I wouldn't recommend going thicker, though.  If you wanted to, an unusually textured yarn could be used, and no other embellishment would be needed.

The journal itself is plain and practical, found in the stationary section of a Walmart, with blank lined pages and stickers to mark them.  Any hard cover book you want to protect can be used.


cover-1

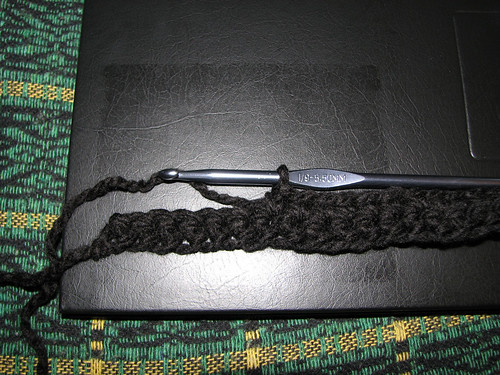
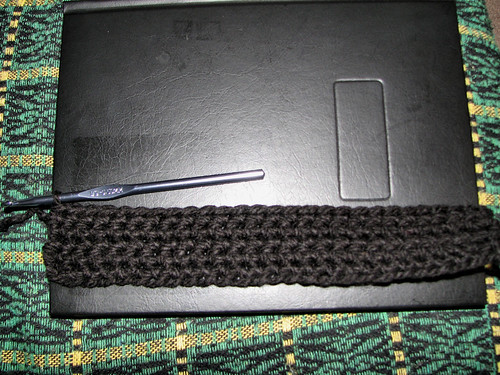
The first part worked is the inner flap, which will be used to form a pocket the book's cover will fit into.  I started out by making a single crochet foundation, rather than working stitches into a foundation chain.  Leave a fairly long tail of yarn for sewing with, later.  I didn't bother counting stitches, and just made it as long as the book's edge.  I then turned and worked sc into the sc foundation.  The sc foundation counts as the first row.

cover-2

I continued doing rows of sc until the flap portion was about 2-3 inches wide.  Depending on the size of the book, you might want to go wider.  This portion of the cover needs a bit more strength and stability, and since it won't be seen unless the book is opened, plain sc stitches do the job admirably.

cover-3

The next row will be the row that bends around the edge of the book.  For this, I changed to double crochet for its flexibility.  Unless your book has an unusually thick cover, one row of dc should be enough for any thickness of yarn.  If using crochet thread, I might do a treble stitch instead.

cover-4

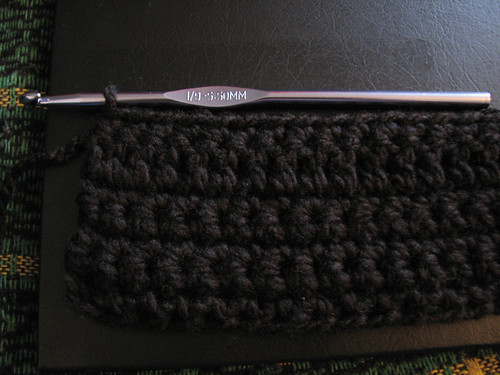
The first row after the folding dc row is done in sc.  Because I was planning to embellish the finished cover, I chose a stitch pattern that would be both plain and sturdy, yet still quite flexible.  I decided to alternate sc and dc rows.  If I'd wanted something sturdier, I would have gone with just sc.  If I weren't planning to embellish the cover further, I would have chosen a more decorative pattern, or used colour changes to add more interest.  Of course there's nothing wrong with a plain cover, either.

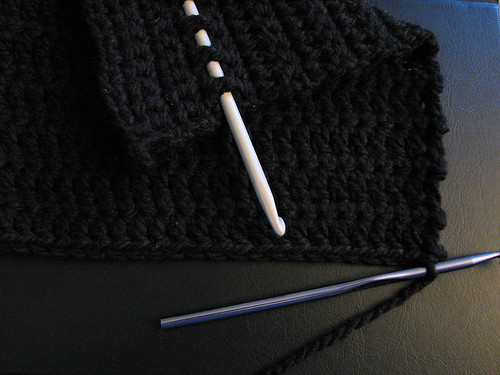
In this photo, the large hook is woven into the folding dc row to show where it is.

I worked the alternating sc and dc rows until the body of the cover was long enough to wrap around the book, measuring from the folding dc row and finishing on an sc row slightly short of the edge - I wanted the cover to stretch snugly over the book.  Then I worked another dc row for the fold around the edge, and finished with the same number of sc rows, including the sc foundation, as the first flap.

cover-5

Here I've placed the finished rectangle around the book, with the flaps tucked under the covers as they will be when closed up.

As you can see, the width of the cover doesn't match the width of the book itself.  The next step will be blocking the piece to the right size.

Wednesday, April 7, 2010

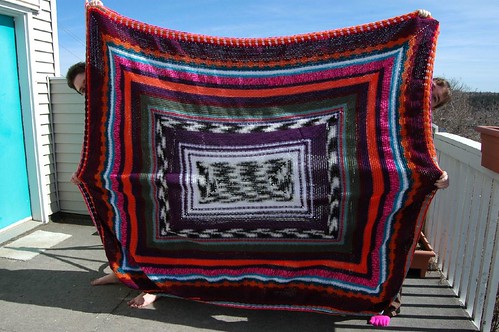
Finished: The Butt Ugly Scrap Buster Blanket!

After a great deal of time and a lot of help from my younger daughter, we've finished the Butt Ugly Scrap Buster blanket.

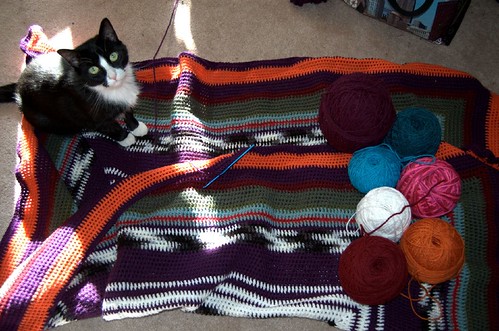
The blanket has two purposes.  1) Since getting the van, we're back to making spontaneous exploratory trips.  I discovered that this has left us with the need for a good, sturdy blanket to keep in the van.  One that can handle a lot of abuse, and that I realy don't care if it gets stepped on, muddy, or dragged through the bush.  And 2) I wanted something that would use up the balls and balls of cheap, bulk acrylic yarn we've got, but weren't using.  There's only so many pairs of slippers, etc. I can made, and the colours weren't the sort I'd use for amigurumi.


Butt Ugly Scrapbuster Blanket

I started off by gathering a few balls of the yarn we'd been accumulating (more were found later).  Since the purpose was to use up all the yarn, I decided to work in the round and just see how big it would eventually get.  I started the centre using a method I found on Ravelry, but I can't find it again, or I'd like directly to it.  I had a couple of false starts before settling on dimensions I liked.  The base chain is whatever you want.  The pattern I got started from suggested either 40 or 60 ch, but I ended up going with 38 (35, plus 3 to turn).  I wanted something slightly wider compared to the length, so I started with a shorter base chain.

To get the centre, dc were worked down the length of the foundation chain.  At the end, rather than turning, a sc plus ch 2 (counts as first dc), then 3 dc, was working into the end (the very last dc of the row).  ch 2 (corner), then dc along the other side of the foundation chain, working the stitches in between the dc of the other side, not into the chain itself.  At the end, ch 2 (corner), 4 dc into the last dc at the end, ch 2, then dc to the other end, again working in between the dc's of the previous row.  At the end, ch 2 and slip stitch into the top of the ch 2 that counts as the first dc of the round.

Each round is worked without turning.  The corners are all (2 dc, 2 ch, 2 dc).  I changed colours at the end of the rounds, though with some, I was so close to the end of a round when I finished, I just switched to a similar colour and finished it, rather than undoing the whole thing.  When changing colours, I usually finished off the previous colour, then restarted the new colour in a corner.


DSC_8965crop

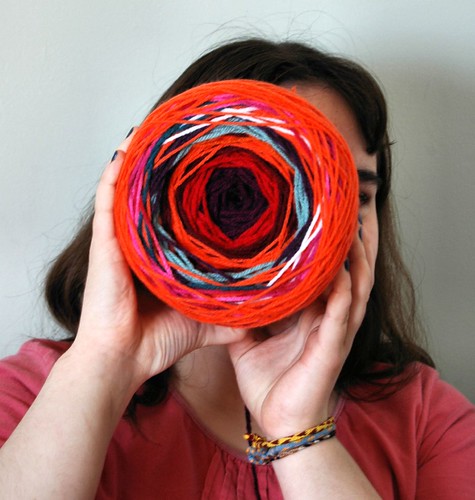
Changing colours at the ends of rounds left me with lots of little balls of yarn.  Especially as the blanket got better, since it took so much more yarn to complete a round.  When we got to the end of the last big ball of yarn, my younger daughter decided to just tie the end to one of the little balls, then started rolling them into a new centre pull ball, tying new colours to the end of each colour she finished.  In this project, we really didn't care if there were knots in the yarn.

We were rather surprised by how large a ball of little scraps we ended up with!

At this point, I decided to make a sort of edging.  Instead of working dc in between each dc of the previous row, I started doing shells of 5 dc, skipping 4 dc and working the shell into the space after the 5th dc.  The numbers didn't add up, so at the corners, I did a group of 3 in the last bit before the corner (which may or may not have been the 5th space), then 3 dc between the dc of the corner, (ch 2, 3 dc) in between the dc of the corner, a group of 3 dc into the space that matched the other side of the corner, then continued the shell pattern.  In the next rounds, I worked the shells into the top of each previous shell.

Much to my surprise, we had enough yarn to do several rounds of shells.

When the yarn started to look pretty low, I stopped going the shells and did a round of 1 sc into the top of each shell (the centre stitch I would have been doing  shell in), ch 4 to the corners.  At the corners, I did sc into the last 8 dc, plus (1 sc, 2 ch, 1 sc) in the corners.  When the round was finished, I worked sc into the back loops only of the sc and ch stitches.  At the end of this round, I didn't bother slip stitching at the end of the round, but just kept working into the back loops of the sc.  For the last foot or so, I let my younger daughter finish it off.  She was so thrilled! *L*


DSC_9010-50%

The finished blanket!  Isn't that just a marvelous piece of fugliness?  Truly eye-wrenching.  It's quite heavy, too.  I had no idea I had that much scrap acrylic lying about the house.  I raided my own storage cubes, my younger daughter handed over her stash from her room, and then I found even more in a couple of boxes tucked under the couch. *L* 

With a great many objections from my daughters, it is now in the van, waiting for the next time we head out exploring, or have an impromptu picnic somewhere.  And it's big enough for them to both wrap themselves up, the next time they decide to cross a river, fully dressed. :-D

Saturday, November 7, 2009

Bobble cap

bobble-cap

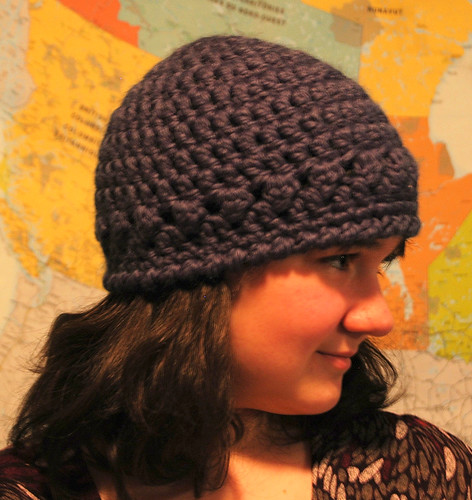
This was a simple and quick cap that I really enjoyed making. The yarn is Lion Brand Wool Ease Thick and Quick in Denim. I find I really like this yarn to work with.

All but the last round is done with a 9.00mm hook. The last round was done with a 10.00mm hook.

Bobbles are clusters of 3 double crochet together (dctog)

I've never written out a detailed pattern of anything I've done before, so if I've made any errors, please let me know.

1st round - 8dc in magic ring join with ss

2nd round - sc into same spot as ss and ch 2 (counts as 1 dc now and throughout). 1 dc into same spot. 2dc into top of next 7 stitches. ss into 2nd stitch of ch 2 (16 stitches)

3rd round - sc into same spot as ss and ch 2. 1 dc into same spot. 1 dc into next stitch. * 2 dc into next stitch, then 1 dc. Repeat from * to end. ss into second stitch of ch 2 (24 stitches)

4th round - sc into same spot as ss and ch 2. 1 dc into same spot. 1 dc into next 2 stitches. *2 dc, 1 dc, 1 dc into next 3 stitches. Repeat from * to end. ss into second stitch of ch 2 (32 stitches)

5th round - sc into same spot as ss and ch 2. 1 dc into same spot. 1 dc into next 3 stitches. * 2dc, 1 dc, 1dc, 1dc into next 4 stitches. Repeat from * to end. ss into second stitch of ch 2 (40 stitches)

6th round - sc into same spot as ss and ch 2. 1 dc into each stitch to end. ss into second stitch of ch 2 (40 stitches)

7th and 8th rounds - repeat round 6

9th round - sc into same spot as ss and chain 2. YOH, insert hook into same stitch, bring up loop, YOH, pull yarn through 2 loops (two loops remain), YOH, insert hook into same stitch, bring up loop, YOH, pull yarn through 2 loops, (3 loops remain), YOH, pull yarn through all loops. Cluster made: equals 3 dctog. *ch 1, skip 1 st, 3 dctog into second stitch. Repeat from * to end, finishing with a ss into top of first cluster (second stitch of ch 2). (20 clusters)

10th round - sc into same spot as ss and chain 2. 1 dc into ch 1 space. * 1 dc into top of cluster, 1 dc into ch 1 space. Repeat from * to end. ss into second stitch of ch 2. (40 stitches)

11th round - sc into same spot as ss and chain 1. 1 sc into each stitch to end. ss into ch 1 (40 stitches)

Switch to 10 mm hook
12th round - sc into same spot as ss and chain 1. Reverse single crochet into each stitch to end. ss into ch 1. Finish off with large tapestry needle

Finish off tail of magic ring by pulling it tight to close up the ring, then using a tapestry needle to weave the tail around the ring another time or two before snipping off.