Pages

Wednesday, December 8, 2010

2010 Christmas ornaments - Step-by-step

Every year, I try to make a new set of decorations for our Christmas tree, and to give away as gifts.  The goal is to shoot for some new craft or technique each time.  Last year, it was apple-cinnamon dough shapes.  They're hanging on our tree now, and still smell just as lovely, as do the sachets I made the year before. 

This year, I'm starting far later, but thankfully the project I chose this time is very quick to make up.  A crafter friend had shared the instructions, and this is my variation of the design.

First, go visit the site and check out the excellent step-by-step instructions that are already there.  I did things differently, but the wrapping instructions are unchanged.

Now, on to the materials.
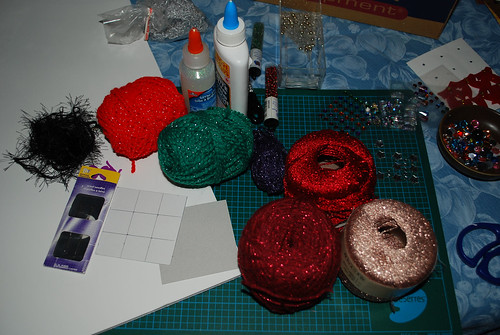
2010 Christmas Decorations

For my version, I decided not to use squares of cardboard glued together.  Instead, I found some foam core to use.  It's not something I normally buy, as I find the cost per sheet ridiculous, but I happened to catch a sale at Michaels and bought two sheets.  I've been using one of them as a backdrop for a lot of my craft photos now.  Very handy.

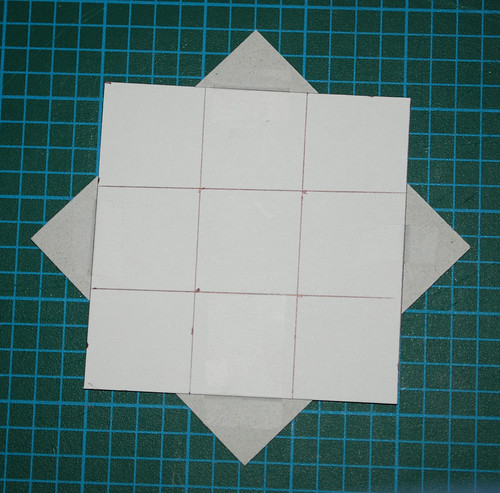
For the template, I cut two 3 inch squares out of some light cardboard I happened to have - they were from packages of 4x5 printer photo paper.  I also went through my yarn stash and dug up some Christmas yarns I used to make hats last year, with a silver metallic thread twisted in, some Patons Brilliant left over from the Ballet Neck Sweater I made for my mother, and some shimmery yarns I picked up here and there but never settled on a use for them, as well as whatever odd bits of yarn I thought might be interesting.  We ended up using yarns not pictured, but I'll get shots of all of them later.

Also on the materials list is scissors, an Xacto knife, sticker gems for scrapbooking, craft gems, white glue, glitter glue, beads and whatever else I found in my craft cupboard I thought might be useful.
2010 Christmas Decorations

To make the template, I marked a 1 inch grid on a square to have some guidelines, then taped the two together to make an eight pionted star.
2010 Christmas Decorations

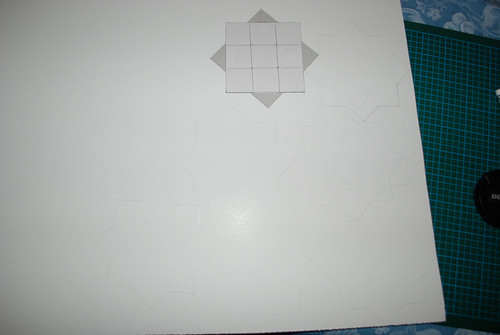
Then I began tracing the shape onto the foam core.  I placed them very close together, sometimes right up against each other because... well, I guess I just like making things difficult for myself. ;-)  I hate waste, and it seemed to me having too much space in between the stars would leave me throwing out far more pieces of foam core than I wanted.  If you're not particularly confident with using an Xacto knife - or just want to make life easier - I'd recommend spacing them out more.

2010 Christmas Decorations

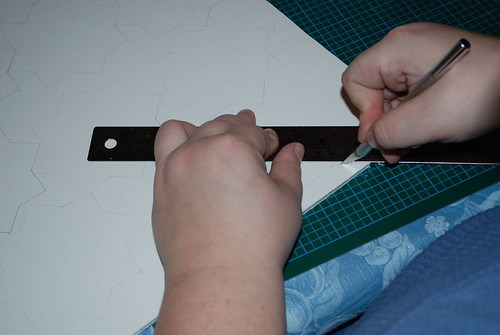
Then I borrowed my daughter's shorter metal ruler (mine's an 18 inch size; way too big for this job) and started cutting out the shapes.  Using my right hand.

I'm a lefty.

One thing about crafting is that I'm learning to use both my hands a lot more!  The sheet of foam core took up too much space to be able to twist it around as I cut, so I had to use both arms. As I worked farther up the side and the angles got harder to reach, I ended up roughly cutting out the shapes so that I could do the fine cutting without the rest of the sheet in the way.
2010 Christmas Decorations

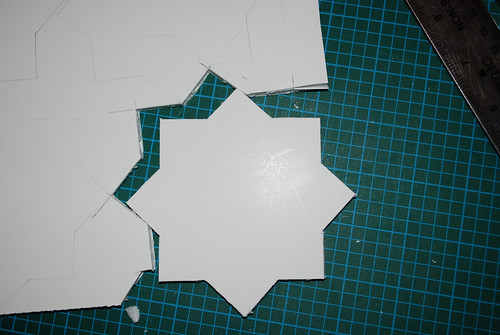
The first star shape.  Unfortunately, my blade was a bit dull, so the edges aren't as neat as I'd like, but with this pattern, as long as they're straight, it's okay.

I did end up having to go out and buy more blades, though, as I couldn't find my package of spares.  Ah, well.
2010 Christmas Decorations

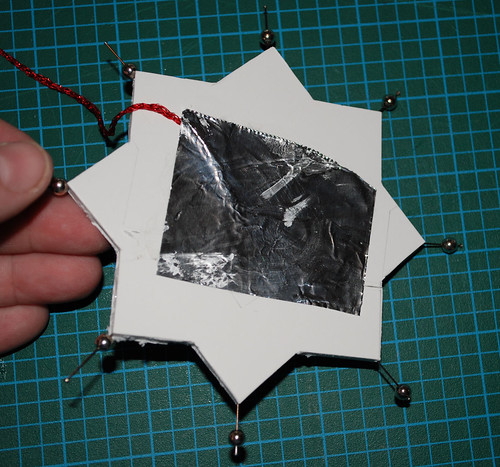
I refer you again to the detailed instructions leading up to this stage. 

For my first star, I decided to go with a sparkling yarn that was much thinner than the instructions recommended.  The end is glued in place under some regular kitchen foil (making sure to wipe off the glue that got onto the front, once I finished getting this shot), and I chose some silver beads to add to the pins on the points.  The beads are optional, but I prefer with over without.
2010 Christmas Decorations

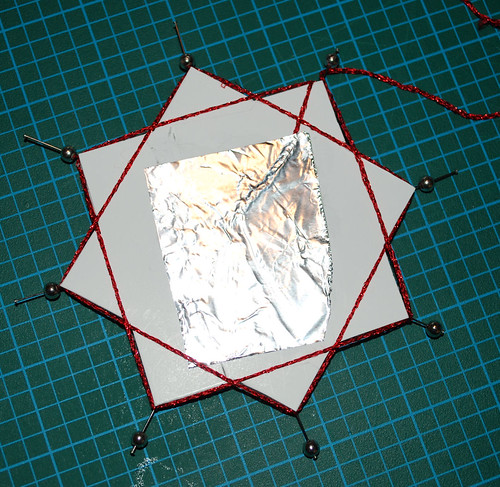
Following the wrapping instructions, this is the first round from the front.
2010 Christmas Decorations

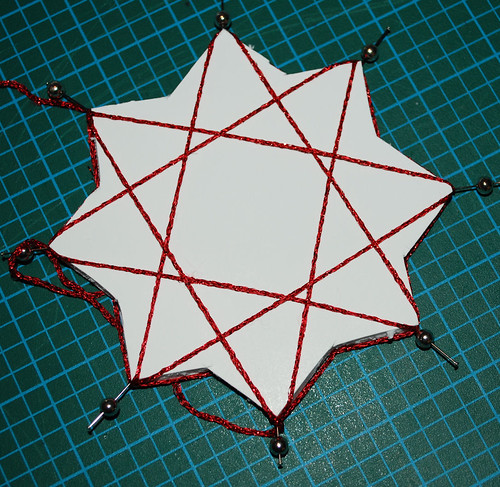
Here's the back view.

I kept wrapping, but after a while it became clear that my yarn choice was really too thin.  Too much white was showing in between the strands.  Unfortunately, I didn't think to get a photo to show the problem until after I'd undone it, so you'll have to take my word for it.  It kinda sucked.

2010 Christmas Decorations

I decided to simply add another yarn and just taped the end beside the first.  This yarn is some Bernat Shimmer left over from a skirt I crocheted from my daughter.  (Once I've added an elastic to the waste, I'll be doing a post on the skirt, too.)

2010 Christmas Decorations

The combination of yarns worked out much better.  As I went around, I loosely twisted the two strands around each other to keep them from separating while I worked.  Here's the front after two complete wraps.  By the time I started the second wrap, I pushed the pins and their beads snug against the points, rather than wait until the end.  I found they tended to get in the way as I wrapped.
2010 Christmas Decorations

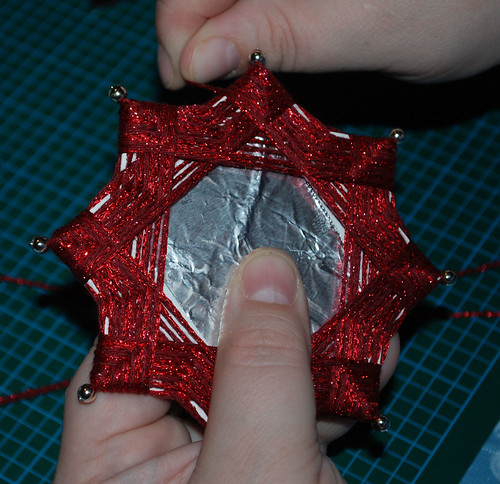
This is after about half a dozen wraps.  You can see how nicely the points are starting to form up, which wasn't happening when using just the thin yarn alone.  I was able to wrap these quite tightly, as the yarn had very little stretch to it.  The emerging pattern reminded me of temari quite a bit.
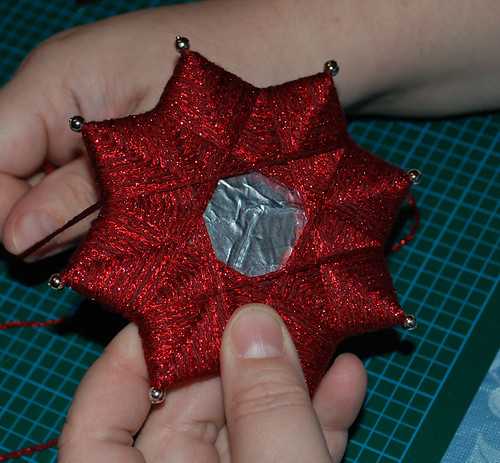

2010 Christmas Decorations

I kept on wrapping until the points were completely covered.  This is the very last wrap on the front.
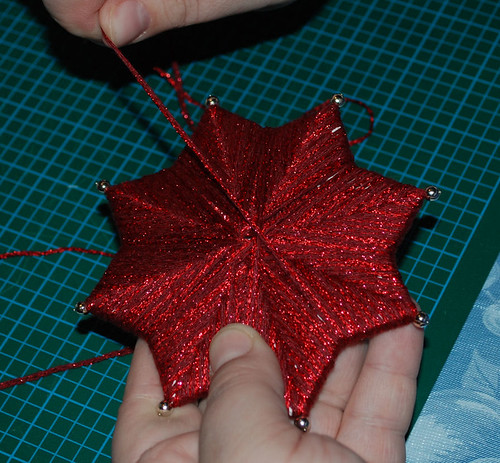
2010 Christmas Decorations

The back builds up fairly thick in the very centre.  This actually made it a lot easier to finish the yarn end.
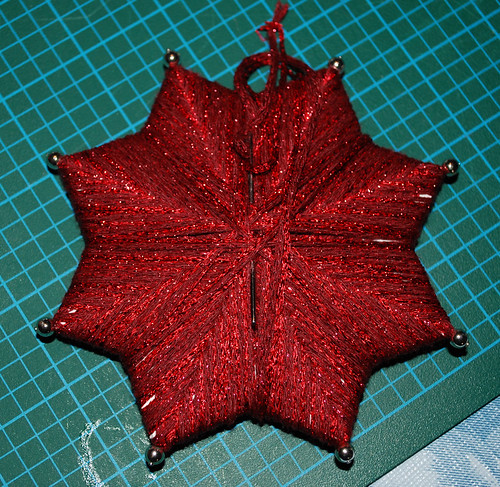
2010 Christmas Decorations

Using a tapestry needle, I sewed the end into the centre of the back, crossing the stitches a few times...
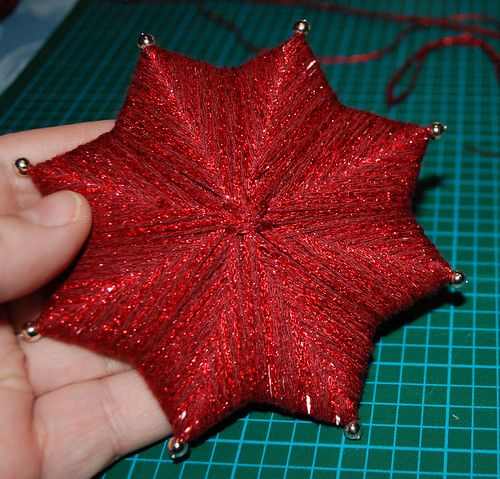
2010 Christmas Decorations

So that it would look nice and neat, like this.

The hanger was stitched into the back last for this one, but with the ones I planned to use glue on, I added the loop at this point. 
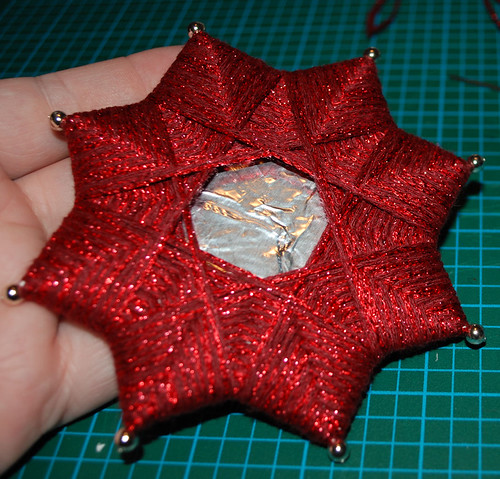
2010 Christmas Decorations

The front, ready and waiting for some final touches.
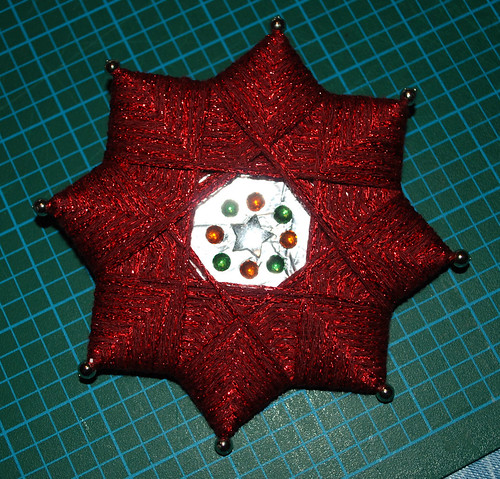
2010 Christmas Decorations

For this one, I used just some adhesive scrapbooking gems.  At this point, the ornament is complete, except for the hanger.
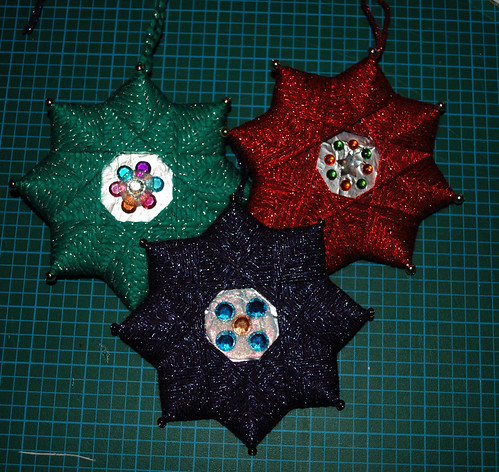
2010 Christmas Decorations

Here are the first three completed ornaments.  For the green and purple, I used some glitter glue, which is still wet in this photo, to place the gems.

After these were done I headed out to get my new blades so I could cut out more shapes without tearing the edges too badly.  Since then, one of my daughters and I made six more, most using novelty yarns, and using decorative papers in the centres as well as foil.  Once the shapes are cut, these are remarkably quick to make.  It's almost addictive!  When we're done, I post more photos.  I'm very pleased with the results.

Friday, November 19, 2010

Caps for Good Campaign

Winter cold had dropped on us rather suddenly of late - no gradual change this year!  For many of us, it's time to grudgingly dig out the winter wear and bundle up before heading out into the biting winds.

Some, however, are far less fortunate.  For one reason or another, they are facing the bite of winter's teeth inadequately prepared for the cold.  As crafters, one way we can help is to make warm winter wear to donate, and for the non-crafty, materials can be donated for others to work up.

For those in the US, the Warm Up America Foundation is running their Caps for Good Campaign.  For those who knit or crochet, free cap patterns are at their site with an address to send them to.  The Campaign runs from November through February. 

Charity Crafts has links to other organizations crafters can donate to for various causes.

Here is a directory of other charities that accept knit and crochet donations, along with The Craft Directory.

Don't forget to look into local charities, shelters and hospitals.  Some people even like to make up items and leave them in public places (tied to a tree branch, for example) with a note attached explaining that they are gifts for anyone. 

Share some warmth. :-)

Thursday, November 18, 2010

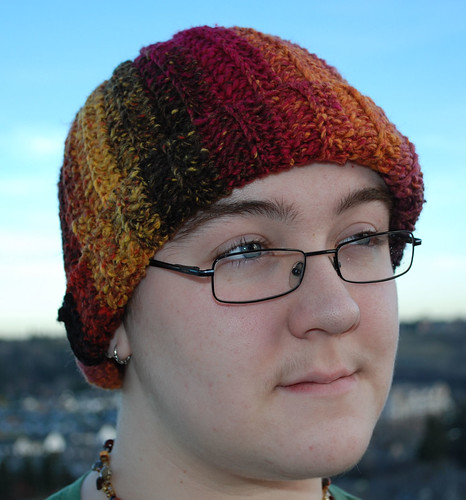
Mosaic Skully

One more post for today!

I had a second ball of Mosaic left and decided to see how it looked without any cables in it.  I decided to do a version of the Skully toque.

DSC_6884crop50%

The toque is worked vertially, and made long enough to fold back when worn.  Which, as always, leaves the earlobes uncovered.  :-P

DSC_6885crop50%

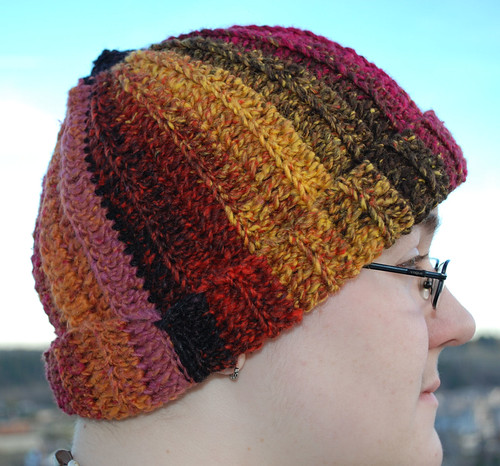
The side view shows the colour transitions quite well.  The closing seam is also shown, where the pink and the brown meet.

DSC_6886crop50%

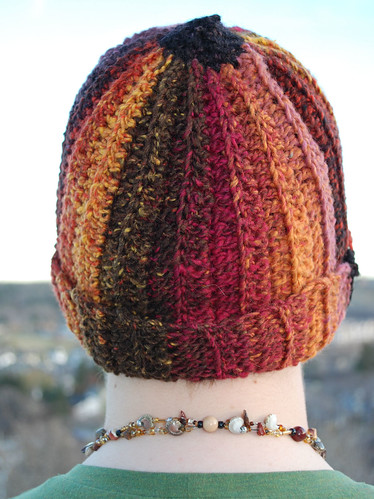
After I slip stitched the seam together, the opening at the top was closed up with single crochet.

This hat took quite a bit less than one ball of yarn.  I had enough left over to make a flower for my daughter's hat and still have a bit left over. 

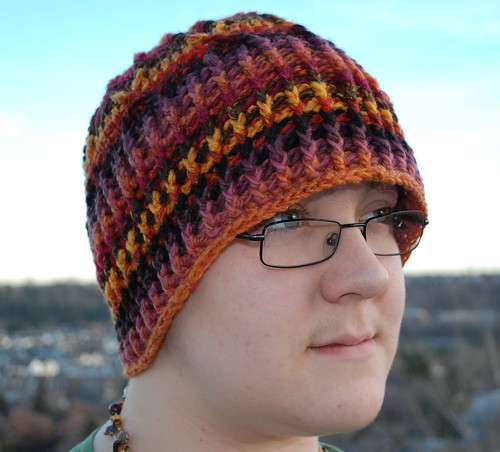
Crossed Cables Mosaic Hat

I saw a display of some Bernat Mosaic yarn and instantly fell in love with the colours.  I limited myself to only one colourway, though, and bought two balls in Medusa.  Like most Bernat yarns, the prices was quite reasonable.  It's an easy care, machine washable and dryable acrylic that has a lovely, soft feel to it. 

DSC_6887crop50%

I made the hat a touch long, though not quite long enough to have to turn back at the forehead.  I was more concerned about covering the ears.

DSC_6888crop50%

Once again, this hat is a modification of my basic flat topped, straight sided hat, which I've found works well for all the yarn types and hook sizes I've experimented with.  I worked the crossed cables starting in the first side rounds without increases.

DSC_6890-50%

I love, love, LOVE the colour transitions in this yarn.  This hat took up one ball of yarn using a 6.00mm hook.

I would definitely recommend this yarn.  The price is quite good for a self patterning yarn - I paid under $6 a ball, and it has a wonderful feel to it.  The easy care is always a bonus, too - just the sort of thing for wearables that will see a lot of use.  I look forward to experimenting with yarn some more in other colourways!  I can just see this being used in a nice shrug or sweater.

Cabled Earwarmer Hat

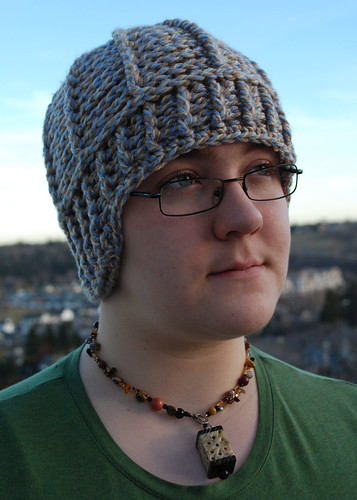
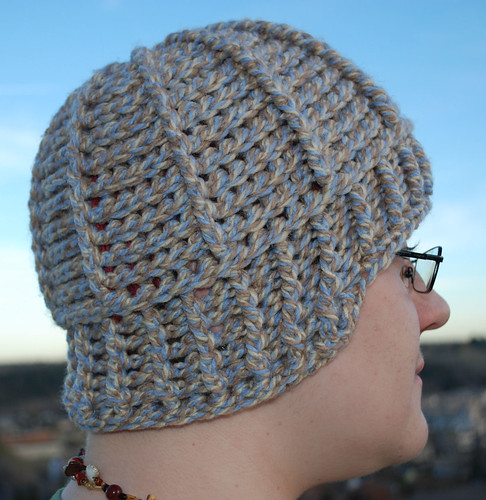
I've been making a few more hats in between working on a new version of my scoodie design.  Here's a variation of a basic hat using front and back post stitches, finishing with an earwarming modification at the bottom.

DSC_6881crop50%

One of my frustrations with longer hats is that it's hard to keep the ears covered when it's folded up to uncover the eyes.  Here I've finished the front of the hat quite low on the forehead, but not so low as to obstruct the vision.

DSC_6883crop50%

Then I continued the ribbed pattern (alternating front and back post stitches) for slightly more than half the circumferance of the hat, reducing each row by one on each end for a bit of a curve.  I finished with a round of single crochet to tidy up the edges, without any increases when working around the turn, so that the earwarmer portion cups the ears every so slightly.

DSC_6882crop50%

I originally intended to make this into a beret or tam, but didn't like how it was turning out, so I ripped it and went with my basic hat pattern (flat disc top, straight sides) starting with 10 hdc worked into a ring, then working in front and back post double crochet to get this pattern.  When it came time to switch to the ribbed brim, I did the first round in back post half double crochet only, then did the rest in alternating front and back post dc.  The yarn is a Bernat Chunky (2 balls) and I used a 9.00mm hook.

The resulting hat has a lot of stretch to it, and the earwarmer portion really does the job.  The only down side is that the hook size and pattern that gives it such comfort and stretch also makes it less than ideal in higher winds.  Great for cooler weather, but I wouldn't wear it in a blizzard. ;-)

Sunday, November 14, 2010

A Gift

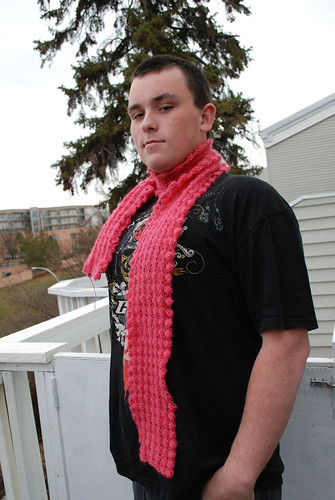
A friend staying with us right now saw some yarn in our stash and asked my younger daughter if she could make a scarf for him with it.  It took a while - we got the yarn from an exchange, so I don't know what it is, but it's thin and fuzzy, which made it more challanging to work with.  It's done now, though, and he happily consented to model it for me.

A gift.

She modified the pattern she used (you may need to sign up at the site to see it) to make herself a blanket for this, and used her favorite wooden crochet hook.  The finished scarf if very light and fluffy, and quite warm. 

Friday, November 12, 2010

Friday Feature: Finger Weaving and the Metis sash

Manitoba, the province I grew up in, is rich in Metis history.  Understandable, since the Metis are why the province came into being.  Many Metis are exceptional artists in beadwork and embroidery, and one of the most distinctive and recognisable symbols of their culture is the Metis sash.  The patterns and colours woven into the sash have come to represent various meanings and different groups within the Metis community.

The original sashes were very long, wide and woven by hand.  Eventually loom woven versions, which were faster to make and cost less, became common.  We have several loom woven sashes ourselves, purchased at Winnipeg's Folklorama and made by local loom weavers.  I won't picture them here, since it's finger weaving, not loom weaving, I'll cover today.

There are still some who weave the sashes by hand, and smaller items can be woven using the same techniques - many friendship bracelet designs are good examples of finger weaving.  Few materials or special equipment is needed. 

For basic finger weaving instructions, here's a good video to start with.


More advanced techniques can be watched at the Metis Museum site as well as this video.


Here are a few other good instructional sites.

Native Tech: Instructions for Finger Weavng Belts

Finger Weaving a Sash

Metis Finger Weaving (pdf)

My own attempts at finger weaving bracelets for my kids have given me a huge appreciation for the skill and patience of those who make the full sized sashes!