Pages

Saturday, December 18, 2010

Baking time! Tourtierre, step by step

It's that time of year again!  The weekend we dedicate to making our Christmas tourtierre.  This year, I ordered a total of 24 pounds of ground meats which should get us about 20 pies, the way we fill them. ;-)

2010 Christmas Tourtierre

I give the butcher shop a week to fill our meats order.  The last of it was ground shortly before I picked it up, but the rest was frozen as they slowly filled my order.  They don't normally carry some of what I ask for.

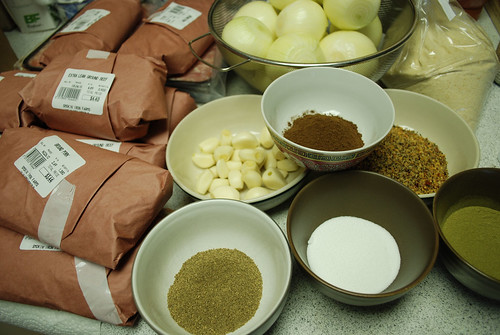
Though our own recipe is a family variation, this is the basic recipe we use.  The quantities are for one pie, but the ingredients in the photo are x24, except that only about half of the meat is in the photo.  Also, our mix includes some spices different from the recipe.

Mdm Benoit's Quebec Tourtierre

1 pound minced pork
1 small onion, chopped
1 small clove garlic, minced
1/2 tsp salt
1/2 tsp savory
1/4 tsp celery pepper (I use just celery seed)
1/4 tsp ground cloves
1/2 cup water
1/4 - 1/2 cup bread crumbs

2010 Christmas Tourtierre

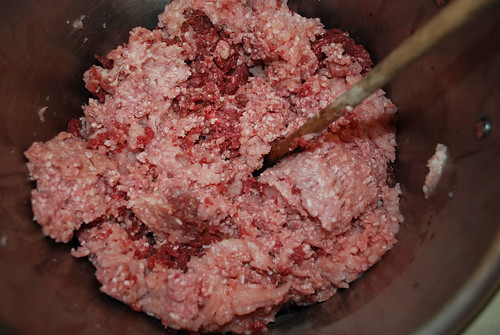
All the meats are dumped into our giant stock pot.

2010 Christmas Tourtierre

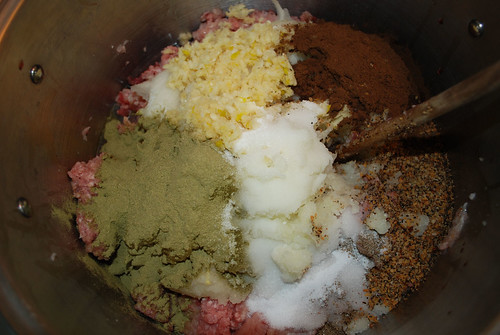
Then everything but the bread crumbs are added and stirred in.  For one pie, you would bring it to a boil over medium heat and cook for 20 minutes, stirring frequently to break up lumps of meat.  It takes a fair bit longer with this much meat!  (Note: while most of the ingredients are increased by the same amount, I use far less water; perhaps a quarter the amount it would be if I used the same math as for the rest.)

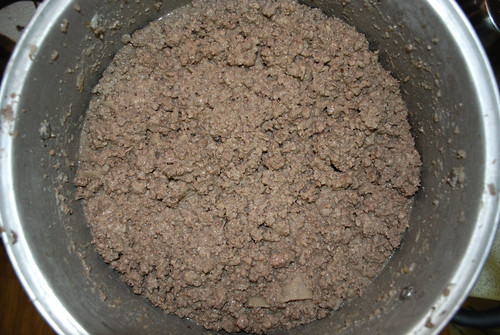
Once the meat is cooked, take it off the heat and stir in part of the breadcrumbs.  Let it sit for 10 minutes, then check to see if the liquid is absorbed.  If not, do it again every 10 minutes until the liquid is absorbed.


It should look like this.

2010 Christmas Tourtierre

evening update: corrected photo

At this point, the filling is allowed to cool, then baked in a double crust pie.  For this much, we let the filling cool for a few hours, then stick it outside overnight.  It doesn't freeze completely in that time, which works rather well when it comes time to fill the pies.

When we didn't have someplace safe outdoors to put the pot, the trunk of a car works rather well.  Of course, if you live somewhere that doesn't get very cold at night, you'll have to find space in a fridge or freezer!

Tomorrow, we make the dough and assemble the pies.  Hopefully, we won't run very late and I'll be able to post photos at the end of the day.  If not, I'll have them up on Monday.

Oh, man, the house smells good!

Saturday, December 11, 2010

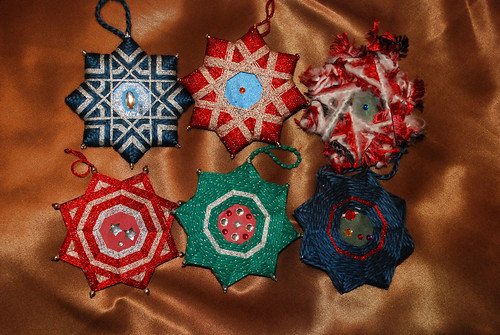
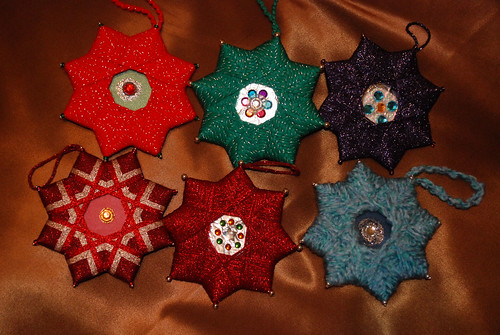
2010 Christmas decorations - fifth (and last!) batch

We've got some different ones in here. :-)

2010 Christmas decorations - finished.

Top left: made by me

Beads: clear transparent beads with silver centres topped with clear transparent seed beads with silver centres

Wrap: alternating blue Bernat Alpaca yarn with silver metallic crochet thread

Centre: blue "gem" card stock, self adhesive gem, silver glitter glue


Top centre: made by my younger daughter

Beads: transparent gold beads with silver centres topped with clear seed beads with silver centres

Wrap: first, Bernat Shimmer metallic yarn, then red metallic crochet thread, then gold metallic crochet thread

Centre: blue "gem" card stock and a self adhesive gem


Top right: made by my younger daughter

Beads: transparent green seed beads with silver centres

Wrap: red and black eyelash yarn and white novelty yarn together

Centre: green "gem" card stock with a self adhesive gem


The three bottom stars have reversed the wrapping pattern.  Instead of starting at the points and working towards the middle, the first wraps start inside the V's and work outwards.  They are still wrapped the same way.  Oh, I just realized I should have taken photos of the backs, which look so nice (except for the loose bits of yarn ends from changing colours) that I seriously considered cutting out more stars and making them backwards!

On the plus side, I like that the strands on the inside are flush to the surface; something I found a bit annoying while wrapping in the original way.  Starting from the centre made it a lot easier to work with very thin strands, too. On the down side, the very last wraps, at the points, are more of a challenge to place without them sliding off and I highly recommend dabbing glue onto the points to prevent loosing them entirely.

Bottom left: made by me.

Beads: silver metallic rounds topped with clear seed beads with silver centres.  After the wrapping was done, each pin had a dab of gold glitter glue added.

Wrap:  starting at the centre, silver metallic crochet thread, red metallic crochet thread, gold metallic crochet thread, red metallic crochet thread

Centre: red "gem" card stock, self adhesive gems


Bottom centre: made by me

Beads: semi transparent green beads with silver centres topped with clear seed beads with silver centres.  When finished, a dab of silver glitter glue was added to each point.

Wrap: starting from the centre, green acrylic yarn with a silver metallic strand, silver crochet thread, then back to the green

Centre: gold "gem" card stock, red self adhesive gems, a self adhesive silver bead in the centre, plus silver craft gems affixed with silver glitter glue


Bottom right: made by my younger daughter

Beads: none  Dabs of clear drying white glue were added to the points when the piece was complete

Wrap: blue Bernat Alpaca and red metallic crochet thread

Centre:  green "gem" card stock.  My daughter accidentally cut the piece too small and it turned out to be a bit off centre, showing the white foam core in one section.  Using a combination of self adhesive gems and gems affixed with glitter glue, she was able to cover the mistake and turn it into a design element. 


That's the last of them!  These were really fun and satisfying to make.  I would happily make dozens more!

Now to decide: which to keep and which to give as gifts!

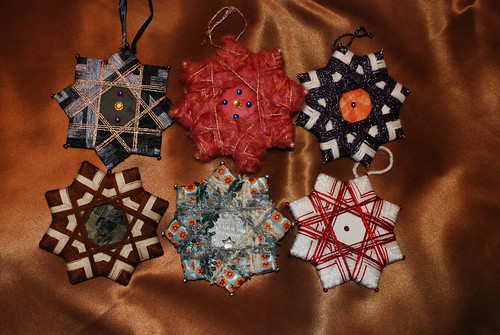
2010 Christmas decorations - fourth batch

These were made by both my daughters

2010 Christmas decorations - finished.

Top left: made by my older daughter

Beads: amethyst

Wrap: variegated ribbon, gold metallic crochet thread

Centre: black card stock; centre is a craft gem affixed with gold glitter glue, the others are self adhesive gems


Top centre: made by my younger daughter

Beads: pearls

Wrap: novelty yarn and gold metallic crochet thread used together

Centre: red "gem" card stock, blue self adhesive gems, gold gem affixed with gold glitter glue


Top right: made by my younger daughter

Beads: transparent gold beads with silver centres, topped with clear seed beads with silver centres

Wrap: alternating Patons Brilliant metallic yarn with Bernat Glow in the Dark yarn

Centre: scrapbooking paper and a self adhesive gem


Bottom left: made by my older daughter

Beads: none

Wrap:  brown and cream crochet thread - wrapping with such thin thread was a major challenge!

Centre: black card stock with two different patterns of scrapbooking paper coated with clear drying white glue


Bottom centre: made by my older daughter

Beads: silver metallic

Wrap: decorative ribbon, textured novelty yarn

Centre: scrapbooking paper, self adhesive gem, silver glitter glue "icicles"


Bottom right: made by my older daughter

Beads: transparent red seed beads with silver metallic centres

Wrap: plain white acrylic yarn, then red metallic crochet thread

Centre: plain foam core with a self adhesive gem

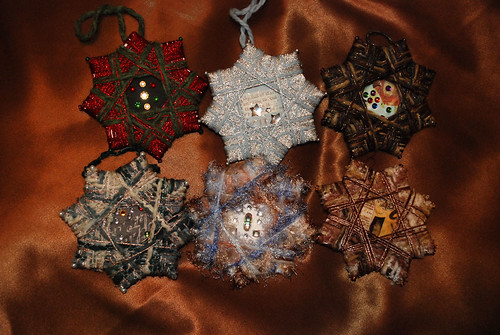
2010 Christmas decorations - third batch

This next batch were all made by my older daughter.

2010 Christmas decorations - finished.

Top left:

Beads: alternating red and green seed beads

Wrap: Red is Bernat Shimmer and red metallic crochet thread together, green is a textured yarn from my daughter's craft stash

Centre: black card stock with a mix of self adhesive gems and craft gems affixed with gold craft glue


Top centre:

Beads: silver metallic rounds

Wrap: silver metallic crochet thread alternating with pale blue yarn of unknown origin

Centre: scrapbooking paper, self adhesive scrapbooking gems and dots of silver glitter glue


Top right:

Beads: amethyst beads

Wrap: variegated and textured metallic yarn

Centre: scrapbooking paper with self adhesive gems


Bottom left:

Beads: faux pearls

Wrap: variegated yarn from my daughter's craft stash together with gold metallic crochet thread

Centre: scrapbooking paper with self adhesive gems


Bottom centre:

Beads: silver metallic rounds

Wrap: variegated novelty yarn of unknown origin

Centre: plain foam core with self adhesive gems


Bottom right:

Beads: gold transparent beads with silver centres

Wrap: variagated and textured craft yarn followed by plain brown crochet thread and gold metallic crochet thread together.

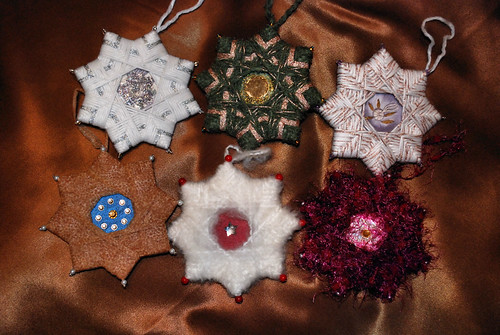
2010 Christmas decorations - second batch

2010 Christmas decorations - finished.

Top left:

Beads: clear beads with silver centres topped with clear seed beads, also with silver centres

Wrap: Bernat Glow in the Dark yarn in white, silver metallic crochet thread, then back to the glow yarn

Centre: A floral image cut from some scrapbooking paper in shades of purple, topped with silver glitter glue.  It's still wet as this photo was taken, which is why the flower is not all that visible.


Top centre:

Beads: clear gold beads with silver metallic centres topped with green seed beads with silver metallic centres

Wrap: Textured green yarn from my older daughter's craft stash, gold metallic crochet thread, then both twisted together.

Centre: green "gem" card stock paper and a gold sequin affixed with gold glitter glue


Top right:

Beads: amethyst coloured semi-transparent beads topped with clear seeds beads with silver centres

Wrap: Bernat Glow in the Dark yarn and gold metallic crochet thread twisted together

Centre: Large flower from some scrapbooking paper with the stamens "painted" with gold glitter glue


Bottom left:

Beads: faux pearls topped with the same seed beads as above

Wrap: animal print ribbon yarn a friend gave to me a few years back

Centre: blue "gem" card stock, gold craft gem affixed with gold glitter glue, silver craft gems affixed with silver glitter glue


Bottom centre:

Beads: red faux coral beads

Wrap: novelty yarn of unknown origin

Centre: red "gem" card stock, self adhesive scrapbooking gem


Bottom right:

Beads: silver metallic round beads

Wrap: novelty yarn of unknown origin

Centre: foil base with gold self adhesive scrapbooking gem

2010 Christmas decorations - first batch

The last of this year's Christmas decorations are now done!  I did the last one today while showing my daughter's friend how to make them, and he'll be doing a total of three as gifts, so I won't be taking photos of those.

Our total this year is 30 decorations, which I think is a record.  We may have done more with our cinnamon dough decorations, but a number of them were quite tiny, whereas these are all the same size.  I took photos of them in groups of six and will be doing a post with details of each group - just to warn you that there's going to be 5 more posts after this one! LOL

Here's the first batch.

2010 Christmas decorations - finished.

There of these were already photographed in the step-by-step post on how these were made. Starting on the top left, I've got:

Beads: green semi-opaque beads with silver centres.  The holes were too large, and the pin heads (I used shorter pins) would go right through some of them, so I added seed beads onto the pin first.  In this case, clear beads with silver centres.

Wrap: Leftover Christmas yarn from last year; acrylic with a strand of silver metallic.

Centre: green "gem" card stock and a single craft gem affixed with gold glitter glue.


Top middle:

Beads: silver faux metal round beads.  I happened to use longer pins for this one, which had a wider head, so I didn't need to use seed beads to prevent them from sliding through.

Wrap: same type of yarn as the red one previously described.

Centre: foil base with teardrop shaped self-adhesive scrabooking gems with the points turned inward, topped with a craft gem affixed with "opal" glitter glue.

Top right:

Beads: semi-transparent amethyst coloured seed beads

Wrap: Patons Brilliant yarn in Plum

Centre: foil base with craft gems affixed with "opal" glitter glue.


Bottom left:

Beads: Semi-transparent red beads with silver centres, topped with clear seed beads with silver centres

Wrap: Started with Bernat Shimmer metallic yarn, then gold metallic crochet thread (Sunset by Phildar, if I remember correctly), ending with red metallic crochet thread

Centre: red "gem" card stock with a gold craft gem affixed with gold glitter glue


Bottom centre:

Beads: same silver beads as the green one above

Wrap: Bernat Shimmer and red metallic crochet thread together

Centre: foil base with self adhesive gems


Bottom right:

Beads: the same silver beads as above, however I was using short pins by this type, so I had to top them with seed beads (clear, silver centres) so they wouldn't pull through the holes. 

Wrap: unknown novelty yarn; I can't even remember if it's left over from something I bought myself, or if I got it through an exchange, the Reuse Centre or Goodwill! *L*

Centre: dark blue "gem" card stock with silver craft gem affixed with silver glitter glue.

Wednesday, December 8, 2010

2010 Christmas ornaments - Step-by-step

Every year, I try to make a new set of decorations for our Christmas tree, and to give away as gifts.  The goal is to shoot for some new craft or technique each time.  Last year, it was apple-cinnamon dough shapes.  They're hanging on our tree now, and still smell just as lovely, as do the sachets I made the year before. 

This year, I'm starting far later, but thankfully the project I chose this time is very quick to make up.  A crafter friend had shared the instructions, and this is my variation of the design.

First, go visit the site and check out the excellent step-by-step instructions that are already there.  I did things differently, but the wrapping instructions are unchanged.

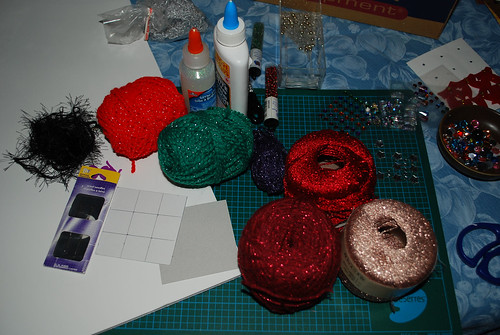
Now, on to the materials.
2010 Christmas Decorations

For my version, I decided not to use squares of cardboard glued together.  Instead, I found some foam core to use.  It's not something I normally buy, as I find the cost per sheet ridiculous, but I happened to catch a sale at Michaels and bought two sheets.  I've been using one of them as a backdrop for a lot of my craft photos now.  Very handy.

For the template, I cut two 3 inch squares out of some light cardboard I happened to have - they were from packages of 4x5 printer photo paper.  I also went through my yarn stash and dug up some Christmas yarns I used to make hats last year, with a silver metallic thread twisted in, some Patons Brilliant left over from the Ballet Neck Sweater I made for my mother, and some shimmery yarns I picked up here and there but never settled on a use for them, as well as whatever odd bits of yarn I thought might be interesting.  We ended up using yarns not pictured, but I'll get shots of all of them later.

Also on the materials list is scissors, an Xacto knife, sticker gems for scrapbooking, craft gems, white glue, glitter glue, beads and whatever else I found in my craft cupboard I thought might be useful.
2010 Christmas Decorations

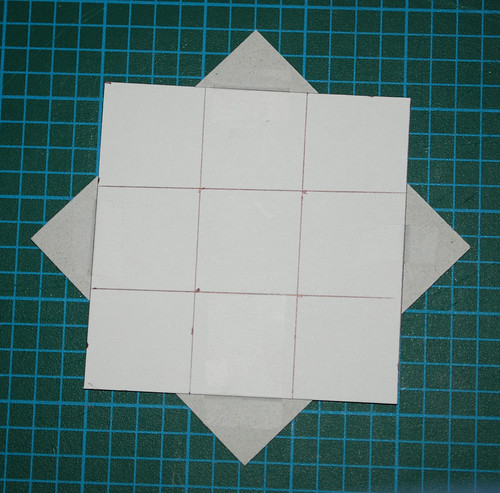
To make the template, I marked a 1 inch grid on a square to have some guidelines, then taped the two together to make an eight pionted star.
2010 Christmas Decorations

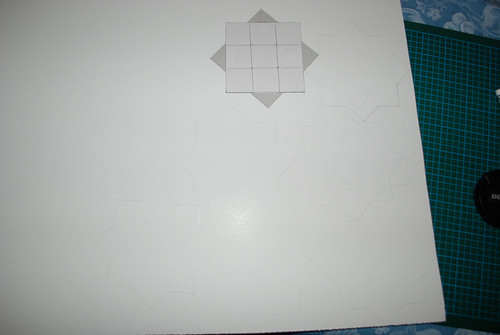
Then I began tracing the shape onto the foam core.  I placed them very close together, sometimes right up against each other because... well, I guess I just like making things difficult for myself. ;-)  I hate waste, and it seemed to me having too much space in between the stars would leave me throwing out far more pieces of foam core than I wanted.  If you're not particularly confident with using an Xacto knife - or just want to make life easier - I'd recommend spacing them out more.
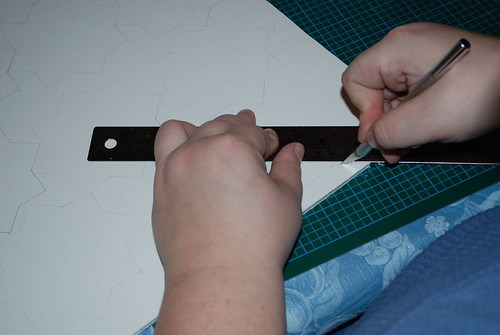

2010 Christmas Decorations

Then I borrowed my daughter's shorter metal ruler (mine's an 18 inch size; way too big for this job) and started cutting out the shapes.  Using my right hand.

I'm a lefty.

One thing about crafting is that I'm learning to use both my hands a lot more!  The sheet of foam core took up too much space to be able to twist it around as I cut, so I had to use both arms. As I worked farther up the side and the angles got harder to reach, I ended up roughly cutting out the shapes so that I could do the fine cutting without the rest of the sheet in the way.
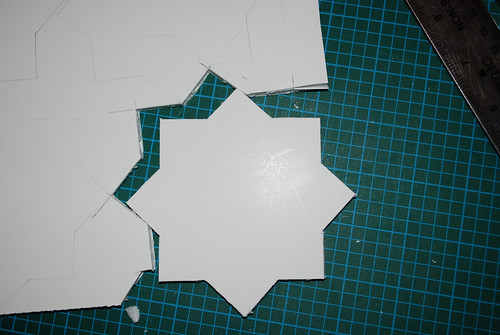
2010 Christmas Decorations

The first star shape.  Unfortunately, my blade was a bit dull, so the edges aren't as neat as I'd like, but with this pattern, as long as they're straight, it's okay.

I did end up having to go out and buy more blades, though, as I couldn't find my package of spares.  Ah, well.
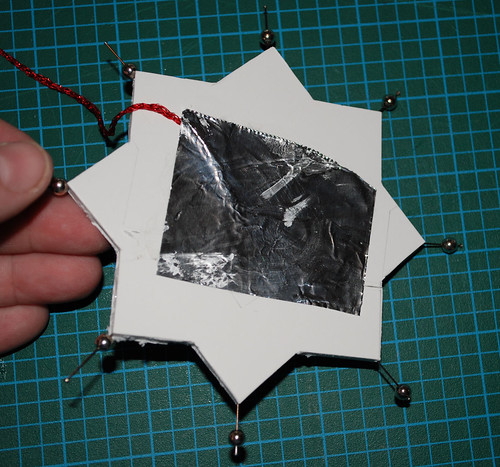
2010 Christmas Decorations

I refer you again to the detailed instructions leading up to this stage. 

For my first star, I decided to go with a sparkling yarn that was much thinner than the instructions recommended.  The end is glued in place under some regular kitchen foil (making sure to wipe off the glue that got onto the front, once I finished getting this shot), and I chose some silver beads to add to the pins on the points.  The beads are optional, but I prefer with over without.
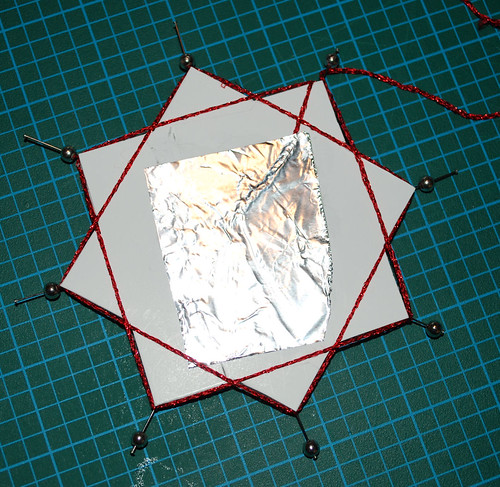
2010 Christmas Decorations

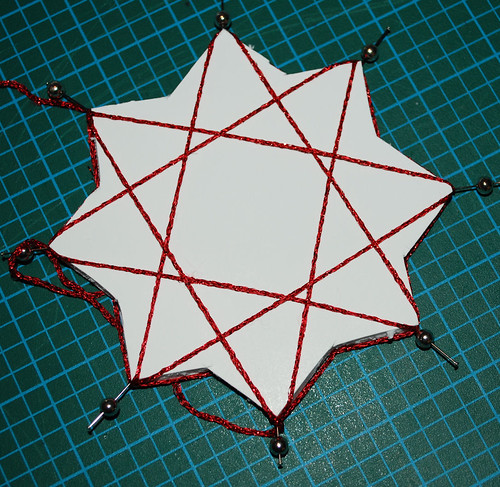
Following the wrapping instructions, this is the first round from the front.
2010 Christmas Decorations

Here's the back view.

I kept wrapping, but after a while it became clear that my yarn choice was really too thin.  Too much white was showing in between the strands.  Unfortunately, I didn't think to get a photo to show the problem until after I'd undone it, so you'll have to take my word for it.  It kinda sucked.

2010 Christmas Decorations

I decided to simply add another yarn and just taped the end beside the first.  This yarn is some Bernat Shimmer left over from a skirt I crocheted from my daughter.  (Once I've added an elastic to the waste, I'll be doing a post on the skirt, too.)

2010 Christmas Decorations

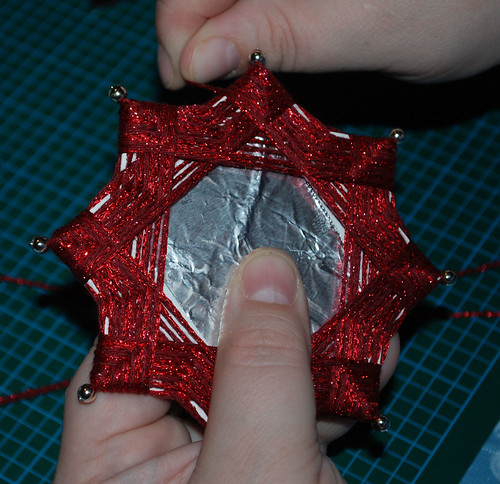
The combination of yarns worked out much better.  As I went around, I loosely twisted the two strands around each other to keep them from separating while I worked.  Here's the front after two complete wraps.  By the time I started the second wrap, I pushed the pins and their beads snug against the points, rather than wait until the end.  I found they tended to get in the way as I wrapped.
2010 Christmas Decorations

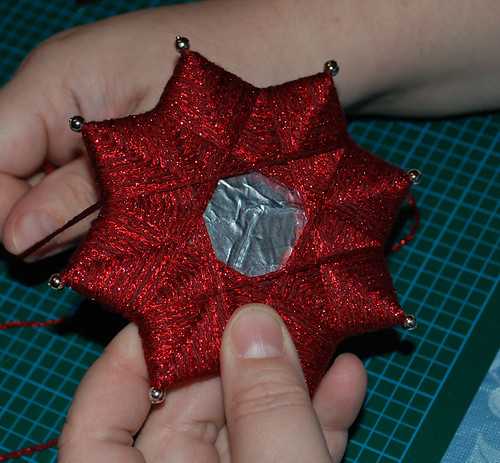
This is after about half a dozen wraps.  You can see how nicely the points are starting to form up, which wasn't happening when using just the thin yarn alone.  I was able to wrap these quite tightly, as the yarn had very little stretch to it.  The emerging pattern reminded me of temari quite a bit.

2010 Christmas Decorations

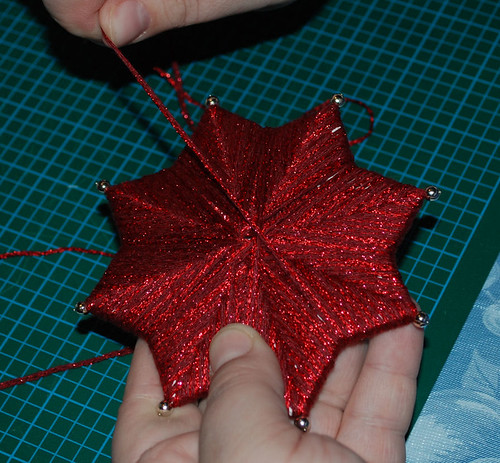
I kept on wrapping until the points were completely covered.  This is the very last wrap on the front.
2010 Christmas Decorations

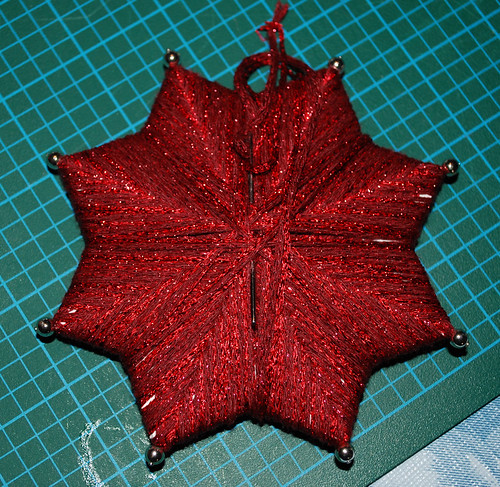
The back builds up fairly thick in the very centre.  This actually made it a lot easier to finish the yarn end.
2010 Christmas Decorations

Using a tapestry needle, I sewed the end into the centre of the back, crossing the stitches a few times...
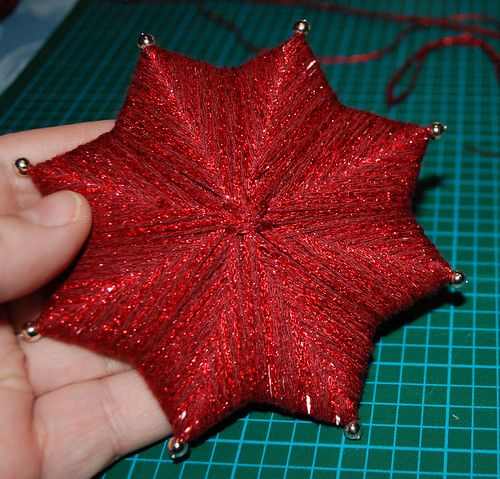
2010 Christmas Decorations

So that it would look nice and neat, like this.

The hanger was stitched into the back last for this one, but with the ones I planned to use glue on, I added the loop at this point. 
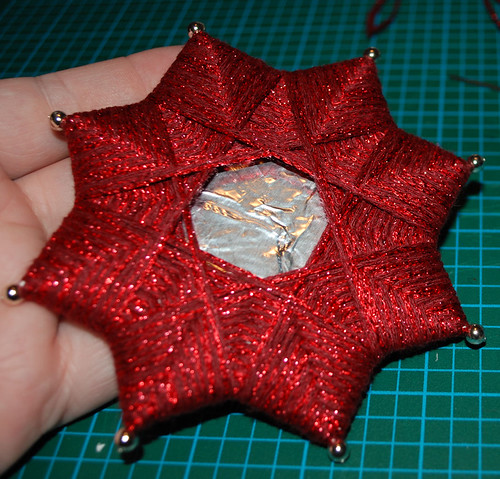
2010 Christmas Decorations

The front, ready and waiting for some final touches.
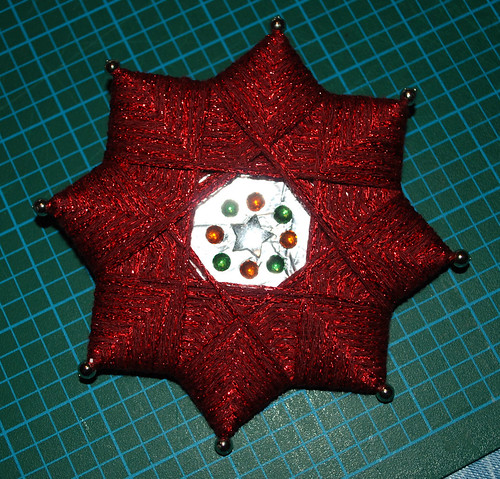
2010 Christmas Decorations

For this one, I used just some adhesive scrapbooking gems.  At this point, the ornament is complete, except for the hanger.
2010 Christmas Decorations

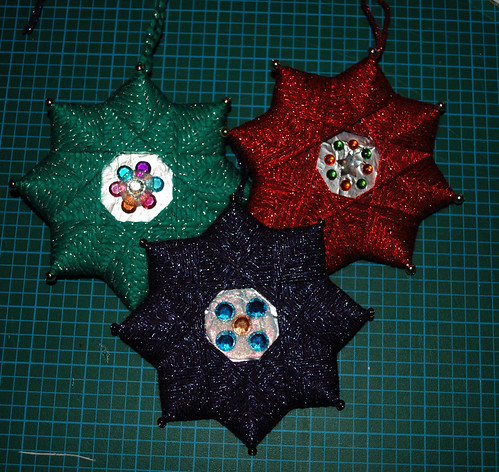
Here are the first three completed ornaments.  For the green and purple, I used some glitter glue, which is still wet in this photo, to place the gems.

After these were done I headed out to get my new blades so I could cut out more shapes without tearing the edges too badly.  Since then, one of my daughters and I made six more, most using novelty yarns, and using decorative papers in the centres as well as foil.  Once the shapes are cut, these are remarkably quick to make.  It's almost addictive!  When we're done, I post more photos.  I'm very pleased with the results.