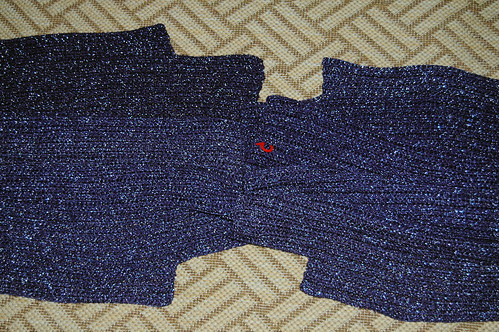
Here we have the finished front and back panels - the tops of the panels are overlapping a bit so you can see the sleeve inset area. Because of the size I'm making, I accordion folded the middle portion so it would all fit in the photo. The stitch marker is marking the front of the panel.
At this point, I spent a lot of time making sure I had the RS (right side, or outside of the panel) and WS (wrong side, or inside of the panel) correct before sewing up the side seam.
I increased the contrast and marked where the side seam is for this photo. This is the outside of the garment. You may want to click on it and check out the largest view to see it better.
Working in back loops only creates a ribbed series of "hills" and "valleys" in the fabric. From the outside of the garment, the side seam is hidden in a "valley," making it essentially invisible.
Here we are, looking at the inside of the garment, where the side seam is on a "hill," making it more visible.
The instructions for this project are very detailed, so I was pretty sure I had it right. That the side seam fell invisibly into a "valley" on the RS of the fabric seemed to confirm to me that I had it right.
Then I started on the upper sleeve.
First off, I should explain that I am a very visual person. When I read instructions, I can see what's being explained in my head. If the instructions aren't clear, the image in my mind can't form, which makes things very difficult. The pattern also has diagrams showing where certain important points are. This is the first area where things started to fall apart with me. The image I got in my mind from the instructions didn't match the diagram. After working on the sleeve for a few rows, I finally figured out that the problem was in the diagram. It didn't clearly show how the sleeve formed. The incongruity bothered me so much, I finally pencilled lines to "correct" the diagram. *L*
That, however, was not why I ended up undoing the sleeve and starting over. The instructions are very specific about which side faces where, how the garment is positioned when you start, etc. I double checked before I started, then checked again and again as I worked. There was clearly something wrong.
When starting the upper sleeve portion, the yarn is joined at the top/neck portion of the garment. What I ended up with was, not a sequence of "hill, valley,hill, valley, hill," but rather, "hill, valley, valley, hill, valley." After reading and re-reading the instructions, I finally noticed something that didn't make sense. After joining at the top corner of the neck, the instructions say to "hdc in blo of next 19 sts."
Translation for non-crocheters, that's "half-double crochet in back loop only of next 19 stitches."
Back loop only? I didn't have any back loops. For this portion of the garment, I was working into the remaining loops of the chains added for the transition from short, underarm rows to long, body rows.
The only place where I could have back loops to work from was from the other side, and only if I were working from the WS of the garment, not the RS as the instructions described.
This meant one of two things. Either I made a mistake and sewed the wrong sides of the side seam together, which I find unlikely, or the instructions are wrong, which I find even more unlikely.
I couldn't even use the photo as reference. The model's hair covers the joining area on one side, and the other side is lost to the depth of field of the photo, so it's not in focus.
Either way, I couldn't leave the sleeve the way it was. The joining was too obvious.
After undoing the sleeve, I had to decide. I could undo the seam and re-do it the other way, which would mean the seam would fall on a "hill" on the outside. This would have made the seam quite visible. Or, I could do the opposite of the instructions and work on the WS of the garment.
I chose the latter, and this is how it turned out.

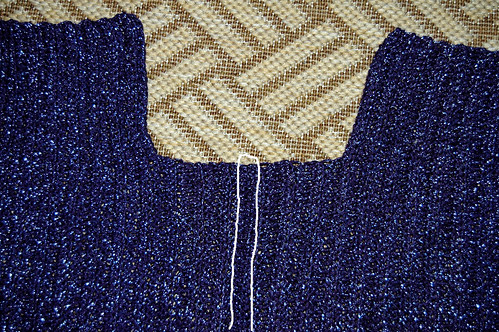
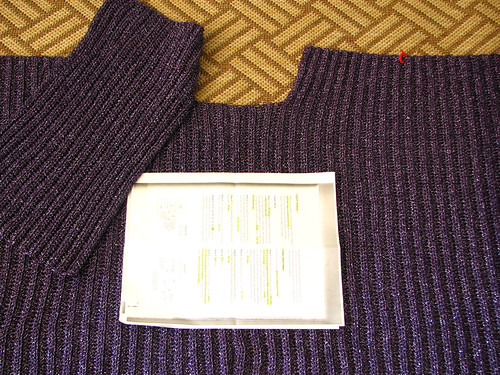
This photo is of the inside of the sleeve area. I have my photo-copy of the instructions slipped under the sleeve panel so you can see the break. You can see that the rows appear to seamlessly continue from the body panel to the sleeve panel.

Still looking at the inside of the garment's sleeve area, you can now clearly see the seam above and below the paper.
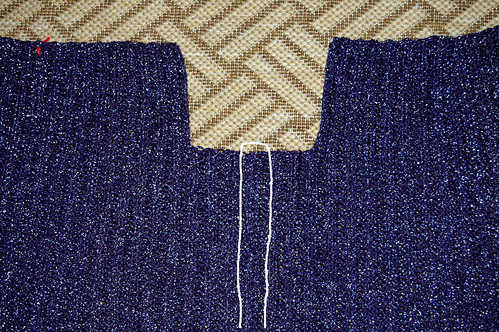
Now an outside view of the upper sleeve. In the diagram, the line representing the unconnected side of the sleeve panel ran from where the joining stitch is made (you can see the loose end of my starting yarn at the top, slightly left of centre), diagonally to the bottom right corner of the sleeve portion. It was as if the top right corner of the sleeve portion (or the top left, if I'd still been following the original instructions) wasn't supposed to be there. I think you can understand why I found that confusing! *L*
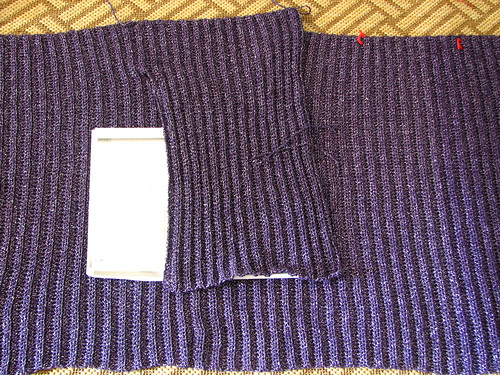
Again, viewing the outside of the garment, and showing inside of the upper sleeve portion.
The next step is to make the underarm panel, filling in the bottom section of the sleeve opening. Then the upper arm portion gets attached to the opposite body panel, while the remaining length will be attached to the underarm portion.
This should be interesting. I've draped the garment onto my daughter to see if I needed to add extra rows or not. The top portion, where the yoke will be added, seems loose, but the underarm portion seems tight. We'll see how it works out once I've put all the pieces together.
No comments:
Post a Comment