This pattern includes instructions for an optional edging. The thick, reversable design is created by working front post stitches. It's also easy to adjust the size. Smaller versions make great coasters. Like the can cozies, this is one of those items that I find myself using for all sorts of things! I even keep one as a coaster next to my keyboard.
Tuesday, July 30, 2013
Potholder pattern now available
I've now added a second pattern to my Everyday Things line - a little something for those who want to try their hand at double ended crochet!
This pattern includes instructions for an optional edging. The thick, reversable design is created by working front post stitches. It's also easy to adjust the size. Smaller versions make great coasters. Like the can cozies, this is one of those items that I find myself using for all sorts of things! I even keep one as a coaster next to my keyboard.
This pattern includes instructions for an optional edging. The thick, reversable design is created by working front post stitches. It's also easy to adjust the size. Smaller versions make great coasters. Like the can cozies, this is one of those items that I find myself using for all sorts of things! I even keep one as a coaster next to my keyboard.
Labels:
double-end crochet,
patterns for sale
Sunday, July 28, 2013
My first pattern for sale!
Well, I've finally uploaded my first ever pattern for sale!
You should be able to click on the above to get to my new Get Crafting! Craftsy store. Purchases can be made through Paypal.
This pattern is the first of a series of patterns I've been working on called Everyday Things; because useful things should be beautiful, too! I had originally intended these for publication as an ebook but have not had the time to put it all together, so I'm releasing them one by one, instead.
With each of the patterns, I will put up two version The first, lower cost, version will be the written instructions plus a photo. The second, higher priced version will include step by step photos and modification ideas and suggestions.
Purchasers of my patterns have my permission to sell the items they make with them, so long as credit for the pattern is maintained; my name or the name and URL to this blog is sufficient.
I hope you enjoy this pattern! If any problems are noticed, or if there are any questions, please feel free to pass them on to me.
Labels:
crochet,
crochet - can cozie,
patterns for sale
Saturday, July 20, 2013
Art in the Plaza
All set up and ready to go! There's quite a variety of artists today, so come on over! We are on Sherwood Dr. by the Education Station and the library.
Sent from Anna's phone
Wednesday, July 17, 2013
Battle Scars
This weekend, while helping my daughter at the Art Walk, I had a bit of a tumble while crossing Gateway Blvd on the Saturday, landing on both my knees. It wasn't even on asphalt; it was on a strip of concrete bordering the crosswalk. The bruises didn't show up until yesterday, and was far more extensive than I expected!
Then I got asked for photos. *L*
So here are a couple of photos of my hairy, scarred up legs to brighten your day. ;-) The left knee has a lot more bruising just inside the kneecap (that's the one I landed on harder), but the bruising extends well down the front of my leg and around the side to where my hand is in the photo. My right knee isn't as bad, but the bruising also bloomed well down the leg.
My daughter feels so guilty. Then I got asked for photos. *L*
So here are a couple of photos of my hairy, scarred up legs to brighten your day. ;-) The left knee has a lot more bruising just inside the kneecap (that's the one I landed on harder), but the bruising extends well down the front of my leg and around the side to where my hand is in the photo. My right knee isn't as bad, but the bruising also bloomed well down the leg.
Sunday, July 14, 2013
Saturday, July 13, 2013
Friday, July 12, 2013
Sunday, July 7, 2013
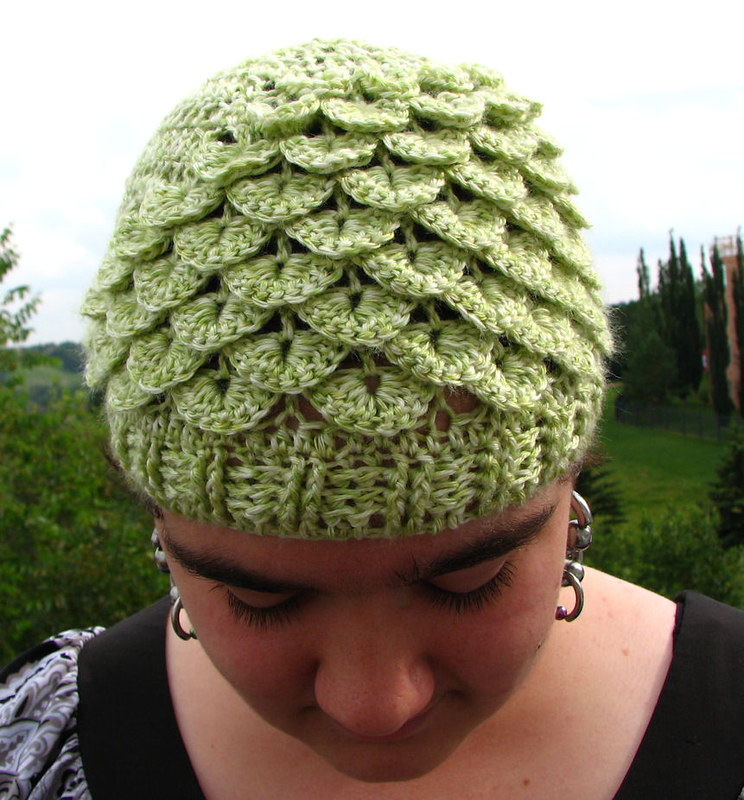
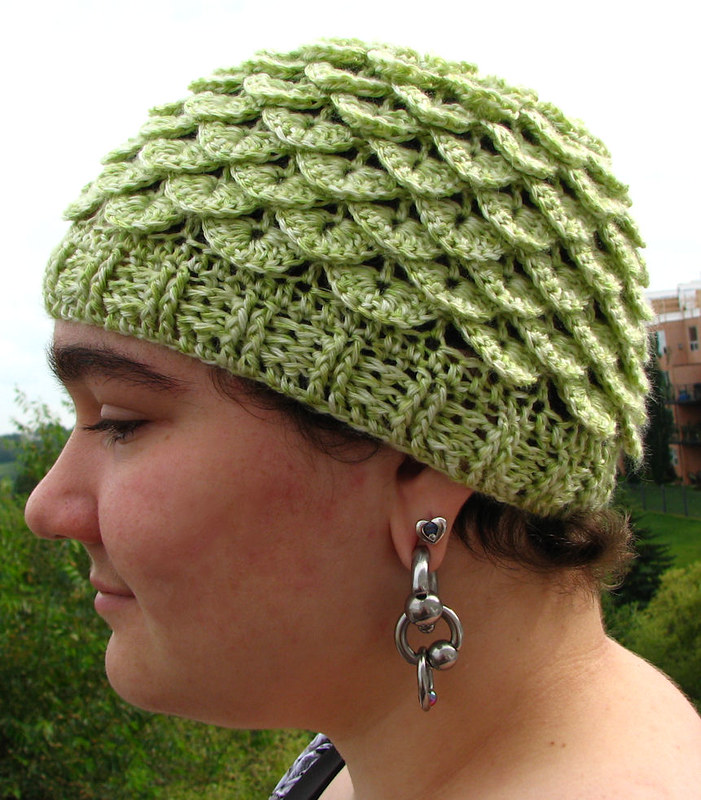
Green Crocodile Hat
With all the stuff that's been going on, I have actually managed to crochet things every now and then!
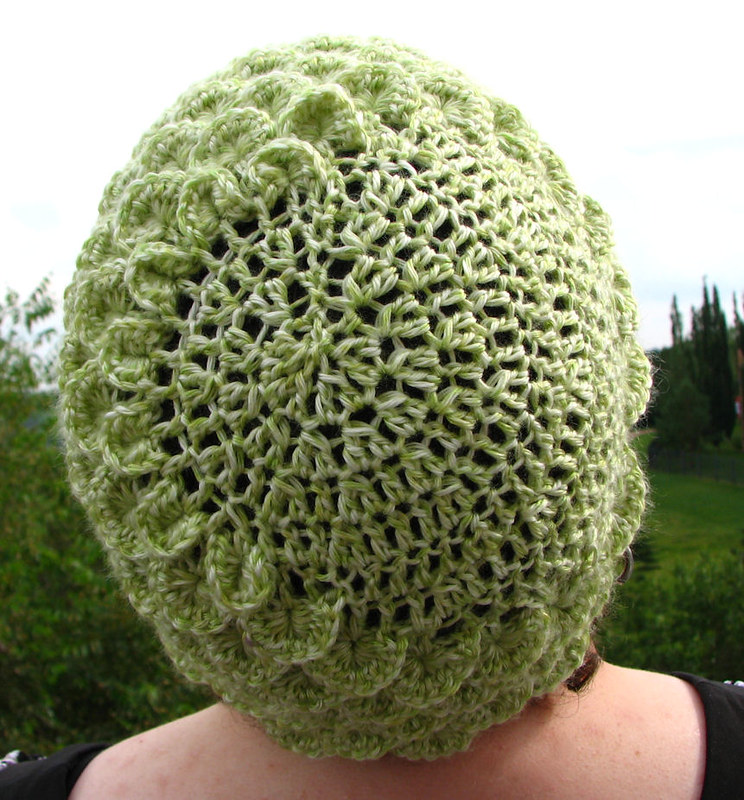
For some time, I've wanted to make a hat with crocodile stitch, but I didn't like how a lot of the hats I saw looked at the top. Worked from the bottom up, the number of stitches needs to be reduced at the top to close it up. In the process, the evenly overlapping stitches around the body of the hat no longer line up nicely, and I wanted to keep that look.
I've made a couple of hats and this is a version I finished today, which ended up becoming a birthday gift for a neighbour who just turned 11.

This just happens to be the front of the hat as my daughter put it on - there is no actual front or back to it.

I worked a couple of complete rounds of crocodile stitch, then slowly reduced the number of scales in each round.
As I started reducing stitches at the top, I did the last row of crocodile stitch scales with half double instead of double stitches.

I do like the all-over scales side.

You can sort of see how I reduced the number of stitches as I worked the crown, as well as the one section of crocodile stitches in half doubles.
I'm rather pleased with the look. I will still likely tweak the design here and there as I make my next one.
The yarn I used is Loops & Threads Elegance, which is a new yarn available at Micheals only, and a 5.00mm hook. At 160yds/147m, it took one and a bit balls of yarn to do this hat. The yarn is 100% acrylic, yet has the feel of a cashmere blend yarn I have! I just love it.
For some time, I've wanted to make a hat with crocodile stitch, but I didn't like how a lot of the hats I saw looked at the top. Worked from the bottom up, the number of stitches needs to be reduced at the top to close it up. In the process, the evenly overlapping stitches around the body of the hat no longer line up nicely, and I wanted to keep that look.
I've made a couple of hats and this is a version I finished today, which ended up becoming a birthday gift for a neighbour who just turned 11.

This just happens to be the front of the hat as my daughter put it on - there is no actual front or back to it.

I worked a couple of complete rounds of crocodile stitch, then slowly reduced the number of scales in each round.
As I started reducing stitches at the top, I did the last row of crocodile stitch scales with half double instead of double stitches.

I do like the all-over scales side.

You can sort of see how I reduced the number of stitches as I worked the crown, as well as the one section of crocodile stitches in half doubles.
I'm rather pleased with the look. I will still likely tweak the design here and there as I make my next one.
The yarn I used is Loops & Threads Elegance, which is a new yarn available at Micheals only, and a 5.00mm hook. At 160yds/147m, it took one and a bit balls of yarn to do this hat. The yarn is 100% acrylic, yet has the feel of a cashmere blend yarn I have! I just love it.
Labels:
crochet,
crochet - hat,
crocodile stitch
Subscribe to:
Comments (Atom)


