Pages

Sunday, October 3, 2010

Crossed Cables hat

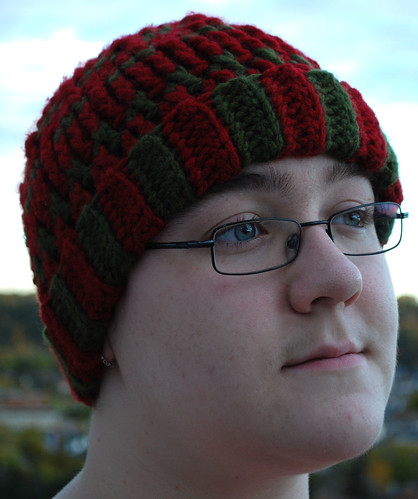
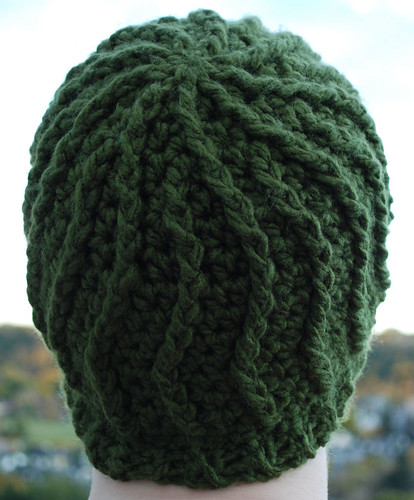
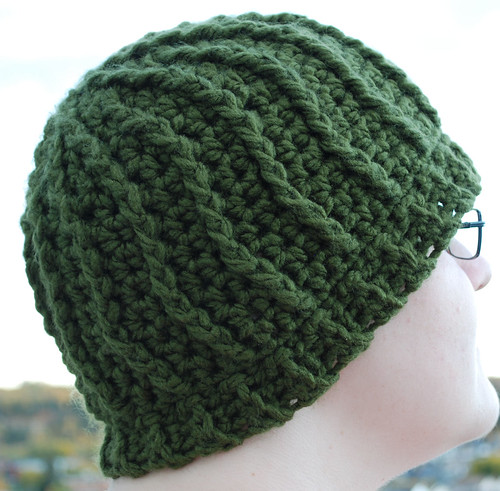
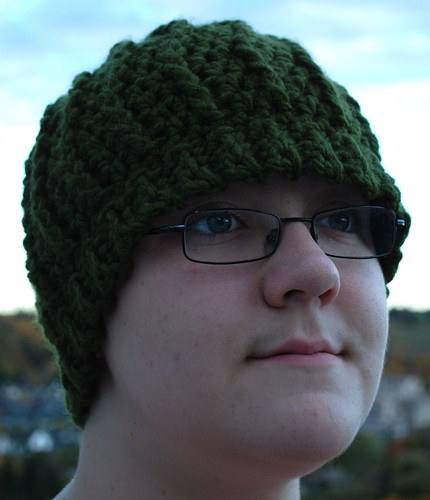
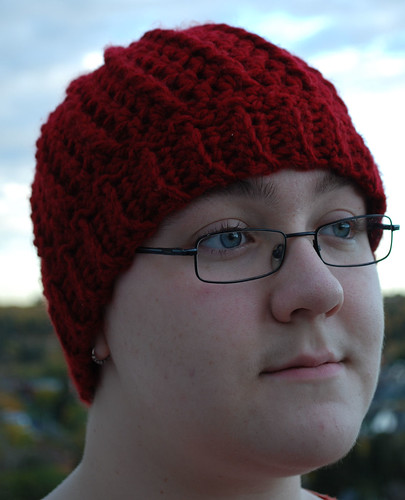
I got some photos today of another cable hat I'd missed earlier.  My younger daughter has claimed this one for herself.


Crossed Cables

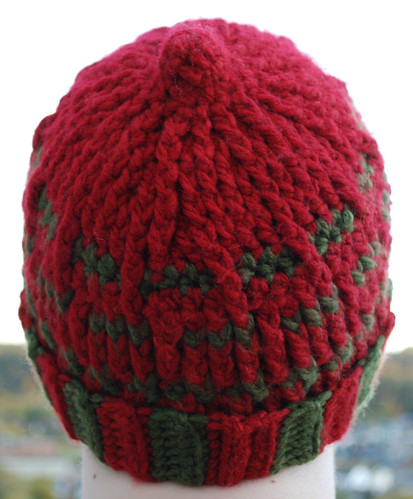
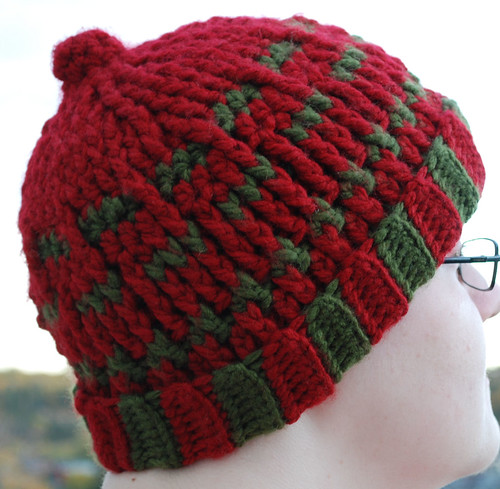
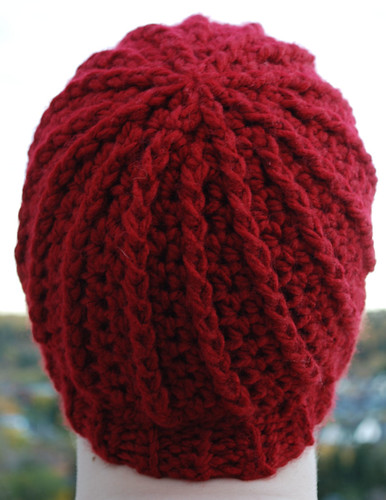
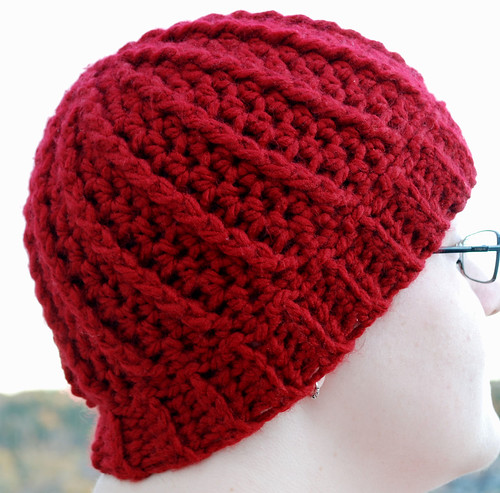
This piece was worked using two strands of Harmony yarn and a 9.00mm hook.  The crown was done in a flat disk of double crochet stitches.  When I reached the size I wanted, I did one round of dc without any increases, then started on the front post stitches to make the cables.

Crossed Cables

The patterns was determined by the number of stitches I ended up having, which was a multiple of five.  The first couple of rounds were in groups of 3 fpdc and 2 hdc.  After that, I split up the first and last fpdc to start the X.

Working the cables really pulled in the sides.  When not worn, the sides look completely straight, rather than gently curving outwards as most of the hats tend to. 

Crossed Cables

The last bit was worked the same was as the Green Cables hat. 

The entire piece was a touch longer than I usually make for a hat that doesn't get turned up - something my daughter really likes!

I'm rather happy with how it turned out, though if I do it again I might change the crossed front post double stitches to front post triple stitches.  I think that would prevent the pulling in.  On the other hand the hat wouldn't be quite a snug as it is, and I don't think I'd want it any looser.  Perhaps if using a thinner yarn or smaller hook, it would be more of a concern.  As it is, I think it worked our rather well.

Saturday, October 2, 2010

Hooded scarf - a prototype

While perusing patterns, visiting blogs, crafting sites, and so on, I have noticed an increased number of patterns for hooded scarves.  It seems a very practical garment.  The simplest method to make one is to make a long, wide scarf, then fold it in half and close up a seam on one side to create the hood.

Looking at the different types, an idea began to percolate in my brain.  After twisting and turning the various permutations around in my head, I decided to give it a go with yarn and hook.

First off, the structure.

I didn't want a hood that came to a point in the back.  I also wanted more depth to the hood, rather than just a folded in half scarf.  Because I like making things difficult, I guess. ;-) This got me thinking of different sewing patterns I've encountered over the years for hoods.  I decided that I would have a flat panel for the width of the head, then build up the sides and/or back.

Next, the construction.

I wanted to be able to work it all in one piece.  I didn't want to be stopping in one place, then restarting the yarn somewhere else.  Nor did I want to be sewing sections together.

I had some Lion Brand Homespun from a project that needed less than I expected, so even though I dislike working with the yarn, that's what I used for this prototype.  I love the colours, softness, weight and easy care of Homespun, but it's a PITA to work with.  Ah, well.

I didn't take photos of the piece as I worked it, simply because I had little idea of what I was doing.  I was just mucking about to see how it turned out.  This is the finished hood.
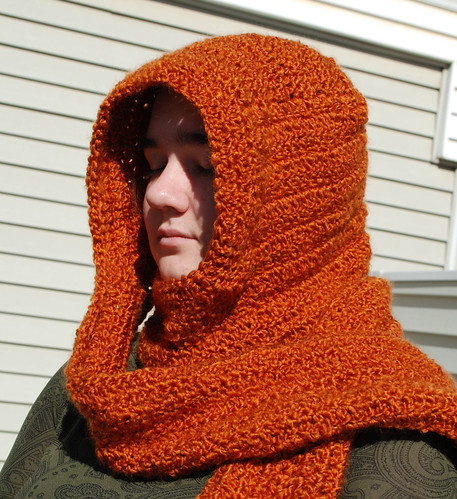

Hooded scarf

My poor daughter.  I made her face the sun so I could get this picture, and she was totally blinded!

I'm pretty happy with how it turned out, though there are a number of things I will be changing for the next one I make.  I'll explain that as I go along.


First up, the top panel.
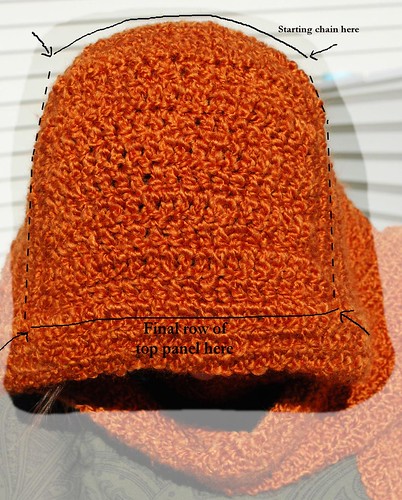


Hooded scarf

Using the Homespun and a 6.00mm hook, I started off making a rectangular panel 20 dc wide.  I worked the length so that it reached from the crown of my head to my hairline, which worked out to be about a dozen rows.  I was more interested in the dimensions than how many rows at this point.


Next, it was time to build up the sides and back.  Here's a back view.
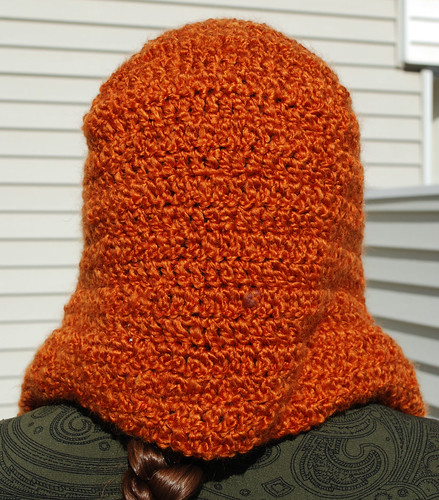
Hooded scarf

To work the sides and back, I turned the top panel and started working dc along three sides, without adding extra stitches to the turns at the corners.  I built these up until, when worn, it reached about the base of the head.  This worked out to be another dozen or so rows.


Next up, it was time to add the scarf portion.  Here is a side view of the piece.
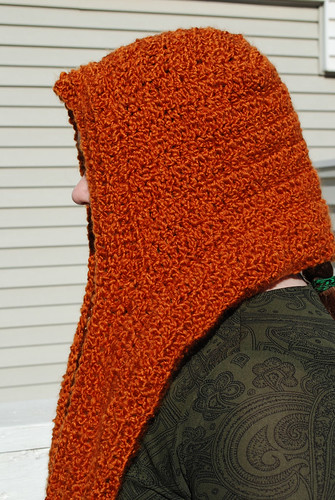
Hooded scarf

And so you can tell what is where...

Hooded scarf

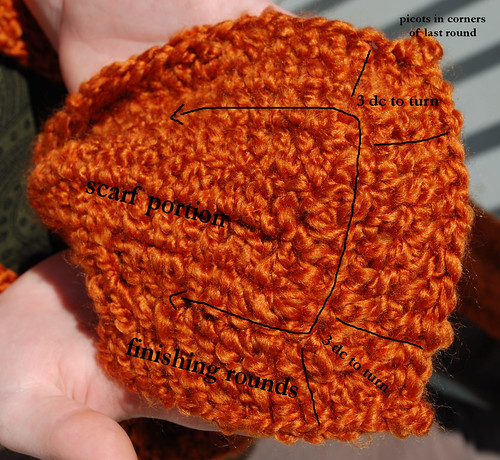
To start on the scarf portion, I simply extended the last row of the hood by working a chain to the length I wanted.  Once I had a length that I could wrap about myself the way I'd want to while wearing it, I counted the number of stitches (+2 ch to turn), then worked dc back to and across the bottom of the hood.  When I reached the other end, I kept going by doing foundation dc to the same number of stitches as the other side (I believe I settled on 120 dc beyond the hood portion to get the length I wanted).  I worked rows of dc until the scarf portion was 4 rows wide, then started working around the entire edge of the piece. 

Without turning at the end of the row, I worked 3 dc into the corner (counting ch3 as my first dc) and started working dc stitches along the end, 3 dc to turn the corner, then kept on going.  This first round got worked into the remaining loops of the foundation dc and foundation ch stitches of the scarf portion.  It's a bit of a pain, but I figured it would look better than changing to work in between the dc stitches.  That would have been easier, but not the look I wanted.

First, a back view...

Hooded scarf

I wanted the scarf portion to be a bit more formed in the back, so that there wouldn't be any gaps in the back letting in drafts.  To do that, I decided to start reducing the number of stitches in the back as I worked the rounds.  I found the middle and put in a stitch marker.  In the first round, I worked the decreases (2 double crochet together or 2 dctog) with 3 regular dc stitches in between (the stitch marker being in the middle stitch).  In each consecutive round, I spaced the decreases farther apart; as I worked my way into the back section and reached the first decrease of the previous round, I'd start the decrease into the stitch just before the previous decrease, rather than into the top of it, then the start of the next decrease of that round was worked into the stitch just after the decrease of the previous round.


Here's the side view again.
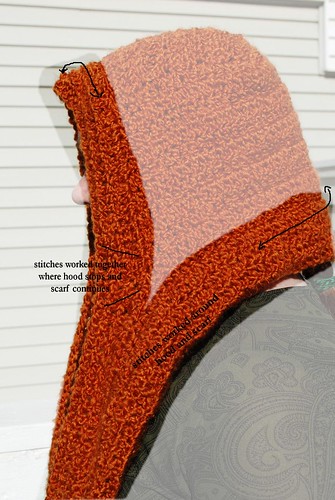
Hooded scarf

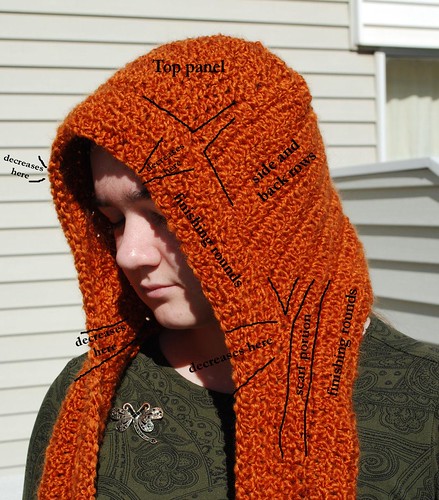
In my first round, when I reached the turn where hood and scarf met, I worked 2 dctog, making sure one of them was right into the corner to prevent any gap.  In subsequent rounds, I worked 3 dctog in the same area.

Hooded scarf

I also worked decreases across the top of the hood, placing the first ones right where the top panel and side sections were joined, then working subsequent decreases closer together in the next rounds.  So as I worked up one side and reached the dc of the previous round, I worked the first half of the decrease into the top of the decrease of the previous round, then the second half into the next stitch at the top of the hood.  Then when I worked across the top and reached the next decrease, I would work the first half of the new decrease into the last stitch just before the previous decrease.  This way, in each round, the number of stitches in front of the top panel was reduced, not the stitches on either side.

Hooded scarf

In the very last round, I added a picot into the 3 dctog at the corners of the scarf portion.  Just because. 

Final verdict.

I find my basic premise is sound.  I like the flat top panel idea, but found that, instead of one large point in the hood, like in the scarf-folded-in-half type, I have two very slight points at either end of the starting chain.  I also think it's a bit too wide.  Next time, I'm going to start with a shorter foundation - perhaps half the width of what I have here - and work increases into the next few rows until it's the width I want.  I think I'd go about an inch or two narrower on the total width, too.  I think I'm good with the depth of the hood, so I'd probably work the top panel to the same length as I did here - long enough to reach from crown of the head to the hairline.

For the shaping at the back, I think I would actually start working decrease rows in the scarf portion, rather than in the finishing rounds.  I might even go so far as to start the decreases in the back of the hood portion.  I'll have to think about that.

I'm not entirely sure what I think about where I started the scarf portion.  On the one hand, I'm thinking of starting it higher up (by reducing the number of rows in the hood portion), which would make it go across face at a higher point.  On the other, I'm thinking of starting it lower down (by adding more length to the hood portion), so that it's not in the way of the face when not wrapped up.

I'm also debating whether or not I'd like the scarf portion wider or not.  With a core width of 4 rows, plus another 4 rows added by the finishing rounds, it's a decent width.  When wrapping it around the face and neck, though, it tends to be a bit gappy.  I think that has more to do with the fact that the scarf is attached to the hood, rather than the width. 

Hmm... I wonder if there's a way to make a keyhole, instead.  That would solve that problem.

Those are just a few of the ideas I'm bouncing around.

Other things I would change or keep:

I would stay with the same hook size and yarn weight.  I'm happy with that.  If I were to experiment with that, I'd probably go with a bigger hook and chunkier yarn, rather than the other way around.  I wouldn't want to stay with this particular yarn, though.  The Homespun splits and catches on the hook horribly, and I was forever having to undo and redo stitches because of it.  I'd definitely go with something that's got a better twist to it. 

Once I get the basic idea down to my satisfaction, I might play with textures and/or colours.  Perhaps adding a contrasting colour for the last round, for example, or adding textured stitches or cables to the hood and scarf potions.

Experimenting will be fun!
Friday, October 1, 2010

Feature Friday: Zombie Gore

It's that time of year again!  No, not Canadian Thanksgiving or Halloween.  It's Zombie Walk time!

Shortly after we moved to Edmonton, we were in Churchill Square, downtown.  As we were wandering around, something very strange happened.

Zombies appeared.  Dozens of them. 

In wedding gowns and suits or tuxedos.

As we stood there, rather stunned by the site, the zombies entered the square from the south west corner and shuffled, shambled, moaned and groaned their way across the square.  They surrounded us, calling for "bbbrrraaaaiiiinnnnzzzzz" and enticing us to "jooooiiinnnnn uuuussssss...."

Then they were gone.

We were entranced.

Soon after, through someone we met through one of our local home school groups, we found out about the River City Zombie Committee.  The next year, my older daughter was able to join them for what's become their annual walk.

This year, our local zombies are doing their walk on October 8.  The theme is Zombie Clowns.  Both my girls will be participating, along with at least one other friend.

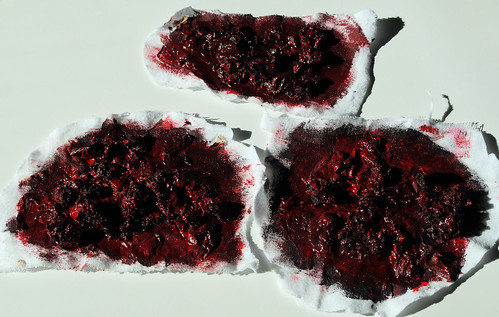
My older daughter decided that her costume needed removable gore.  She wanted something realistic, flexible, and would not require ruining clothing to do it.

This is what she came up with.

Zombie Gore

She's agreed to do a step-by-step for me later, photographing and describing each step, for those interesting in making some for their own costumes.  The base is some fabric scraps which will be held in place with gauze and cloth bandages.  Bits of other fabric and... I'm not sure what else... were attached to the base for the texture, then painted in layers.  The final layers are a mixture of paint and glue to make the colour more stable.

I think it is suitably disgusting.

:-D

Thursday, September 30, 2010

Shell topped Wrist Warmers

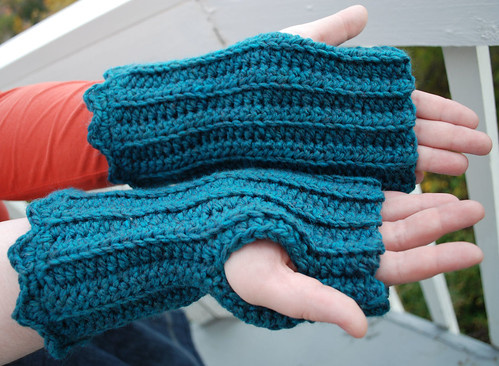
After doing so many hats and cables, I switched to something quick and easy.  I made a pair of arm/wrist warmers.  They're the same basic pattern I used here.  Just rows of stitches worked in the back loops.


Top view of both warmers.  I used a thicker yarn than before; some bulky (5) yarn left over from another project and a 6.00mm hook, worked in dc instead of hdc.


Shell topped wrist warmers

The base chain was long enough to completely cover the wrists, but the length can be adjusted to whatever is desired.  The thumb opening is created when the basic rectangle it slip stitched closed.  The only major change from the ones I made before is the shell stitch topping the arm end.  First, a round of sc was worked evenly around the edge, then I did a round of shells separated by 1sc.  Each shell is [1 sc, 1 hdc, 1dc, 1hdc, 1sc] worked into one stitch.

The chunky yarn makes things bulkier than I typically like to wear on my arms, but they do the job. :-D

Tuesday, September 28, 2010

Cable Madness

After playing around with cables in the last three hats, I decided to play around a bit more.  I used the leftover yarn used in the Red and Green Cable Hats.  I made things up as I went along a lot more than I did with the previous hats.  I also used the 6.00mm hook again.

The first change I made was right from the start, with a small peak.

Cable Madness

I started off with 9 dc in a magic ring, then did the next round in 9 dc at well.  The next round was increased with 12 hdc.  After that, I started working the front post double stitches.  I can't remember where I placed the increases, but whenever I did, it was with an hdc worked after a fpdc stitch was done.  In the next round, that hdc would have a fpdc stitched worked around it, making for a crown of solid cables.

Cable Madness

Looking at this view, you can see why our alternative name for this is "the nipple hat." ;-)

The first round I made without any more increases was done in green hdc.  That's when I finally stopped to count and see how many stitches I had in the round.  I can't remember the final number, but it was divisible by four, which is why you can see a red cable over the green at every 4th stitch, and that it was a higher number than the Red and Green Cables hats.  Though it was a higher number of stitches, doing all but the increase stitches in fpdc made it actually a touch smaller than the Red Cables hat, which was done with the same size hook.

Note: When changing colours, I simply dropped the yarn and took up the new colour.  This left a vertical row visible on the inside of the hat.  Hmm... now that I think about it, I should have taken a photo of how the inside of this hat looks.  Will have to keep that in mind.


The first red round after the first green round was made up of 3 hdc followed by 1 front post triple crochet stitch (fptc), going around a corresponding stitch in the last round of red in the crown.  The next round in red worked 1 hdc into each hdc of the previous round, and 1 fpdc around the fptc of the previous round.  That was followed by another round of green, this time doing all fpdc.  When I switched back to red again, I worked a pattern of 3 fpdc, 1 fptc, with the fptc worked around a fpdc just after where the previous fptc had been worked.  I did another round of all fpdc in red, then switched to green again.  This third round of green alternated 1 hdc and 1 fpdc.

The next rounds are hidden by the upturned cuff.  The next round switched back to red, this time working an hdc into the fpdc of the previous green round, and a fpdc around the hdc of the previous green round.  Another round of just fpdc in red was worked.

The last rounds before the cuff of the hat were done in green.  One round of all fpdc was done, then another round of hdc was worked *in between* each stitch of the previous round.


Cable Madness

The ridged cuff of the hat was then worked in the same manner as the Red and Green Cables hats, using a starting chain of 9 stitches, making for a cuff 8 stitches wide.  To alternate colours, I would just drop the yarn from one colour, then pick up the next, making sure that the yarn was pulled snug whenever I changed back again.  When the cuff is turned up, it naturally folds at the last round of green hdc, so what you're seeing in this photo is almost the entire width of the cuff. 

As you can see by the instructions, there was really no rhyme or reason to making this hat.  I was just playing with cables and wanted to see what an all-over cable design would look like.  With so many fpdc used, the entire hat is actually a touch smaller than usual for this size of yarn and the hook size used.  It's a tighter fit than the Red Cables hat, even though the same hook size is used, and the crown is larger, with a greater total number of stitches in the rounds making up the sides.  In fact, it would probably fit an older child better than an adult.

Would I make this hat again?  Probably not.  Am I glad I made it?  Yes.  It was fun to wing it as I went along.  The closest thing I had to a plan in making this was "use lots of front post stitches."  That and I wanted to use up some of the left over yarn from the previous hats.

Which, by the way, each needed 2 skeins of yarn, though more than half a skein of each colour was left over when they were done, leaving me plenty to make this one.

Green Cables

This next hat was done almost the same way as the Red Cables hat.  Even the yarn type is the same.  There are just a couple of notable differences.  First off, I used a 9.00mm hook. With the same number of stitches used in each round that was done in the Red Cables version, this made it a size larger than what I usually make.

Green Cables

Though I used the same number of stitches, you can see that I joined the new cable into a different spot than the Red Cable hat, as well as experimenting when where I attached the fpdc to create the wavy cables.

Green Cables

You can see the changes in direction of the cables a bit better here.

The ribbing around the edge was also done the same way as the red version, including the round of sc done first.  The ribbing is only 3 sc long, which means I started it with a chain of 4 instead of 5.


Green Cables

Even with the narrower ribbing, this version is a fair bit longer than the red one.  It's a bit lower over the eyes than I normally like, but has better ear coverage.

I do like this variation of the cable hat, but I think the 9mm hook is a bit too big.  It's a great way to make a larger hat without having to change the number of stitches in the pattern, though.

Red Cables

Here's the next piece in my recent group of hat experiments.

I was looking to try out a new yarn with this hat, Loops & Threads, Charisma from a local Michaels.  It's a very soft, 100% Acrylic, bulky (5) yarn made in Turkey.  Machine washable and dryable.  Recommended hook size is 8mm.

I don't have an 8mm hook.  I have a 7mm, which is being used by one of my daughters for something else.  It's also a plastic hook, the same as my 10mm, that I can't stand using.  They have an odd, sticky sort of feel to them.  I prefer aluminum hooks, and I have a 9mm hook in aluminum, which I used for a different hat.  For this project, I went with my 6mm hook.

Red Cables

The basic structure of this hat is the same as my previous ones - flat disc for a crown with straight sides.  I decided to do a very simple cable pattern so I could see just how much of a natural curve developed.  I  started this one by working 8 dc into a magic ring.  The next round worked 1 fpdc and 1 hdc into each dc of the previous round.  The following round worked 1 fpdc and 1 hdc into the fpdc of the previous round, then 1 hdc into the hdc of the previous round.  In the following round, I added another cable by working 1 fpdc, 1hdc into the fpdc of the previous round, 1 fpdc around the first hdc of the previous round, then 1 hdc into the last hdc before the fpdc of the previous round.

For the following increase rounds, I alternated where the increase hdc was added so that each cable had the same number of hdc on either side of it until the disc was the size I wanted, which was at 1 fpdc, 2 hdc all the way around using this yarn and hook size.  Had I been working with a thinner yarn that needed more rounds to reach the size I wanted, I would have added another cable into the next increase round in the same manner as before; the key being adding a new cable where the next increase round would make an odd number of stitches in between the existing cables.  This way, the new cable is added by working a fpdc around the middle stitch between the existing cables.


Red Cables

That pattern was continued to build up the sides for several more rows until it reached about half way down my forehead when I tried it on.

I decided to change directions for the ribbed finish.  First, I did one more round in sc.  After slip stitching the round closed, I chained 5, then worked 4 sc back down the chain.  At the end, I slip stitched into each of the next two sc in the body, then turned, rotating counter clockwise and pulling the yarn strand across the top and tucking it snug against the body of the hat so that it's between the slip stitch and the first stitch worked in the new row.  I find this looks better than rotating clockwise.  Whichever direction you choose, just make sure it's dine the same all the way around.

The next row is 4 sc worked into the back loops only of each sc in the previous row.  Ch 1, then turn.  That pattern was repeated all the way around.

Red Cables

The last row in the ribbing ends away from the body of the hat with a ch 1.  Working on the inside of the hat, the first and last rows were slip stitched together.

I like the simplicity of this pattern.  The gentle curve of the cables that naturally forms when working in the round is quite attractive, I think. 

I really enjoyed working with this yarn, too.  It's got a nice texture, flows smoothly and doesn't have a tendancy to split like so many bulkier yarns do.  The finished hat is very light and warm.  A very nice yarn for winter headgear.  I just picked up a couple more skeins last night, since it happens to be on sale again right now.  It's a less expensive yarn, but I still hate paying full price. *L*