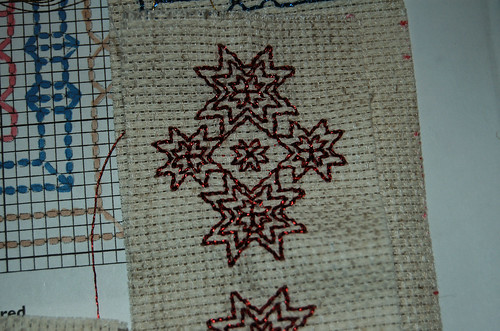
There are times when I like to bring along whatever project I'm working on when we're out and about - like when I have a doctor's appointment and have been warned there might be at least a 2 hour waiting period! I haven't been happy with the various bags I've been using to carry things, so I decided to experiment and make one myself in crochet.
Because it was an experiment, I really didn't care too much about the yarn. I was more interested in durability and quantity.
After digging around in my yarn basket, I found this variegated yarn from a Walmart bargain bin. Good enough. ;-)
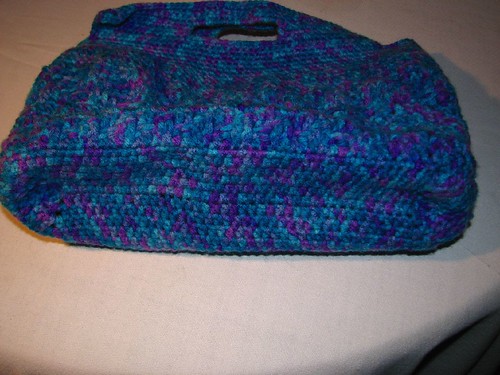
I wanted the bag to have a flat bottom. Using a size H/8 - 5.00mm hook, I made a rectangle, working in the round, using half double crochet until it was the size I thought would be useful. I then did a row of sc, decreasing by doing 2sctog at the "corners" to tighten up the shape I wanted before switching to dc for the body. (If I make this again, I think I won't bother doing the base in the round, but just back and forth rows, then build up the sides from there.)
For the body, all I wanted was a fabric dense enough that things like my hooks and pens wouldn't fall through - and I wouldn't discover the point of my embroidery scissors poking through again, either! Still working in the round, I stuck to using dc, but experimented with front and back post stitches to give it a bit of texture - and kill the monotony of working in just one stitch for so long.
When I got it high enough, I switched to sc. I did a few rounds of sc before switching to a G/6 - 4.25mm hook. I kept doing rows of sc for a few more rounds, then worked up the handles. Until this point, I hadn't really counted anything, so I was pleasantly surprised to find that the wide sides were divisible by three, making it easy to split up for the hand opening. Once both handles were done, I finished with a row of sc around the entire edge.
One of the biggest issues I had with the various bags I'd been using before is that I'd have to dig around the bottom for my tools, which would sometimes get caught on any yarns, threads or fabrics I had for whatever project I was working on. That and I disliked discovering sharp things with my fingers. So I made pockets inside.
Here is the bag inside out.
First, I made long, narrow pockets for the sides. These are not only handy to carry pens, gauge rulers and hooks, but they helped give shape to the bag.
On one side, I added a shaped pocket for my scissors, then a plain pocket for things like needle cases, tape measure, etc. I ran out of the variegated yarn while making this pocket, so I got my younger daughter to go through her yarn stash to find me the same type of yarn in a decent colour to finish with. The alternative was hot pink "camo" yarn. *L*
After attaching the pocket, I chained in some loops to hold stitch markers.
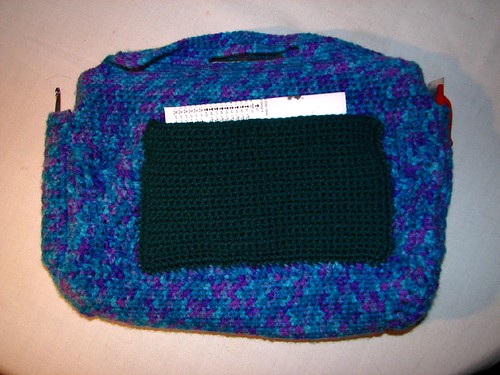
On the other side, I made a larger pocket to hold my photo-copied patterns, instructions or notes.
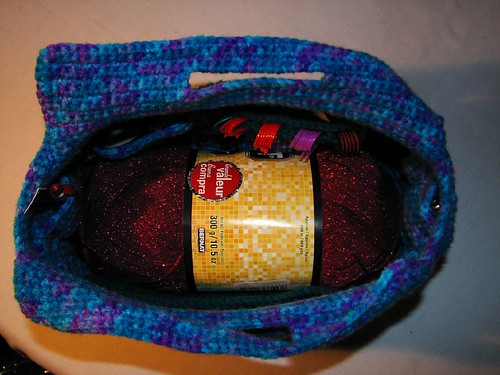
The bag can hold a surprising amount of stuff. Here, I've stuck in a huge skein of Bernat Shimmer yarn I happen to have. It could probably hold at least six of the regular balls of the same type of yarn.
The only thing I have to figure out now is my pin cushion. I've got one of those tomatoes with the aluminum oxide strawberry for cleaning needles. It would catch like crazy. I'll probably just stick it into a plastic bag or something before putting it into here.
I haven't had the chance to use this yet, but I think it will work out just fine. :-D
Monday, December 29, 2008
Project travel bag
Sunday, December 21, 2008
Christmas sachet; probably the last one
I finished my sixth sachet and I think this will be my last one. I don't expect to have the time to do any more before Christmas.
Larger images are available in my flickr set here.
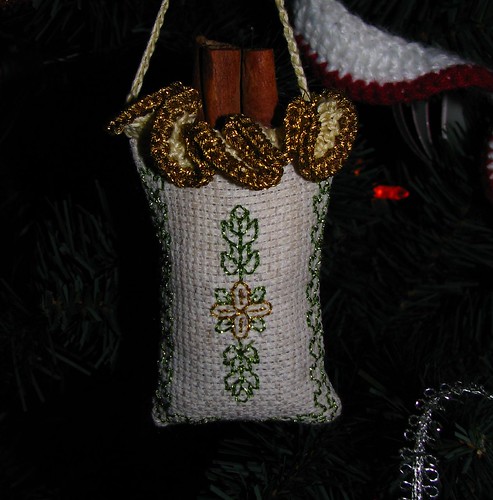
This sachet was a bit larger than the last one, but still small enough that I didn't want to close it up inside out, then flip it, so I assembled it the same way. I did have enough room inside to use the polyester fibre fill, as well as tuck in some cloves with a bit of vanilla scented fluff.
The edging was done the same, up to the one row of sc around three sides. In the next row I did 3ch, skip two, 1 sc into the third stitch, all the way around.
I then did shells into each 3ch loop made up of [1sc, 1hdc, 1dc, 1 hdc, 1 sc], skipping the 1sc in between the loops.
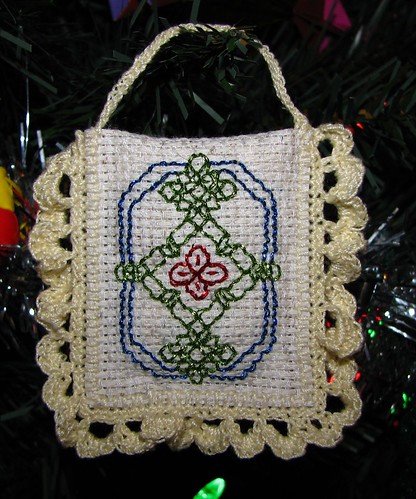
At the end of the shells, I did a length of chain for the hanger, fastened it on the other side, then went back over it again in sc, putting each sc around the chain, rather than into each stitch, then fastened off the thread.
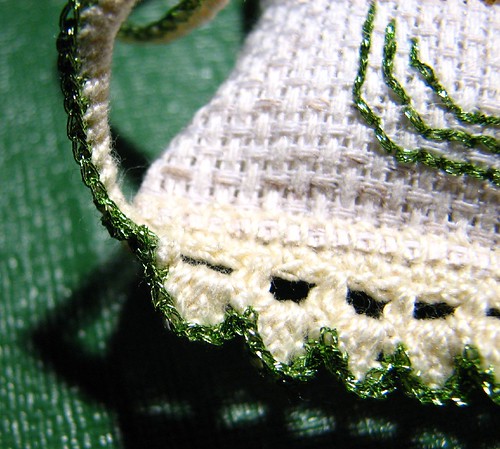
For the final row, I seperated a single strand of the metallic embroidery thread from what I had left of the green. The last thing I wanted to do was use short lengths like I did when I used the red. It was still a pain in the butt to work with, but at least I didn't have to add in new threads!
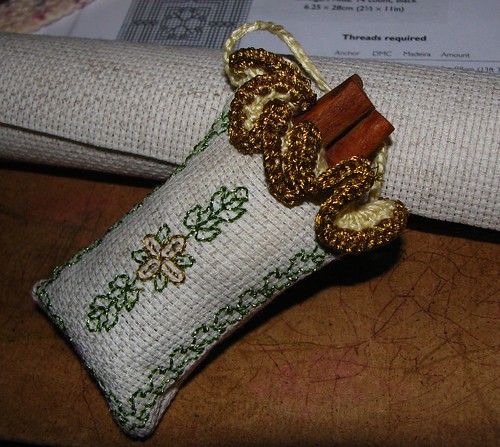
I did 1 sc into each sc and hdc, and 3 sc into each dc, of every shell. When I reached the end, I decided I hadn't tormented myself enough by working with the metallic thread into the shells. I still had a fair amount of the metallic thread left, so I went up the hanger, too. At the very start of the hanger, I did 2 sc together to make a nice bend, did 1 sc into each sc along the hanger, then finished off the thread after slip stitching into the first sc of green at the other end.
Here's the finished sachet.
As much as it's a pain to work with the metallic thread, I do like how it looks! ;-)
Labels:
Christmas,
Christmas sachets,
decorations,
embroidery,
thread crochet
Wednesday, December 17, 2008
Christmas sachet - another one down
Because I did most of this sachet the same as the last one, I'm just posting the finished photo today. Full size photo available here.
After finishing up to the button hole stitch edge, I did a row of sc around the end (including 3 sc in one stitch to turn the corners). I counted how many sc I ended up with and it was a total divisible by three, which helped me decide what to do next.
After turning, I did 5 ch, skip 2, 1 sc into the 3rd sc of the previous row. I continued making loops like this all the way around, except for the very last one. For that one, I did 2 ch, 1 dc into the last stitch, which left my hook in the middle of the loop. I then turned and did 2 ch, 4dc into that loop, then 1 sc into the 1sc of the previous row. For the rest of the edging, I did 5 dc into each loop and 1 sc into each sc of the previous row until the last loop. In the last loop, I did 4 dc, 2 ch, 1ch into the loop, then slip stitched into the base of the loop.
Without finishing off, I then made the hanger. I did 1 sc into the corner of the sachet itself, using the opening at the base of the very last button hole stitch, then made a change long enough to hang from. I fastened it to the sachet at the other end with a sc, then slip stitched into the bottom of the first sc row and turned. I then slip stitched across the chain to make it sturdier, then finished off the thread at the other end.
I was still doing both sides of the sachets with this pattern, so this decoration is reversible. Front and back are virtually identical.
Labels:
Christmas,
Christmas sachets,
decorations,
embroidery,
thread crochet
Tuesday, December 16, 2008
Christmas sachet - doing things differently.
For the smaller pieces, I changed things quite a bit, so I'm posting another step-by-step. If you want to see the full size photos, you'll be able to access them here.
Because of how tight the stitching was to the edges - and how the edges were fraying - I threw out the plan of stuffing them with cloves and cinnamon sticks out completely. Here, I've just folded the fabric in half, making sure the front and back stitching lined up, then used a running stitch to close up two sides.
For the filling, I folded and trimmed a facial tissue to fit. I did add a few drops of the vanilla oil inside the folds.
Once it was stuffed, I closed up the final side, continued stitching down the folded side to give it a sharper crease, then kept on going around in between the previous stitches for a double running stitch.
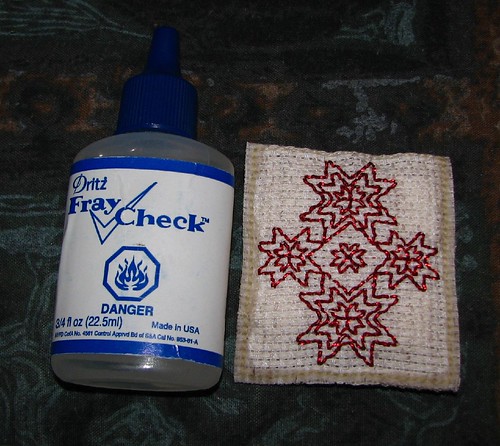
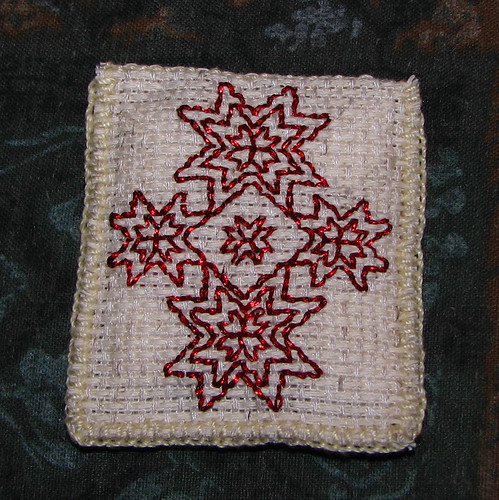
Once the stitching was done, I used Fray Check along the stitch line, then trimmed the 3 edges to 1 strand of the Aida cloth weave outside the double running stitch.
Back to button hole stitching. I chose this side to be the front, and the folded edge is now the top.
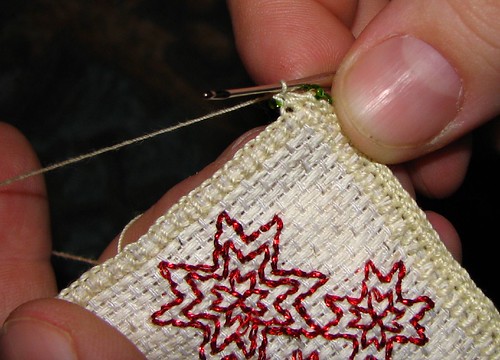
At this point, I wanted to try something new. I haven't crocheted with beads before, so I went digging around my craft bin and found some green seed beads that closely match the green metallic thread I've been using for these.
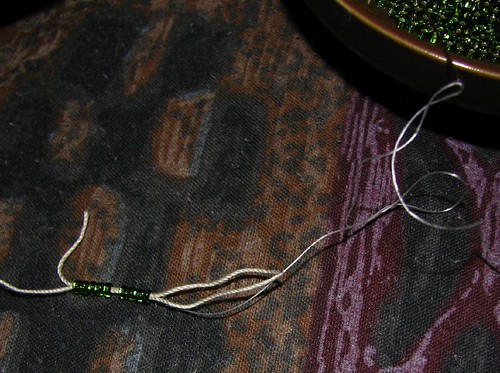
After counting out the stitches on the three sides, I needed to add that many beads, plus more for turning the corners, to the crochet cotton. To do that, I tied one end of some beading thread to the end of the cotton, then threaded a beading needle. This way, the beads could slide fairly easily onto the thicker cotton thread. I ended up threading 100 beads.
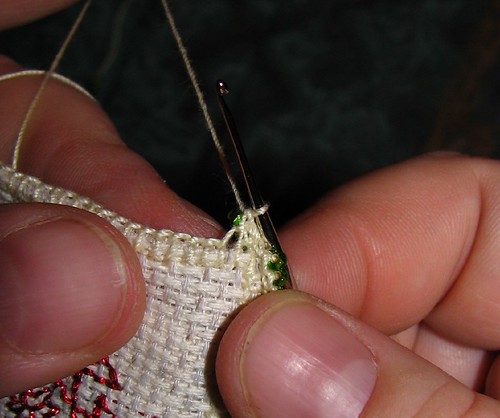
Working from the back of the sachet, I worked a row of sc, adding 1 bead for each stitch, adding an extra stitch and bead to the turn. Normally, I'd do 3 stitches in the corner to turn it, but with the thickness of the beads, I didn't want it bunching up. It did tend to curl back a bit, but it worked better than trying to stuff in a third bead.
To add the beads in each sc, the thread is pulled through as per usual, then a bead is slid down the thread, close to the hook.
Unfortunately, the photo showing how the bead is placed didn't turn out.
Once the bead is in place, the sc is finished as usual, making sure the bead is fixed on the back of the stitch.
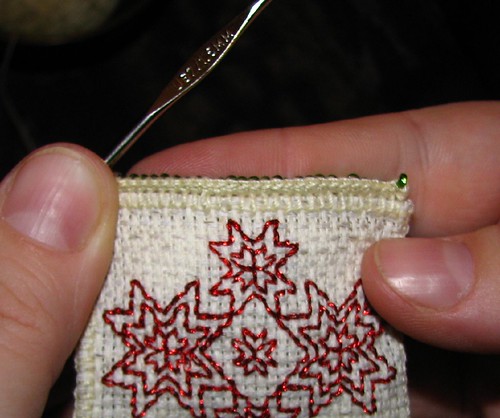
Here's what the row of sc looks like from the back of the project (front of the sc row).
After I did the beads around three sides of the sachet, I made a chain for the hanger, then did another row of sc (this time ensuring that 3 sc were done in one stitch at the corners for the turn), while still working from the back of the project.
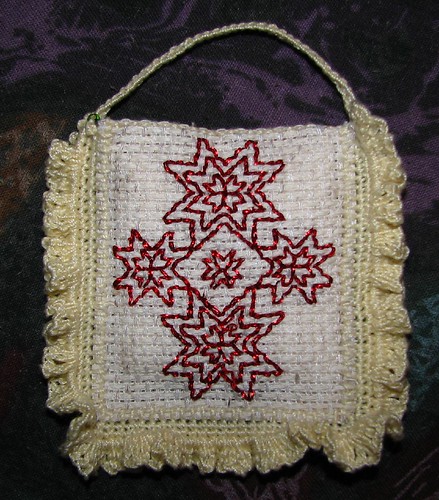
When the second row of sc was done, I turned the project and, now working from the front of the sachet, did a ruffle in the same manner as I finished the previous sachet. In between each sc of the previous row, I did [1dc, 1ch, 1dc, 1ch].
As I was working, I noticed the chain I made for a hanger had a tendency to twist. To fix that, when I finished the three sides of ruffled edging, I slip stitched into each chain of the hanger to give it a bit of bulk, then finished off and fastened the thread.
Here's a view of the back. Without the beads, it's still neat and tidy enough that the decoration can be considered reversable.
All done! :-)
Labels:
Christmas,
Christmas sachets,
decorations,
embroidery,
thread crochet
Monday, December 15, 2008
Third one done!
I've finished the third sachet. It's past midnight, but I wanted to post these while I had the chance, since I don't expect to have much of an opportunity tomorrow.
For this one, everything was done the same as on the previous sachet, except for the decorative top. I used the same crochet cotton and hook size as before, too.
After doing two rows of button hole stitch, I did a chain for the hanger from one corner to the other, then went back again with a row of sc, catching both rows of button hole stitch together for extra thickness.
The next row was of 2 dc in between each sc of the previous row. Doing it in between instead of through the loops on top opened things up a bit for a lacier effect.
The third row was of 2 dc into each dc of the previous row again, except that I added 1 ch in between every dc stitch, so it wouldn't be as dense and to add extra ruffling.
The end result was so nicely ruffled and soft, I decided to leave it as it was, instead of adding another row in the metallic thread, like the others. That, and I didn't want to fight with that thread again! *L*
All done!
Labels:
Christmas,
Christmas sachets,
decorations,
embroidery,
thread crochet
Sunday, December 14, 2008
Second sachet finished
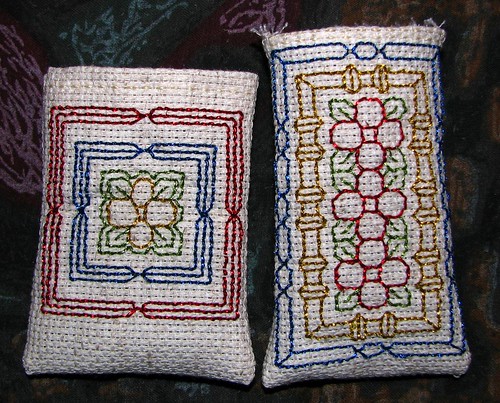
I was able to finish one more decoration tonight. Here's two pouches, ready for stuffing - I finished the one on the right. I'll finish off the second one later tonight.
At this point, they were put together the same as I described previously.
I made one change with the stuffing. I found some cotton fluff - the kind that is found in pill bottles - and used it for the vanilla oil. It held the oil quite well. After adding a few drops, I rolled it up, then tucked it on top of the cloves before adding more polyfill, then the cinnamon sticks.
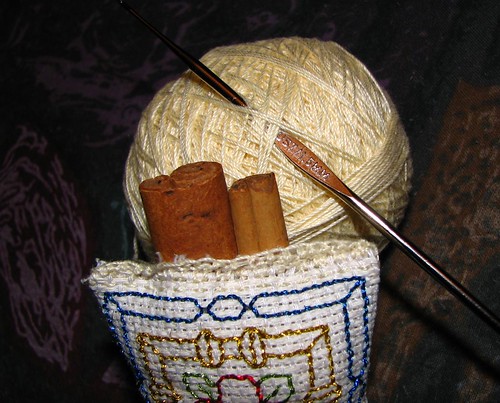
This time, I use actual crochet cotton. Specifically, No. 20 Mercerized Crochet Cotton, brand name Daisy, in Ecru. I managed to acquire about 6 or 7 skeins of it (400 yards each) at the Reuse Centre - a skookum find! This stuff is pretty expensive. The ball in the picture was wrapped to be centre pulling, to avoid tangles.
In closing up the sachet pouch, I did three rows of button hole stitch. The first row was done very tightly, with a stitch in between the cinnamon sticks to hold front and back together. The second and third rows were done more loosely, skipping stitches as needed to make it uniform, and so I could fit in the crochet hook. This cotton is quite a bit finer than the embroidery thread I used in the last one.
Using a 1.5mm hook, I did a sc row into the button hole stitch row. (1.5mm isn't the smallest hook I own, but it is the smallest hook I've ever used. It definitely takes getting used to!!) Then I turned it and did a row of 3 dc into one sc of the previous row, then 1 sc in the next stitch, continuing the pattern the across and ending in a group of 3dc.
The third row, after turning, was made up of 1 ch, skip one dc, 3 dc in second dc of 3 dc group, 1 ch, then 1 sc into the sc of the previous row, all the way across.
Then, because I must be some sort of masochist, I added a row using a single strand of the metallic thread. I worked the red up the sides of the lacy area, including the button hole stitch rows, in sc across to the other end. Because the thread was so fine, I put 2 sc into each stitch of the previous row, except for the sc, which just got one sc into it.
Because I wasn't sure how long of a thread I'd need, I used strands pre-cut to stitching length. The hardest part of this was having to add new threads in - twice. It's the most difficult material I've ever crocheted with.
When that was done, I went back to the Ecru, fastening it to the back where front and back panels separated around the cinnamon sticks, made a chain for hanging, then attached it to the other side of the sticks
All done!
Labels:
backstitch,
Christmas,
Christmas sachets,
crochet - finished details,
decorations,
embroidery,
thread crochet
Saturday, December 13, 2008
Christmas sachet decorations - first one done
My intention was to do all the stitching first, then assemble all the decorations at once. Unfortunately, I haven't been working on them daily, as I should be, and I'm very far behind. My daughter is wanting to get together with a friend this weekend. One of these is for her family, and I don't know that I'll get another chance before Christmas, so I got my daughter to choose one of the pieces I'd finished stitching, and I completed it last night.
If you want to see the photos at full size, they are available here.
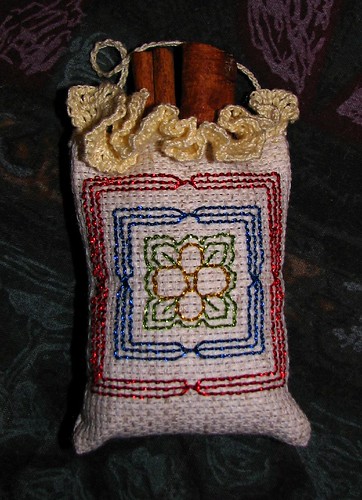
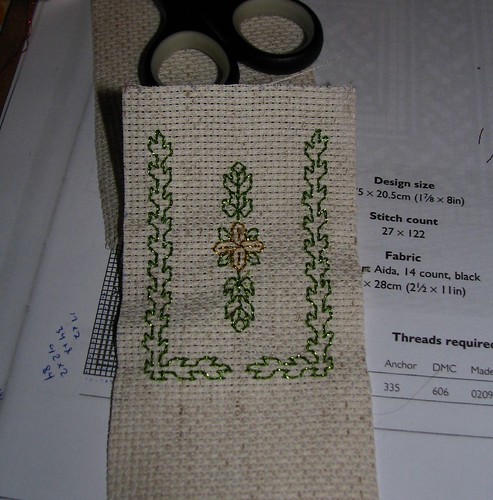
First off, the pattern my daughter chose. Her friend really likes green, so she picked the one with the most green in it. :-D
The pattern details in the background are for a different design I'm currently working on.
It took me a while, but I eventually figured out that I didn't have to do the embroidery on both sides of the decorations, since only one side will be visible. I'm a bit slow sometimes, but I do catch on. ;-)
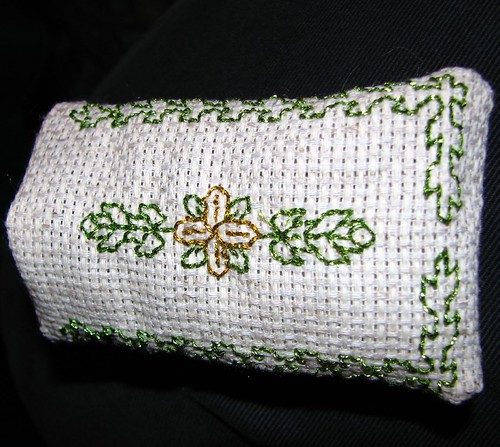
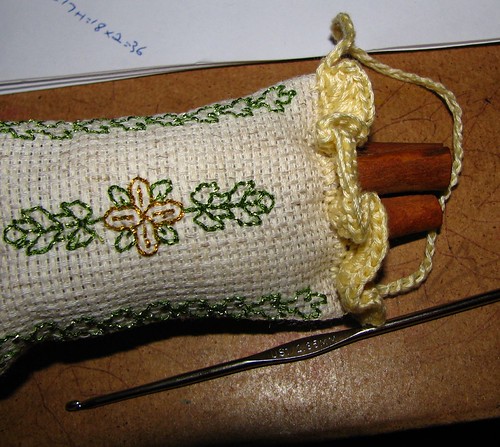
Closing up the sachet. I used some ordinary embroidery thread that fairly closely matched the fabric colour and, with 2 threads on the needle, closed up the sides using a running stitch. I started at the bottom and made sure to catch the "hem" at the top. It probably would've been easier to stitch the fold over first, but I didn't want a row of stitching visible when it was done. It probably wouldn't have made a difference, though.
Flipping it right side out was a bit of a challenge. I was a touch concerned that I'd pull the sides right out. For the smaller ones, I'm going to close them up differently, so that I won't have to flip them.
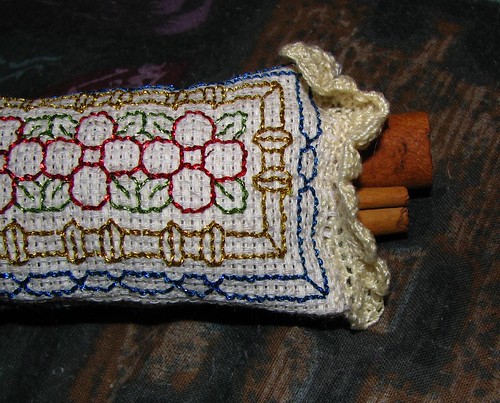
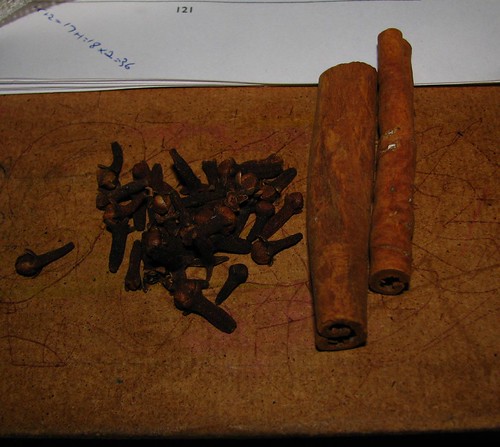
For the filling, I grabbed about a tablespoon of cloves and two short cinnamon sticks. I put a bit of polyester fibre fill into the bottom of the sachet, added the cloves, added a bit more polyfill, then put in the cinnamon sticks. More polyfill went around the sticks to hold them in the middle.
As I was stuffing around the cinnamon sticks, I brought out the vanilla oil. I couldn't find potpourrie type oil in vanilla, but I did find aromatherapy oil. The eye dropper is just something from out medicine cabinet. *L* I added a drop to some of the polyfill, then wrapped it with more polyfill before tucking it behind the cinnamon sticks.
I quickly realized that polyester fibre fill does NOT hold the oil in place. You'll see more on that later.
Once I was satisfied with how much I'd stuffed it, I used the same embroidery thread as earlier to close up the top. Against, I used 2 threads on the needle, and used a button hole stitch to give a base for the crochet to come. I closed up the front and back until I got to the sticks, then did just the front for a while, then caught up the back again when I was past them.
Next, I broke out the crochet hook. I went with a 2.35mm hook and worked with the full 6 strands of embroidery thread. I started with a row of sc all along the button hole stitch edge. When I got to the end, I made a chain long enough to hang it, then slip stitched it into the beginning, making sure to get rid of any twists that happened along the way.
The next row was made up of 2 dc in each sc to get the ruffle effect. At the end I finished it off, leaving a long tail of thread behind.
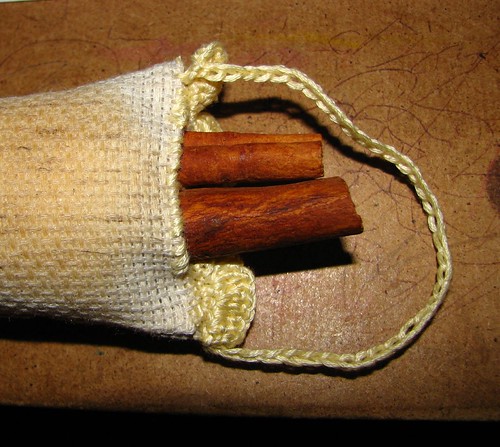
Oops! Remember the issue with the oil I mentioned? It looks like the cinnamon sticks had an accident. *L*
In fastening the crochet, I worked the long thread end into the back of the crochet and button hole stitch base until the front and back diverged. Then I whip stitched behind the cinnamon sticks, adding a stitch to the front in between the sticks to close it up a bit more tightly. To finish, I worked the end into the final bit of crochet and button hole stitch to anchor it before trimming what was left.
This next bit falls thoroughly into the "I'm a flippin' idiot" category. I'd mentioned before that the metallic thread is a real pain to work with. So what do I do? Crochet with it!
I used the full 6 strands and the same size hook as before, putting 2 sc into each dc in the previous row. What a pain in the patookah!! I worked the loose end into the crochet as I went along, too. In the full size photo, you can see the ends sticking out of the crochet. They unraveled and splayed all over the place as I was working. As for the working thread, not all the strands would catch on the hook, so I'd have to undo it a bit to try again. Believe me, you don't want to be undoing more than a stitch or two with this!
It sure does look nice, though!
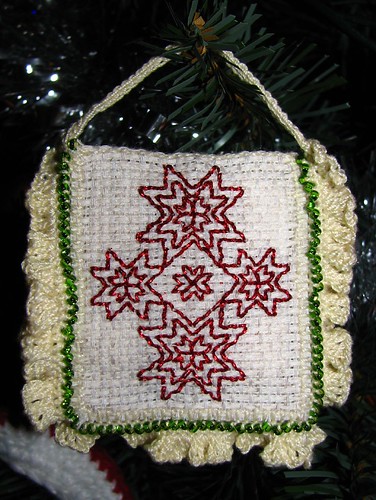
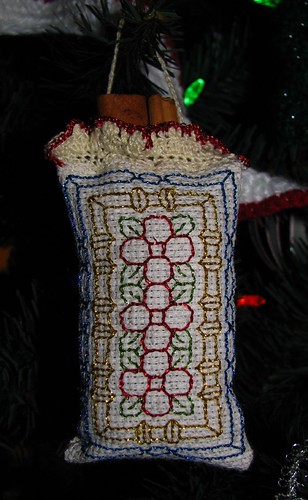
Of course, I had to get a picture with it in the tree. It'll wait there until my daughter takes it with her for her friend.
I like it. :-D
If you want to see the photos at full size, they are available here.
First off, the pattern my daughter chose. Her friend really likes green, so she picked the one with the most green in it. :-D
The pattern details in the background are for a different design I'm currently working on.
It took me a while, but I eventually figured out that I didn't have to do the embroidery on both sides of the decorations, since only one side will be visible. I'm a bit slow sometimes, but I do catch on. ;-)
Closing up the sachet. I used some ordinary embroidery thread that fairly closely matched the fabric colour and, with 2 threads on the needle, closed up the sides using a running stitch. I started at the bottom and made sure to catch the "hem" at the top. It probably would've been easier to stitch the fold over first, but I didn't want a row of stitching visible when it was done. It probably wouldn't have made a difference, though.
Flipping it right side out was a bit of a challenge. I was a touch concerned that I'd pull the sides right out. For the smaller ones, I'm going to close them up differently, so that I won't have to flip them.
For the filling, I grabbed about a tablespoon of cloves and two short cinnamon sticks. I put a bit of polyester fibre fill into the bottom of the sachet, added the cloves, added a bit more polyfill, then put in the cinnamon sticks. More polyfill went around the sticks to hold them in the middle.
As I was stuffing around the cinnamon sticks, I brought out the vanilla oil. I couldn't find potpourrie type oil in vanilla, but I did find aromatherapy oil. The eye dropper is just something from out medicine cabinet. *L* I added a drop to some of the polyfill, then wrapped it with more polyfill before tucking it behind the cinnamon sticks.
I quickly realized that polyester fibre fill does NOT hold the oil in place. You'll see more on that later.
Once I was satisfied with how much I'd stuffed it, I used the same embroidery thread as earlier to close up the top. Against, I used 2 threads on the needle, and used a button hole stitch to give a base for the crochet to come. I closed up the front and back until I got to the sticks, then did just the front for a while, then caught up the back again when I was past them.
Next, I broke out the crochet hook. I went with a 2.35mm hook and worked with the full 6 strands of embroidery thread. I started with a row of sc all along the button hole stitch edge. When I got to the end, I made a chain long enough to hang it, then slip stitched it into the beginning, making sure to get rid of any twists that happened along the way.
The next row was made up of 2 dc in each sc to get the ruffle effect. At the end I finished it off, leaving a long tail of thread behind.
Oops! Remember the issue with the oil I mentioned? It looks like the cinnamon sticks had an accident. *L*
In fastening the crochet, I worked the long thread end into the back of the crochet and button hole stitch base until the front and back diverged. Then I whip stitched behind the cinnamon sticks, adding a stitch to the front in between the sticks to close it up a bit more tightly. To finish, I worked the end into the final bit of crochet and button hole stitch to anchor it before trimming what was left.
This next bit falls thoroughly into the "I'm a flippin' idiot" category. I'd mentioned before that the metallic thread is a real pain to work with. So what do I do? Crochet with it!
I used the full 6 strands and the same size hook as before, putting 2 sc into each dc in the previous row. What a pain in the patookah!! I worked the loose end into the crochet as I went along, too. In the full size photo, you can see the ends sticking out of the crochet. They unraveled and splayed all over the place as I was working. As for the working thread, not all the strands would catch on the hook, so I'd have to undo it a bit to try again. Believe me, you don't want to be undoing more than a stitch or two with this!
It sure does look nice, though!
Of course, I had to get a picture with it in the tree. It'll wait there until my daughter takes it with her for her friend.
I like it. :-D
Labels:
backstitch,
Christmas,
Christmas sachets,
decorations,
embroidery,
thread crochet
Wednesday, December 3, 2008
Blast from the Past: Beaded medallion
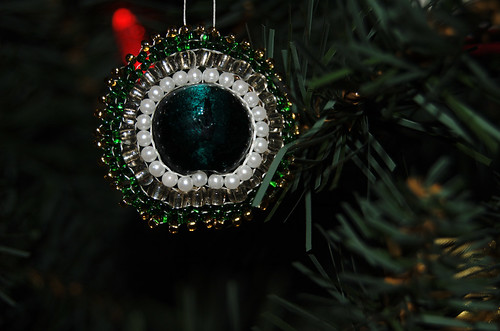
I made these beaded medallions as my Christmas decorations a few years back. The large glass beads I used for the centers were either in this green or a golden brown, in several different shapes.
To make these, I started by making a thread base around the bead. I threaded the bead and tied the thread around quite tightly, then moved the knot into the middle of the bead (the loose end was woven into the beads later on). Next, I added more loops in a sort of figure 8 around and through the bead so that there were three wraps of thread on each side. Still using the same thread, I added the first row of beads in brick stitch onto the base threads, continued with brick stitch for two more rows, then ended with a picot edge. Using the same thread I was beading with, I anchored the beads by going back into them a few times, then made the loop, and finally anchored the end of the thread back into the bead work.
I was really happy with how they turned out. They look really nice in the tree. They're fairly small - about 2 inches across - and would do well on a mini-tree, too.
Labels:
Blast from the past
In the works - Christmas sachets for the tree
Here's what I've got done so far with this year's Christmas decorations.
I've started up a new crafts set on my flickr account that you can visit to view the full size images.
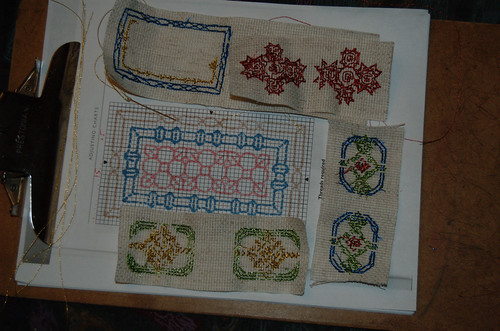
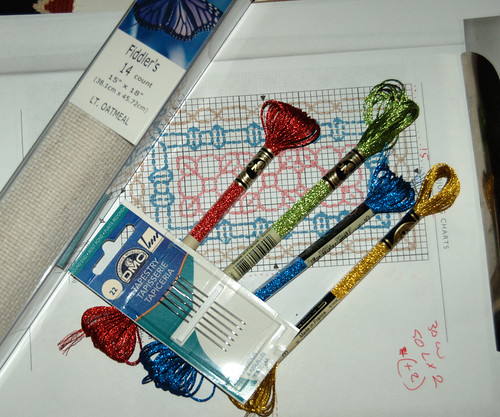
The materials for this project - at least the stitching part of it. Some Aida cloth, Jewel Effects embroidery thread from DMC, and patterns from the book, Creative Backstitch.
I would have preferred to use a different colour of cloth, such as a bright red or a dark green. There wasn't any available, so I went with the off white and chose my thread colours accordingly.
When the stitching is done, the sachets will be filled with cinnamon sticks, which I want to have sticking out the top, some whole cloves, and a bit of fiberfill, which will be scented with vanilla oil.
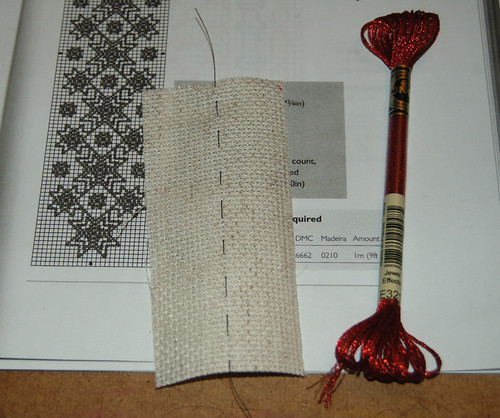
The first pattern I worked on was an adaption of a bookmark. I counted out the number of squares I needed on the Aida cloth, then added a couple extra rows before cutting it out. For these, I only need to mark the centre of the cloth in one direction.
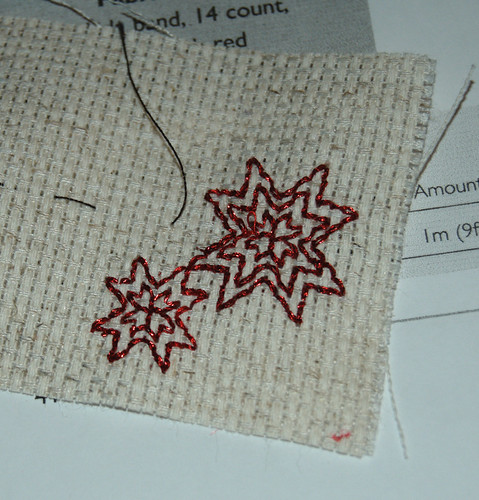
Here's the start of the star pattern. It's been a long time since I've worked on Aida cloth and forgot how easily the edges fray. I should've used some Fraycheck or something. The size of the sachet is a bit on the small size, though, so when I get around to doing the pattern again in a different colour, I'll be cutting out larger pieces of cloth.
I'll be honest - that metallic thread is *horrible* to work with. I'm using 2 strands on the needle, but the strands start to unravel rather quickly, so I find myself with 4 thin strands in no time at all. It also catches (as you can see by the bit of a loop on the larger star) and breaks apart easily. I end up having to use far shorter lengths of thread than I prefer. I dislike having to restart new threads so frequently. Still, the sparkle is beautiful, and that's what I'm after, so it's worth the frustration.
A view of the back of the work in progress (like I mentioned before, I find I learn quite a bit from the back of a piece of embroidery).
That's another area where this thread is irritating. The ends don't like to stay anchored, and when stitching over them on the back to hold the ends in place, little strands tend to catch and get pulled to the front.
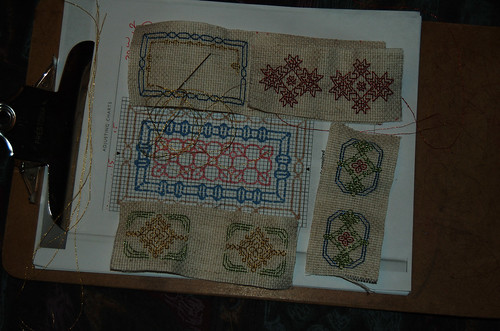
Now we're into photos I took today. This is a view of what I've got done so far. The one on the bottom and the one on the right were both actual sachet patterns from the book, which were stuffed with lavender blossums. I added more rows to the sides than I did for the stars pattern, but I'll be going even bigger for others done in the same patterns.
The piece in progress at the top is a pattern from the book that was modified for a needle case. I still added a couple extra rows, and I'm liking this size.
A quick look at the backs.
A closer look at the front. In the book, these were done all in one colour in regular embroidery thread. Half the fun is modifying a pattern to suit my own preferences. :-D
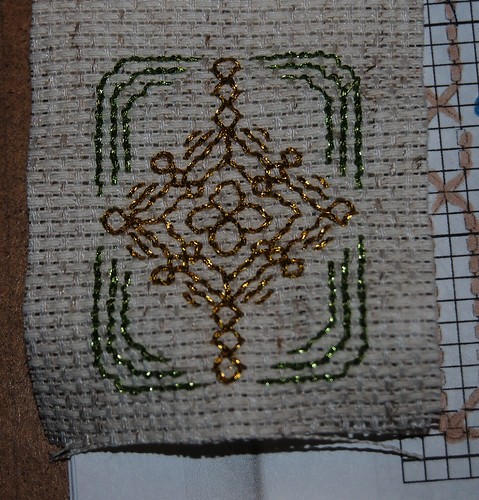
A look at the finished stitching of the modified bookmark pattern.
A closer look at another of the sachet patterns. You can see that the edge on the right, which will be part of the top of the sachet, is fraying quite a bit. Even with the extra rows I've added, it's going to be a bit of a problem when it comes time to finish the top.
I'm going to do all the stitching first, then will do all the assembly, stuffing and finishing at once. I hope to make about a dozen of these, but I'll be happy with 8 or 10, if I start to run out of time.
Labels:
backstitch,
Christmas,
Christmas sachets,
decorations,
embroidery,
thread crochet
Subscribe to:
Posts (Atom)