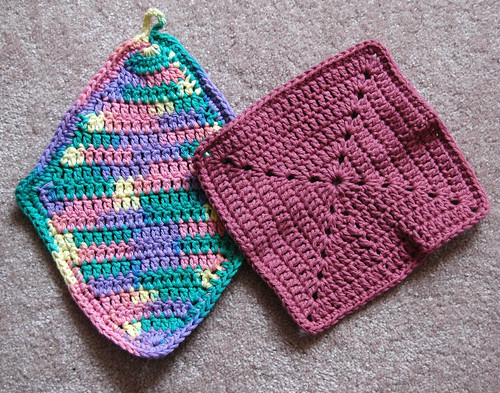
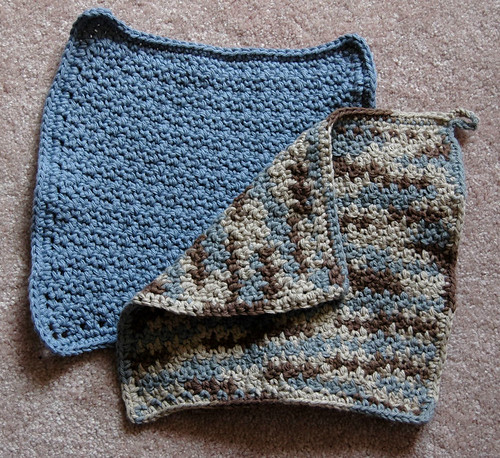
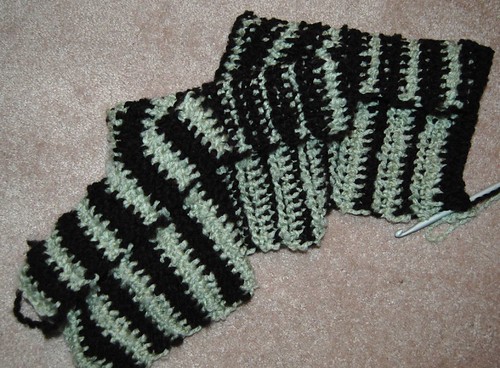
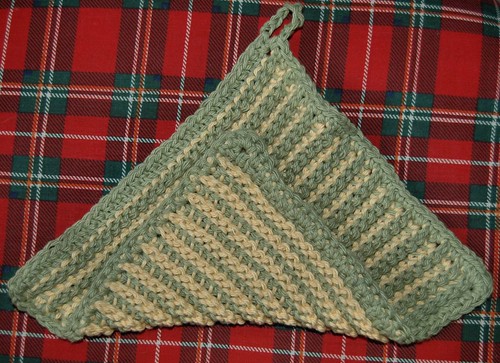
Here are a few more items I made to build up an inventory for this weekend.
I finished a couple more tawashi, with more in the works.
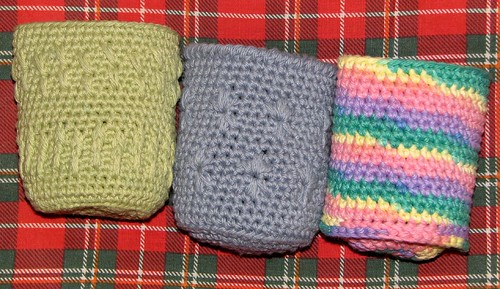
I've got a few java jackets ready, and will be able to do more tonight. They're very quick and easy. These were made using some worsted weight acrylic yarn and a 4.25mm hook, and sized to fit some Tim Horton's take out cups. I played around with different patterns, and will post instructions for them another time.
I've also been playing around with cup cozie designs.
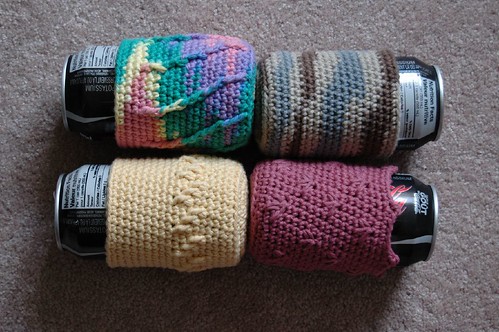
A few last can cozies for the collection - with the rainbow one, I was experimenting with a way to make a flat, slightly wider, base. The others were worked in a spiral, but that one was worked in rounds.
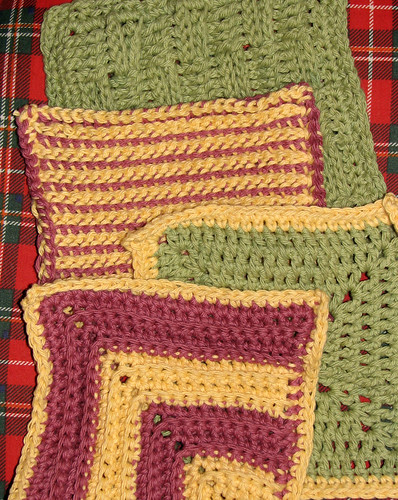
Finally, a few last dishcloths and another double-ended hook potholder.
I think I've got a decent amount of items for tomorrow's garage sale. I'm quite curious as to what kind of feedback I'll get with them. We never really found anything else for the sale - one of the side benefits of moving so often, I guess. *L* My older daughter has done some baking for her contribution.
Should be fun. :-)
Friday, May 28, 2010
More inventory
Labels:
crochet,
crochet - can cozie,
crochet - cup cozie,
crochet - java jacket,
double-end crochet,
tawashi
Finished - Moebius shawl
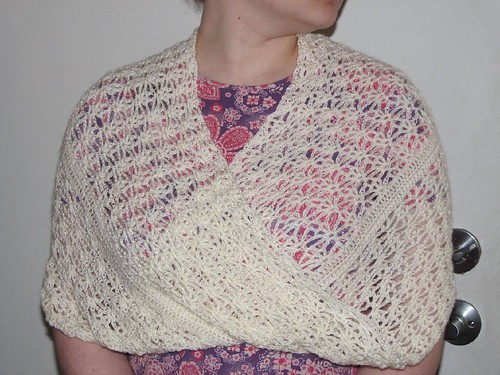
This week's Feature Friday is being taken over today with a couple of posts. First up is my finished Moebius Shawl.
Actually, shawl is probably the wrong word for it. Wrap, maybe? My younger daughter has graciously modelled it for me in these phots. First, worn around the shoulders.
The yarn is Bernat Baby, a 100% fingering weight yarn (superfine, 1). It's machine washable and dryable. It took two 50g/1.75 oz (about 247 m / 270 yards) balls to make this. I used a 5.00 mm hook instead of the suggested 3.50 mm. It turned out light and airy, just as I wanted it. The foundation chain for this was 220 stitches (the pattern I chose was a 10 stitch repeat). Because of the Moebius twist in the foundation, that made the first row of double crochet 440 stitches.
The wrap is light enough to work well as a scarf/neckwarmer.
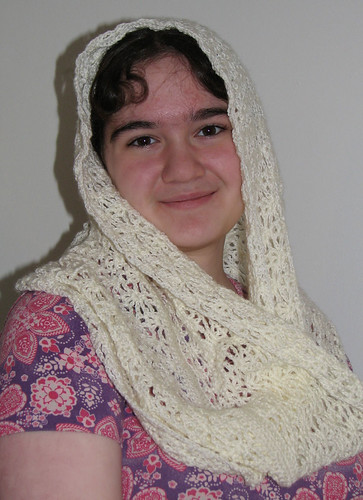
It does pretty well as a cowl, too. :-)
I think my daughter is hoping it doesn't sell over the weekend. She really likes it. :-D
Labels:
crochet,
crochet - finished details,
moebius
Wednesday, May 26, 2010
New yarns
The girls and I recently checked out Knit and Purl, a local yarn shop near one of our favorite haunts. I love the specialty shops.. and yet I don't! So many beautiful yarns - such high prices! Yeah, I know, they're worth it... I just hate spending money.
We did pick up a couple of new yarns, though. My younger daughter chose these two skeins.
I managed to snag a photo before she balled up the second one. This is Misti Cotton, 2 ply, 83% Peruvian Pima Cotton, 17% Silk. It's 175m, 100 grs, hand wash, lay flat to dry, gentle iron, dryclean symbol P; no hanging, no drier, no sunlight (??), no bleach, no... I'm not sure what the symbol stands for, but it looks like a candy in a twisted wrapper. *L* This beautiful green is Eucalyptus Leaf, 8912. We got it at a sale price of $9.99 - I don't remember what the regular price was anymore. My daughter has no idea what she will make with it, but that's okay. It can sit in her stash and inspire her. It feels absolutely glorious! Incredibly soft and pliable.
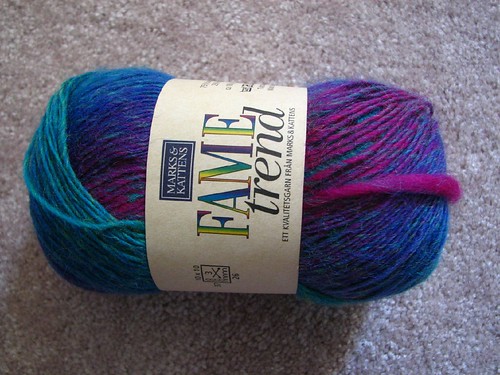
For my own choice, I picked something I normally don't - bright, rainbow colours!
This is Marks & Kattens Fame trend. 75% Superwash ull (wool), 25% polyamid. 100g and a very generous 420 m. Care instructions are to wash separately, no iron, no bleach, no drier, lay flat to dry, dryclean symbol P. The colourway number is 653. It put me back $15.99 The feel is every so slightly scratchy.
I don't normally go for brights, but these colours really appeal to me. I want to make something with it that will highlight the gradients. I've been going through my patterns, and I think I've found a nice, simple yet airy half-circle shawl that will work rather well. I won't be starting it until after I'm done with the garage sale this weekend, and finished the last of the amigurumi necromorph I promised to someone ages ago.
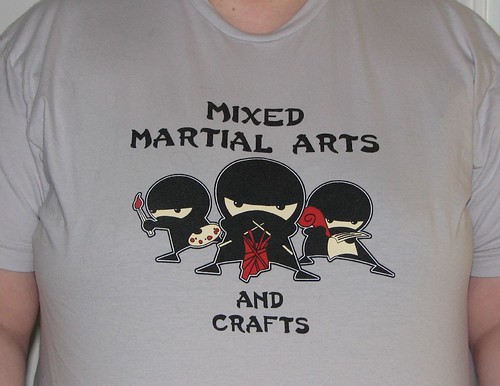
Oh, and one more photo to share... a Mother's Day gift from my husband came in the mail recently. This is my new favorite t-shirt!!
I've told him the next one I want has a crochet hook on the back and reads "don't talk to me, I'm counting!"
Friday, May 21, 2010
Feature Friday: freestyle embroidery
This week I decided to combine my Feature Friday with a Blast from the Past.
Free style embroidery uses the same stitches are non-freestyle embroidery - and there are a great many types of stitches! The only difference is that it's not usually done from a pattern or transfer. I prefer freestyle, as I like to make things up as I go along.
There's a bit of a story behind the piece featured below.
I've always been a doodler. Few surfaces escaped my restless hands. One of my first jobs after I moved out on my own was at a sports apparel company, prepping orders, doing quality control and packing them for shipping. What my clothes looked like didn't matter a whole lot, since clients never saw me. I wore the same kind of heavy duty jeans I used for throwing bales on the farm, and always had in my pockets a pen, box cutter and permanent marker.
During breaks, my restless fingers soon had me doodling on my own jeans with the permanent marker. I usually drew a particular image, upside down, on the front of my thighs. After a few washes, the doodles would fade, and I'd draw over the lines again with my marker.
The job entailed a fair amount of wear and tear on my clothes, so it wasn't long before I had holes in my knees. Being the frugal sort (or perhaps miserly would be more appropriate a description), I chose to repair the holes in my knees. I didn't like patches. Instead, I drew a loose outline of a rose that covered the hole by a generous amount, then filled it in with satin stitch. The result was a very durable patch that didn't look like a patch.
Fast forward a few years. Now married and living in BC, my husband found himself a denim jacket that had a large blank panel on the back. He let me draw on it using fabric markers. I did drawings up the sleeves, across the yoke on the back and, of course, the large back panel. Those still faded with washing, so I tried fabric paints in one section. I didn't like how the fabric felt afterwards, so I didn't do any more. I kept recolouring with fabric markers as the jacket faded, and the designs along with it.
By this time, my husband had given me the jacket.
Eventually I got tired of that and decided the only way to make the back design permanent was to embroider it. Until then, my knee patches were the most ambitious pieces I'd attempted. This was to be my first major embroidery piece.
It took me 6 months of stitching - spread over 9 months.
I loved that jacket so much, I wore it until it fell apart. When it was no longer salvageable, I cut off the back panel, and have kept it ever since.
Here it is.
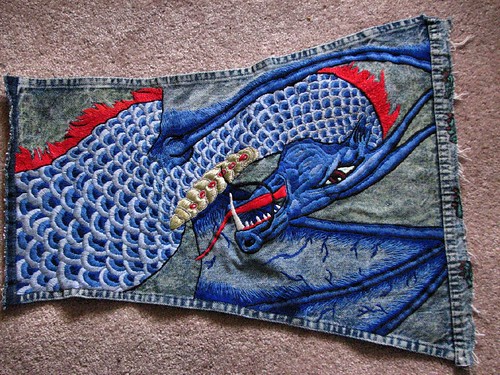
This is an overview of the entire piece, which is done mostly in satin stitch, which remains my favourite stitch.
I played around with different blues to shade the face. In this photo, you can actually see the sloppier stitches where I'd started, and hadn't quite gotten the hang of stitching, at the top of the neck, between the head and red mane. The mane was done in long and short stitch, with a strand of metallic filament added to the embroidery floss for a bit of sparkle. I'd added a silver strand to the white thread I did the teeth with.
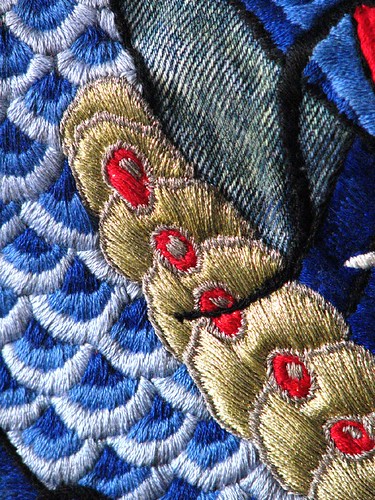
The chest plate was done in metallic embroidery thread in gold and silver, with embroidery floss for the red "rubies." The metallic thread was an incredible pain to work with! It was constantly fraying at the ends and breaking at the needle. After a while, I gave up on using the short threads recommended. Instead, I used a very long thread, with the needle near the very end. I'd do a few stitches, move the needle down and away from where the thread was already starting to break, trim the end of fraying bits, do a few more stitches, move the needle again, and so on. There was a lot of wasted thread that way, but I was no longer starting new ones every ten or so stitches!
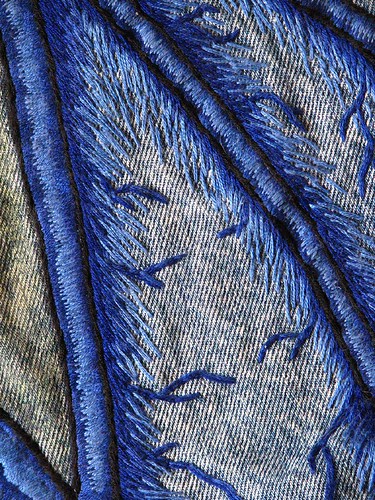
The shading of the wings were done in long and short stitch, while the blood vessels were done in stem stitch.
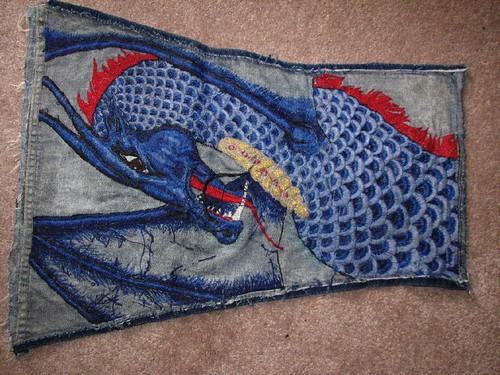
When it was finished, I covered the entire inside of the panel with embroidery glue to protect the strands from catching on anything.
The very last thing I did was some time after the embroidery was finished. If you look back at the photos above, you might notice a difference in colour in the denim surrounding the dragon, but not in the wing area. That is from glow in the dark paint. Once fully charged, the phosphorescent paint formed a bright outline of the overall dragon shape.
I got a lot of compliments and feedback while wearing this jacket, and one guy at a bus stop even offered to buy it. I wasn't willing to part with it.
This is just one rather large example of freestyle embroidery. Over the years I've done a few other small pieces. When my girls were small, I made a couple of vests for them. One, in royal blue, has seashells, an eel, and fish done in white stem stitch outlines. Another, in dusty rose, has several butterflies. That one was made extra special, as the embroidery threads, including some in silk, were from my late Great Aunt's stash, which my mother got after her aunt died and passed on to me, since my mother doesn't do embroidery herself.
Freestyle embroidery is a great way to embellish wearables - and can have the extra benefit of strengthening clothing in hard wearing areas.
If you're not too keen on sketching your own designs, go ahead and find some iron on transfers. There's no need to learn a lot of stitches and their variations, either. Most of my own work has been done in only three stitches - long and short (great for shading or blending colours), stem (excellent for curved lines) and satin (for a solid sheen). There's certainly no shortage of colours to choose from in basic cotton embroidery floss, though if you have access to a specialty shop, it's fun to try out different fibres, too.
Fabric or some clothing item to stitch, a variety of sharp pointed embroidery needles (which have larger holes than sewing needles), a pile of floss in different colours, scissors and maybe an embroidery hoop. You don't need much to get started. Practise some stitches on some scrap fabric, or even create your own little sampler of different stitches to see how they look.
Hhhhmmm... now I'm itching to stitch!
Labels:
Blast from the past,
embroidery,
Feature Friday
Saturday, May 15, 2010
Building inventory
Our co-op has an annual spring garage sale. We hadn't been living here long when the first one happened, but have signed up for a table this year. With the feedback I had during our Christmas Craft Sale last year, I decided to test the waters a bit and include some small crocheted items, plus a couple of bigger pieces.
Working on those has kept my hands nice and busy. :-D
Most of what I'm doing are quick, useful things like dishcloths, pot holders and can cozies in Handicrafter cotton. Here are some of the pieces I've got so for. There are a few others that I forgot about when I took the photos, but I'll do those another time.
The cloth is done in tunisian stitch. I started off doing single stitches, as I had been with the double ended hook technique, but found the fabric curled up quite a lot. I didn't want to have to block a dish cloth, so I switched to double stitches. I ended up blocking it anyway, as tunisian tends to slant to one side quite a lot.
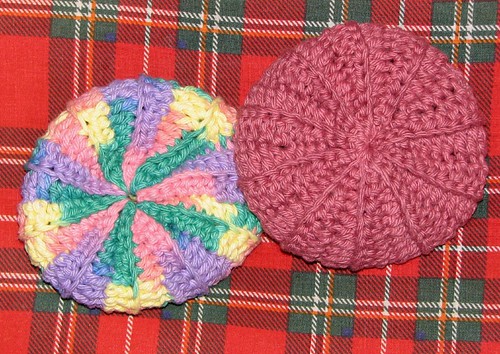
So far, this is the only tawashi I've done, but will be doing more with multiple colours when my skeins of yarn start getting too small to do full sized items.
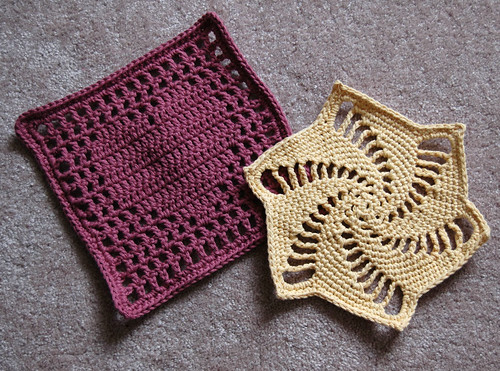
I started getting tired of doing simple squares and rectangles, so I did my first ever filet crochet, finding a heart motif in one of my craft books, and a star motif using only single crochet and chain stitches that I found in another of my books. I just made it bigger than the pattern in the book, then finished is with a single crochet edging, adding picots to the tips to make them ore defined.
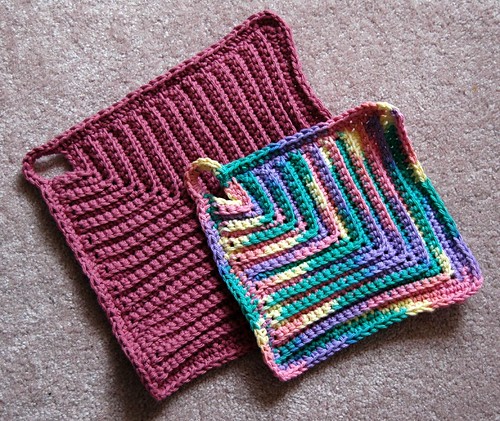
This herringbone pattern is from working in the back loops only. It's a bit like working a single ripple of a ripple afghan, without reducing at the ends of the rows.
I'll be making more of these potholders with the double ended hook. I've made a variation of these that resulted in a MUCH thicker fabric that I'll be giving more info about in its own post.
Just some simple dishcloths using double crochet stitches.
The basketweave pattern makes this ideal for potholders, while still being flexible enough to be a nicely textured washcloth.
The texture on these was created by alternating sc and dc stitches all the way across, then working sc into the dc of the previous row and dc into the sc of the previous row.
More can cozies! I love these things. I've been experimenting with textures, which serve as extra grip when being held.
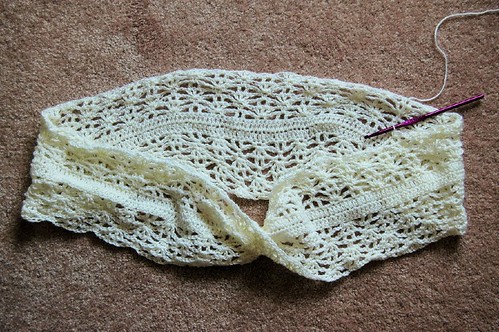
Here is a more intricate piece I want to try out; a Moebius shawl (also spelled Mobius and Möbius) in fingering weight yarn. Usually when joining a long chain into a loop, great care is taken to ensure there are no twists. Here, a single twist is deliberately introduced to create a one-sided form.
This is less than half the width it will be when it's done. I spent quite a bit of time flipping through my pattern books to find something that was lacy and open enough to wear in the summer, yet dense enough that it wouldn't be too fragile. It's meant to be worn with the twist in the front, around the shoulders as a shawl, or as a cowl or neckwarmer.
Labels:
crochet,
crochet - can cozie,
crochet - misc,
double-end crochet,
moebius,
tawashi
Friday, May 14, 2010
Feature Friday: Loom knitting
A friend of mine has taken up loom knitting, and seeing her work, I'm definitely going to pick up a set of looms and try it myself in the future! For now though, here are a few pieces from Laura, done on knitting looms.
If you've ever done corking before, you can knit on a loom, as it's the same basic principle. Looms are available in a variety of shapes and sizes, and would be ideal for people with hand troubles that make knitting with needles painful.
Here's Laura's take on it.
"I picked up the loom knitting this past winter since I liked the IDEA of knitting, but didn't like dealing with two needles. I loved it instantly. I still consider myself fairly novice, but it's so easy to create things that I'd never be able to do with needles.
Hats are usually the first thing everyone tries because it just means knitting on the loom in the round, then picking up the stitches at the end and pulling them together with a piece of yarn.
After that, I started experimenting with mittens (I purchased a special loom for this) and scarves.
The scarf in the picture was made with Red Heart Pomp-a-Doodle yarn and with the way you can straight-knit on the loom, the pompoms never get in the way."
You can see some of Laura's other lovely items in her Artfire shop.
Labels:
Feature Friday,
knitting loom
Tuesday, May 4, 2010
Follow up - double ended crochet
After doing the Feature Friday on double ended crochet, I spent some time looking at tutorials and figuring out what I was doing wrong. I then continued the piece I was working before, this time doing it right.
I wasn't impressed.
In this photo, I've got the piece folded in half to show both sides. I tried it using both single and double stitches. I liked the double stitches better, but not by much. In fact, I liked the section I'd done wrong better. I figured if all I wanted was stripes, I wouldn't bother using a double crochet hook at all.
I ended up ripping the whole thing and putting the hook away for a while. I did use it later on to experiment with tunisian stitch, but that's about it.
We've got a garage sale in our co-op coming up, and I decided to make a few quick pieces to see how they sell. For now, I've been making dishcloths, can cozies, etc. in Handicrafter Cotton, which I find I really like. It's a very versatile and easy care yarn. After looking at different ideas, I tried the double ended crochet hook again.
What a difference!
Now THIS I like! The finished piece is thick enough to be a potholder, though it could also be a dishcloth. It has an almost spongy feel to it. It's done in single stitch, yet remains flexible and soft. I'm really happy with how it turned out.
I'll be making more of these!
Labels:
crochet,
double-end crochet
Subscribe to:
Posts (Atom)