Pages

Showing posts with label crochet - hat. Show all posts

Sunday, October 3, 2010

Crossed Cables hat

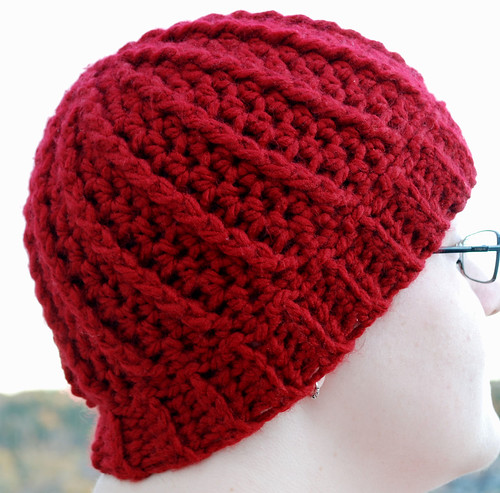
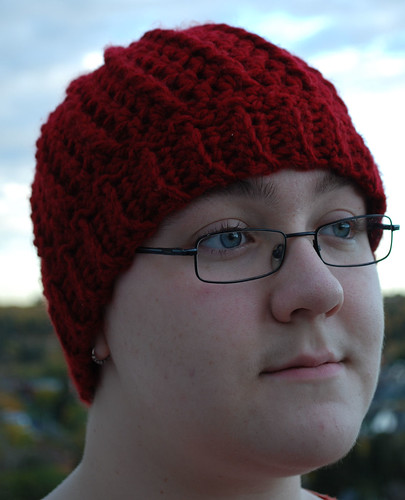
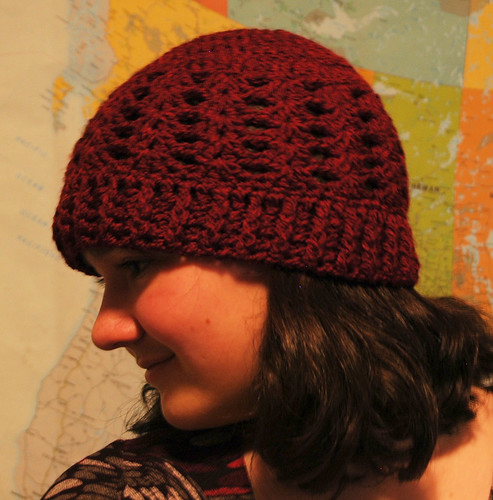
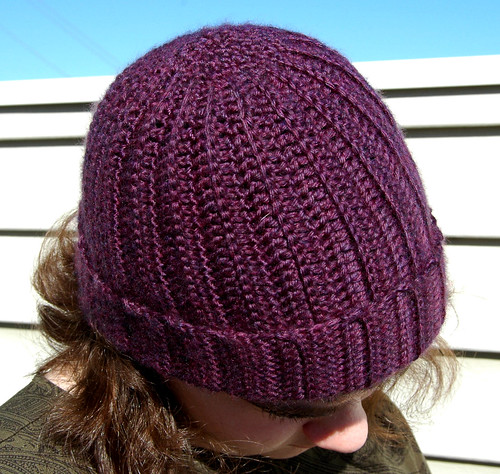
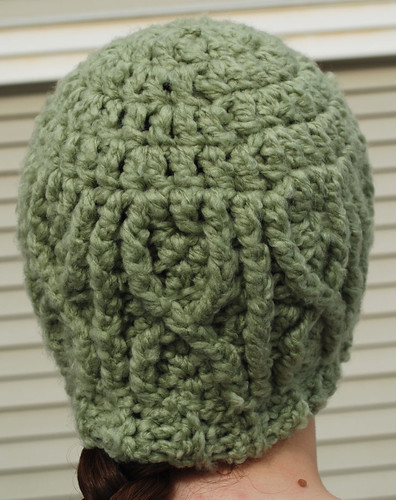
I got some photos today of another cable hat I'd missed earlier.  My younger daughter has claimed this one for herself.


Crossed Cables

This piece was worked using two strands of Harmony yarn and a 9.00mm hook.  The crown was done in a flat disk of double crochet stitches.  When I reached the size I wanted, I did one round of dc without any increases, then started on the front post stitches to make the cables.

Crossed Cables

The patterns was determined by the number of stitches I ended up having, which was a multiple of five.  The first couple of rounds were in groups of 3 fpdc and 2 hdc.  After that, I split up the first and last fpdc to start the X.

Working the cables really pulled in the sides.  When not worn, the sides look completely straight, rather than gently curving outwards as most of the hats tend to. 

Crossed Cables

The last bit was worked the same was as the Green Cables hat. 

The entire piece was a touch longer than I usually make for a hat that doesn't get turned up - something my daughter really likes!

I'm rather happy with how it turned out, though if I do it again I might change the crossed front post double stitches to front post triple stitches.  I think that would prevent the pulling in.  On the other hand the hat wouldn't be quite a snug as it is, and I don't think I'd want it any looser.  Perhaps if using a thinner yarn or smaller hook, it would be more of a concern.  As it is, I think it worked our rather well.

Tuesday, September 28, 2010

Cable Madness

After playing around with cables in the last three hats, I decided to play around a bit more.  I used the leftover yarn used in the Red and Green Cable Hats.  I made things up as I went along a lot more than I did with the previous hats.  I also used the 6.00mm hook again.

The first change I made was right from the start, with a small peak.
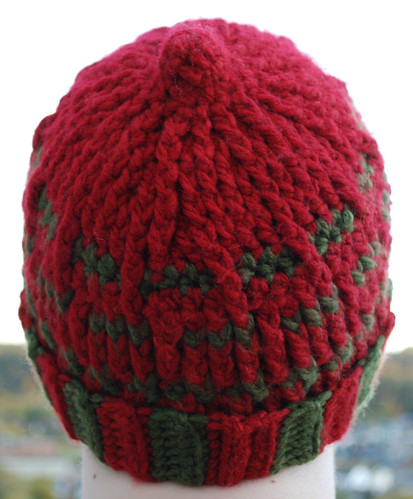
Cable Madness

I started off with 9 dc in a magic ring, then did the next round in 9 dc at well.  The next round was increased with 12 hdc.  After that, I started working the front post double stitches.  I can't remember where I placed the increases, but whenever I did, it was with an hdc worked after a fpdc stitch was done.  In the next round, that hdc would have a fpdc stitched worked around it, making for a crown of solid cables.
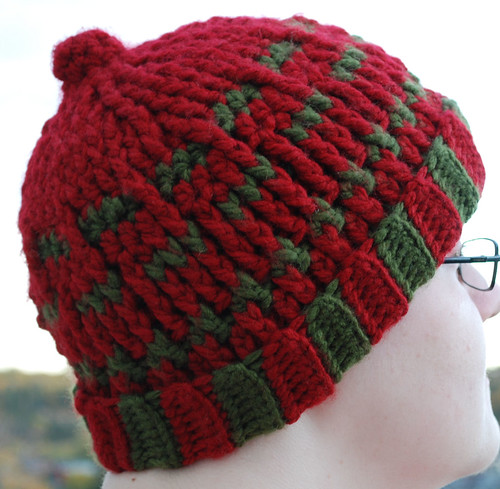
Cable Madness

Looking at this view, you can see why our alternative name for this is "the nipple hat." ;-)

The first round I made without any more increases was done in green hdc.  That's when I finally stopped to count and see how many stitches I had in the round.  I can't remember the final number, but it was divisible by four, which is why you can see a red cable over the green at every 4th stitch, and that it was a higher number than the Red and Green Cables hats.  Though it was a higher number of stitches, doing all but the increase stitches in fpdc made it actually a touch smaller than the Red Cables hat, which was done with the same size hook.

Note: When changing colours, I simply dropped the yarn and took up the new colour.  This left a vertical row visible on the inside of the hat.  Hmm... now that I think about it, I should have taken a photo of how the inside of this hat looks.  Will have to keep that in mind.


The first red round after the first green round was made up of 3 hdc followed by 1 front post triple crochet stitch (fptc), going around a corresponding stitch in the last round of red in the crown.  The next round in red worked 1 hdc into each hdc of the previous round, and 1 fpdc around the fptc of the previous round.  That was followed by another round of green, this time doing all fpdc.  When I switched back to red again, I worked a pattern of 3 fpdc, 1 fptc, with the fptc worked around a fpdc just after where the previous fptc had been worked.  I did another round of all fpdc in red, then switched to green again.  This third round of green alternated 1 hdc and 1 fpdc.

The next rounds are hidden by the upturned cuff.  The next round switched back to red, this time working an hdc into the fpdc of the previous green round, and a fpdc around the hdc of the previous green round.  Another round of just fpdc in red was worked.

The last rounds before the cuff of the hat were done in green.  One round of all fpdc was done, then another round of hdc was worked *in between* each stitch of the previous round.
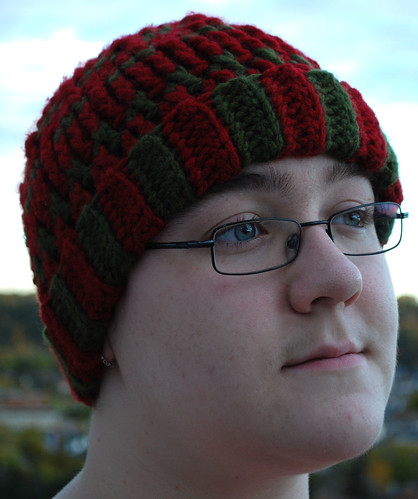

Cable Madness

The ridged cuff of the hat was then worked in the same manner as the Red and Green Cables hats, using a starting chain of 9 stitches, making for a cuff 8 stitches wide.  To alternate colours, I would just drop the yarn from one colour, then pick up the next, making sure that the yarn was pulled snug whenever I changed back again.  When the cuff is turned up, it naturally folds at the last round of green hdc, so what you're seeing in this photo is almost the entire width of the cuff. 

As you can see by the instructions, there was really no rhyme or reason to making this hat.  I was just playing with cables and wanted to see what an all-over cable design would look like.  With so many fpdc used, the entire hat is actually a touch smaller than usual for this size of yarn and the hook size used.  It's a tighter fit than the Red Cables hat, even though the same hook size is used, and the crown is larger, with a greater total number of stitches in the rounds making up the sides.  In fact, it would probably fit an older child better than an adult.

Would I make this hat again?  Probably not.  Am I glad I made it?  Yes.  It was fun to wing it as I went along.  The closest thing I had to a plan in making this was "use lots of front post stitches."  That and I wanted to use up some of the left over yarn from the previous hats.

Which, by the way, each needed 2 skeins of yarn, though more than half a skein of each colour was left over when they were done, leaving me plenty to make this one.
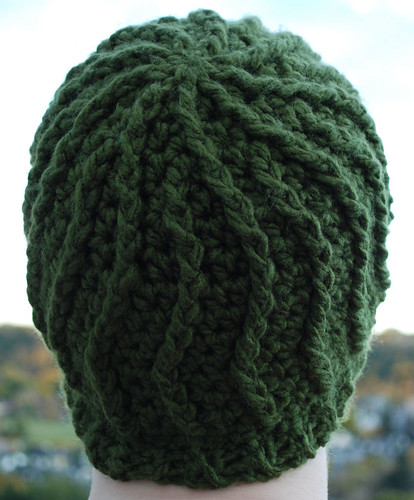
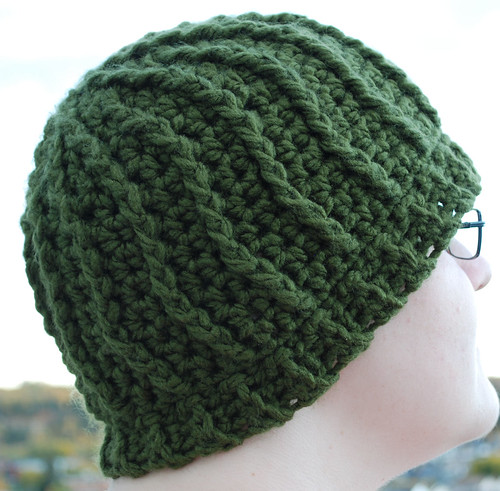
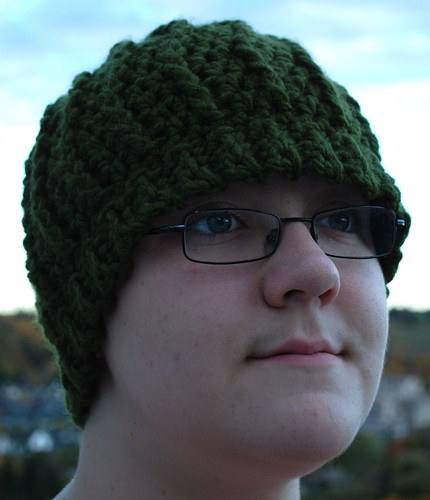
Green Cables

This next hat was done almost the same way as the Red Cables hat.  Even the yarn type is the same.  There are just a couple of notable differences.  First off, I used a 9.00mm hook. With the same number of stitches used in each round that was done in the Red Cables version, this made it a size larger than what I usually make.

Green Cables

Though I used the same number of stitches, you can see that I joined the new cable into a different spot than the Red Cable hat, as well as experimenting when where I attached the fpdc to create the wavy cables.

Green Cables

You can see the changes in direction of the cables a bit better here.

The ribbing around the edge was also done the same way as the red version, including the round of sc done first.  The ribbing is only 3 sc long, which means I started it with a chain of 4 instead of 5.


Green Cables

Even with the narrower ribbing, this version is a fair bit longer than the red one.  It's a bit lower over the eyes than I normally like, but has better ear coverage.

I do like this variation of the cable hat, but I think the 9mm hook is a bit too big.  It's a great way to make a larger hat without having to change the number of stitches in the pattern, though.

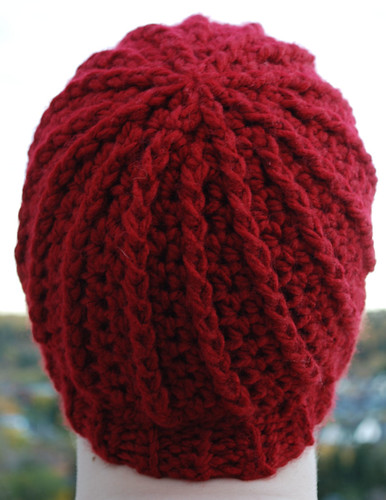
Red Cables

Here's the next piece in my recent group of hat experiments.

I was looking to try out a new yarn with this hat, Loops & Threads, Charisma from a local Michaels.  It's a very soft, 100% Acrylic, bulky (5) yarn made in Turkey.  Machine washable and dryable.  Recommended hook size is 8mm.

I don't have an 8mm hook.  I have a 7mm, which is being used by one of my daughters for something else.  It's also a plastic hook, the same as my 10mm, that I can't stand using.  They have an odd, sticky sort of feel to them.  I prefer aluminum hooks, and I have a 9mm hook in aluminum, which I used for a different hat.  For this project, I went with my 6mm hook.

Red Cables

The basic structure of this hat is the same as my previous ones - flat disc for a crown with straight sides.  I decided to do a very simple cable pattern so I could see just how much of a natural curve developed.  I  started this one by working 8 dc into a magic ring.  The next round worked 1 fpdc and 1 hdc into each dc of the previous round.  The following round worked 1 fpdc and 1 hdc into the fpdc of the previous round, then 1 hdc into the hdc of the previous round.  In the following round, I added another cable by working 1 fpdc, 1hdc into the fpdc of the previous round, 1 fpdc around the first hdc of the previous round, then 1 hdc into the last hdc before the fpdc of the previous round.

For the following increase rounds, I alternated where the increase hdc was added so that each cable had the same number of hdc on either side of it until the disc was the size I wanted, which was at 1 fpdc, 2 hdc all the way around using this yarn and hook size.  Had I been working with a thinner yarn that needed more rounds to reach the size I wanted, I would have added another cable into the next increase round in the same manner as before; the key being adding a new cable where the next increase round would make an odd number of stitches in between the existing cables.  This way, the new cable is added by working a fpdc around the middle stitch between the existing cables.


Red Cables

That pattern was continued to build up the sides for several more rows until it reached about half way down my forehead when I tried it on.

I decided to change directions for the ribbed finish.  First, I did one more round in sc.  After slip stitching the round closed, I chained 5, then worked 4 sc back down the chain.  At the end, I slip stitched into each of the next two sc in the body, then turned, rotating counter clockwise and pulling the yarn strand across the top and tucking it snug against the body of the hat so that it's between the slip stitch and the first stitch worked in the new row.  I find this looks better than rotating clockwise.  Whichever direction you choose, just make sure it's dine the same all the way around.

The next row is 4 sc worked into the back loops only of each sc in the previous row.  Ch 1, then turn.  That pattern was repeated all the way around.

Red Cables

The last row in the ribbing ends away from the body of the hat with a ch 1.  Working on the inside of the hat, the first and last rows were slip stitched together.

I like the simplicity of this pattern.  The gentle curve of the cables that naturally forms when working in the round is quite attractive, I think. 

I really enjoyed working with this yarn, too.  It's got a nice texture, flows smoothly and doesn't have a tendancy to split like so many bulkier yarns do.  The finished hat is very light and warm.  A very nice yarn for winter headgear.  I just picked up a couple more skeins last night, since it happens to be on sale again right now.  It's a less expensive yarn, but I still hate paying full price. *L*

Autumn Basketweave hat

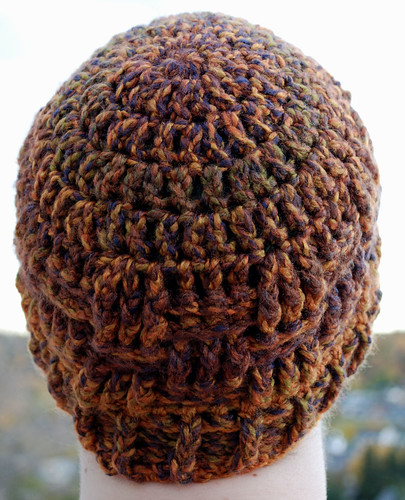
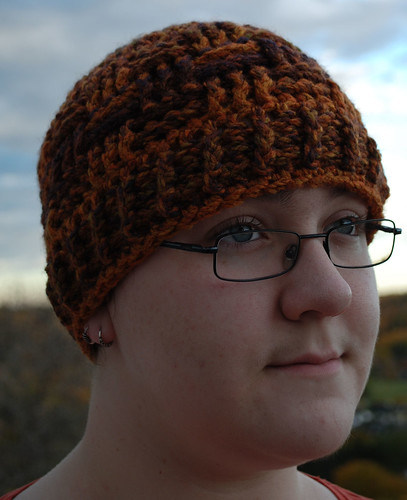
This next hat was made using the same yarn as my Simplicity Itself Reading Jacket and a 6.00mm hook.  I really love this yarn.  It's got a wonderful feel and I like the gradual shading.

The hat itself is pretty basic.

Autumn Basketweave

I started with 8 sc in a magic ring, then worked the flat disc for the crown in dc until it had the diameter I wanted. 


Autumn Basketweave

This sides were worked in a basketweave pattern, which is just alternating groups of front post and back post dc.  To figure out how many in each group, I divided the total number of stitches in the crown's final round by different numbers to see which would give me an even number of groupings.  The even number ensures that the last group is done in the opposite stitches of the first group, so if you start with a group of fpdc, you'll finish the round with a group of bpdc.  With the gauge in this hat, it worked out to multiples of 3, so that's how many stitches I did in each group.  I could have gone with 6, but I thought it wouldn't have looked as good.  Personally, I would not go with more than 5 stitches per group, just for aesthetic reasons.  If you like a larger grouping, go for it.

The first round was done in just dc with no increases to get the straight side started, then the second round was done in groups of 3 fpdc, 3 bpdc around.  The third round reversed the pattern, doing bpdc into the fpdc of the previous round.  The fourth round worked fpdc into fpdc, bpdc into bpdc, matching the 3rd round, then the pattern got switched again in the 5th and 6th rounds.  I stopped at 6 rounds, but if you wanted something a touch longer, you could add a couple more rounds here, or into the "cuff" section.

Autumn Basketweave

The hat was then finished with a "cuff" alternating one front and one back post dc for three more rounds and a final round of sc.  That last round of sc pulls the edge in just a little bit, so it not only tidies up the edge nicely, but it makes for a snug, draft free fit.

If I wanted to, I could have continued the rounds of alternating front and back post dc until it was long enough to be turned up when worn, but I think with this yarn, it would have been a bit too thick.  I could also have added an earflap section as in my Cable Petals hat.

I've made hats with this basketweave pattern a few times, with each one being slightly different due to the thickness of yarn and hook size.  It's a really basic hat with just enough texture to make it interesting, yet it's still the type of thing you can work on while watching a movie or having a conversation. 

Monday, September 27, 2010

Cable Petals

Recently, I got an itch to experiment with crochet cables.  The result was several hats.  Although I had no pattern or plan in mind, I used the same basic structure for all but one of them.  The crown of the hat is done in a flat disc until it's just wide enough to cover the top of a head, then the sides are worked without increases to various lengths, depending on if I want to so a ribbed "cuff" or add extras such as ear flaps.

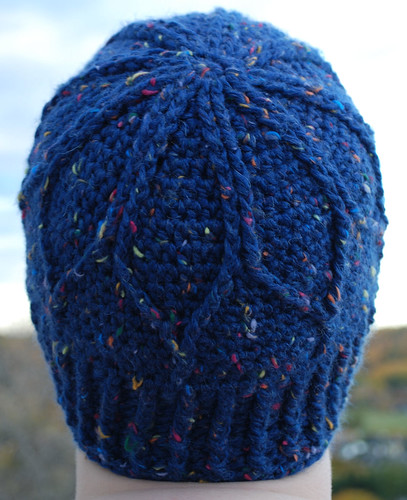
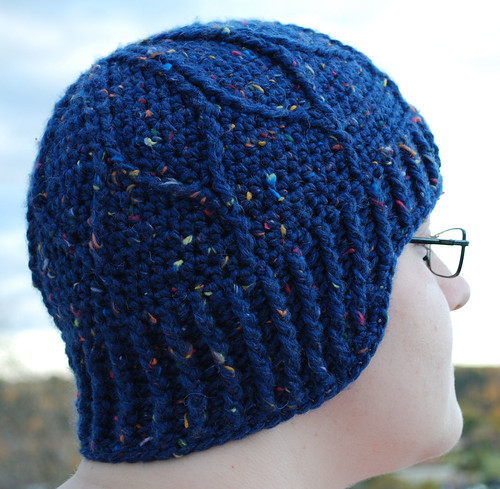
For this hat, I used a some Patons Shetland Chunky Tweeds in Medium Blue that I had gifted to me, but hadn't found a project for it.  It was quite nice to work with, and I would definitely use it again.

The recommended hook size is 6.00mm, but for this project, I went with a 5.50mm hook - I think.  It was either that or a 5.00mm, and I really don't think I went that small.  I may or may not work the pattern again and write out an exact details, but until then, I hope this description is enough for you to figure out how to make one yourself.

Cable petals hat

I started this pattern with a 9 sc magic circle.  The next round was increased to 18 in dc.  For the third round, I worked the increase stitches in hdc in between pairs of front post double crochet (fpdc).

For each round following, I kept working hdc in between the fpdc stitches until I reached the size I wanted.  The increase stitch was worked into the top of the second of each pair of fpdc.  I think I did one round without increases without changing where the fpdc were placed.  After that, I worked the straight sides and changed where I placed the fpdc stitches by one in each direction to bring the cables into the points of the petals.  The last round had one fpdc around both fpdc of the previous round, and one extra hdc added to make up for the one less fpdc.

Cable petals hat

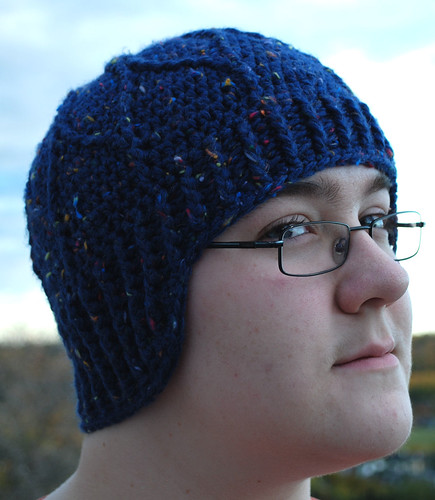
To finish the cap, I worked a "cuff" in alternating front and back post dc for several rows.  For the ear flap I worked rows into slightly more than half of the hat - I tried it on first, then marked where I roughly wanted the flap portion to begin and end in front of each ear.  I started and finished with an hdc, then did the rest in alternating front and back post dc, making I sure started and finished with the same stitch.  When working on the inside of the hat, I also made sure to work front post stitches into the back post stitches of the previous row and vice versa, so that on the outside, it all came out the same.

To make the slight curve of the earflap portion, I reduced by one stitch at the beginning and at the end of each row by skipping the second last stitch and working an hdc into the last stitch of the previous round.  Extra care had to be taken to make sure I did the front and back post stitches in the the next row in the right places.

Cable petals hat

The hat was finished with one round of sc.  The curve of the earflap was kept by working 2 sc in the "corners" of the flap, while two sc were done together where the flap switched to the forehead portion.

This hat used up most of the two balls of Shetland Chunky I had.  The smaller hook together with the cables made for a much snugger fit than I normally do.  I'm very happy with how it turned out, but to do it again I would move up to the 6.00mm hook.  Either that, or it would do well as is for an older child.  I really like how the earflap portion hugs around the ears and keeps out drafts, though for a glasses wearer, the snugness does tend to affect how the glasses sit on the face.

Monday, November 16, 2009

Pretty cluster hat

cluster-stitch-hat

Here's a simple little hat I made by experimenting with a cluster stitch. The yarn is the same I used for the mittens I made during my crochet blitz. It's a lovely yarn to work with (and the colour in this photo is more accurate than the one of the mittens) and I definately want to use it again.

The pattern was pretty basic. Using a 6.50mm hook, I made a flat disk of double crochet until the crown was the width I wanted. After 1 more round of dc, without increases, I switched to doing clusters. For the first round I skipped 3 stitches, then did 4 dc in one. For the remaining rounds, I worked the 4 dc in between the 2nd and 3rd dc of the previous cluster. When it was as long as I wanted, I did a round of sc into the top of each dc, then made the ribbed cuff by alternating front and back post dc.

With a nice, chunky yarn like this, the hat was very quick to make up. I think I finished it in about an hour, maybe an hour and a half with interruptions. ;-)

Saturday, November 7, 2009

Bobble cap

bobble-cap

This was a simple and quick cap that I really enjoyed making. The yarn is Lion Brand Wool Ease Thick and Quick in Denim. I find I really like this yarn to work with.

All but the last round is done with a 9.00mm hook. The last round was done with a 10.00mm hook.

Bobbles are clusters of 3 double crochet together (dctog)

I've never written out a detailed pattern of anything I've done before, so if I've made any errors, please let me know.

1st round - 8dc in magic ring join with ss

2nd round - sc into same spot as ss and ch 2 (counts as 1 dc now and throughout). 1 dc into same spot. 2dc into top of next 7 stitches. ss into 2nd stitch of ch 2 (16 stitches)

3rd round - sc into same spot as ss and ch 2. 1 dc into same spot. 1 dc into next stitch. * 2 dc into next stitch, then 1 dc. Repeat from * to end. ss into second stitch of ch 2 (24 stitches)

4th round - sc into same spot as ss and ch 2. 1 dc into same spot. 1 dc into next 2 stitches. *2 dc, 1 dc, 1 dc into next 3 stitches. Repeat from * to end. ss into second stitch of ch 2 (32 stitches)

5th round - sc into same spot as ss and ch 2. 1 dc into same spot. 1 dc into next 3 stitches. * 2dc, 1 dc, 1dc, 1dc into next 4 stitches. Repeat from * to end. ss into second stitch of ch 2 (40 stitches)

6th round - sc into same spot as ss and ch 2. 1 dc into each stitch to end. ss into second stitch of ch 2 (40 stitches)

7th and 8th rounds - repeat round 6

9th round - sc into same spot as ss and chain 2. YOH, insert hook into same stitch, bring up loop, YOH, pull yarn through 2 loops (two loops remain), YOH, insert hook into same stitch, bring up loop, YOH, pull yarn through 2 loops, (3 loops remain), YOH, pull yarn through all loops. Cluster made: equals 3 dctog. *ch 1, skip 1 st, 3 dctog into second stitch. Repeat from * to end, finishing with a ss into top of first cluster (second stitch of ch 2). (20 clusters)

10th round - sc into same spot as ss and chain 2. 1 dc into ch 1 space. * 1 dc into top of cluster, 1 dc into ch 1 space. Repeat from * to end. ss into second stitch of ch 2. (40 stitches)

11th round - sc into same spot as ss and chain 1. 1 sc into each stitch to end. ss into ch 1 (40 stitches)

Switch to 10 mm hook
12th round - sc into same spot as ss and chain 1. Reverse single crochet into each stitch to end. ss into ch 1. Finish off with large tapestry needle

Finish off tail of magic ring by pulling it tight to close up the ring, then using a tapestry needle to weave the tail around the ring another time or two before snipping off.

Friday, November 6, 2009

Vision hat


vision-hat
Originally uploaded by amkb

I've finally taken some photos of the projects I've made so far, though unfortunately, none are very good. Ah, well.

Here, my daughter is modelling the crocheted Vision Hat, so called because the origional pattern called for Vision yarn from Coats and Clark. I didn't have any. This yarn is Bernat Alpaca Natural Blends. It's a bulky yarn (5), 70% acrylic, 30% alpaca, hand wash, lay flat to dry. It's a lovely yarn to work with, and really quite inexpensive for an alpaca. It's soft, light and warm to wear, and the pattern has a really comfortable stretch to it.

The pattern is available for free here.

Friday, September 25, 2009

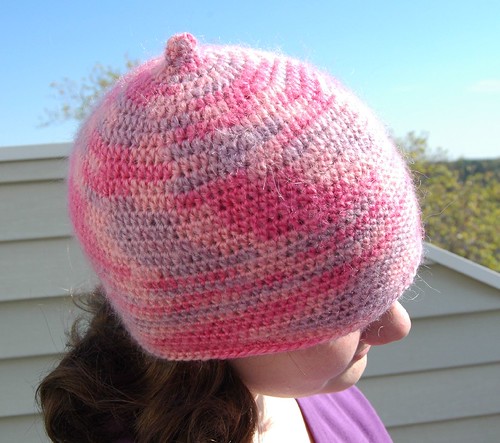
Blitz - Mohair hat

For this project, I used another one of gorgeous mohairs I found at Goodwill. This pattern is from Hip to Crochet: 23 Contemporary Projects for Today's Crocheter. The pattern recommended a sportweight yarn, but I thought it would work well with this mohair blend.

mohair-hat

I used the recommended 4.00mm hook size. The yarn is from les fils marnel yarns, Rainbow - a French named yarn made in Italy. It's 70% acrylic, 20% mohair and 10% wool. It's machine washable in warm water, which is an added plus.

The pattern is worked in hdc, including the strange little nipple at the top. The down side of working in this pink colour is that I couldn't past the image that I was crocheting a giant breast. LOL It's meant to be worn with the bottom turned up, but my kids like it better down. It's much lighter and thinner than the recommended yarn would have been, while remaining beautifully warm. It does look strangely lumpy when not being worn, though.

Monday, September 21, 2009

Blitz - Son of Skully

This is a variant of the Skully I did before. The pattern itself is the same, except for changing the total number of dc stitches per row, and the total number of rows. The yarn is the same worsted weight yarn I used for the Biker Beret, except that I used 2 strands on a 9.00mm hook.


sonofskully

With the extra thick yarn, closing up the top was slightly different from before, too. I only needed 2 rounds of sc and, rather than doing two sc together every few stitches to decrease, I did on sc into the "hill" of back-loop crocheted rows, skipping the "valleys" in between. For the last round, I reduced it the same way. With the yarn this thick, it was better to skip stitches completely than to bulk things up by doing 2 stitches together.

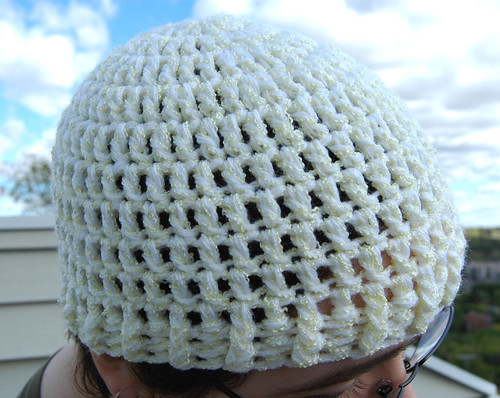
Blitz - pale hat

I made up this hat using a yarn I picked up at a yarn and fabric exchange a couple of years back. I have no idea what it is, but it's quite nice. A bit difficult to work with, as it's made of of two strands of white yarn, and one squiggly strand of pale yellow that was almost like a string, wrapped loosely around the other two strands. It made for an interesting texture, but tended to get missed by the hook as I worked.

pale-hat

For this, I used 2 strands together on a 6.50mm hook. The main part of the hat is done in basic double crochet, with the last several rows done in alternating front and back post double crochet. With this yarn, using the two strands together resulted in a very squishy feeling texture that's quite warm and cozy.

Blitz - hat and scarf

These two were a bit of a frustration for me. I only had two balls of the yarn I used for these. It's a gorgeous yarn, Maxi Tosca from Lang Yarns. It's 55% new wool and 45% acrylic. It's even machine washable, though in cooler water, gentle cycle and with detergent for fine wash and no softener. No drier. At that point, I figure hand washing would be better. *L*

I picked it because I loved the colour gradients (I like the slow transition of colours better than variagated yarn) and how incredibly soft and light it felt. I choked a bit at the price, but I loved it enough that I considered getting more so that I would have enough to make something wearable; something where I could enjoy its beautiful softness.

By the time I was done this pair, I was glad I changed my mind!!

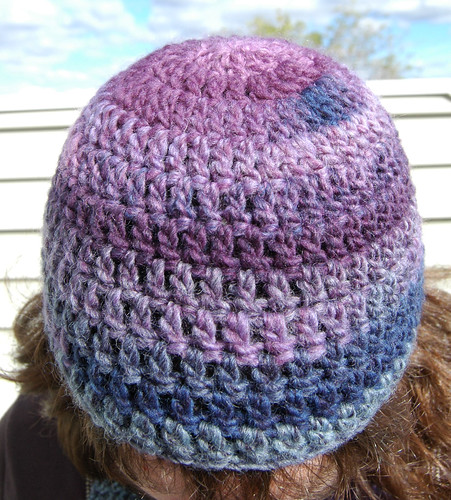
Tosca-hat

The hat is a simple double crochet hat, very much like the Biker's Beret I'd done previously. I changed the increases per round and number of increased rounds slightly, to suit the yarn. I used a 5.50mm hook.


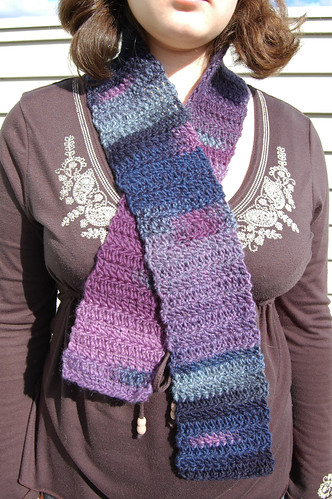
Tosca-scarf

The scarf was incredibly frustrating. I ripped this several times before settling on a basic double crochet pattern to match the hat (I originally wanted to work it lengthwise, but that didn't work out) and finding a width that let me get a decent length with the amount of yarn I had left over, including what remained from the hat. Once I did find the dimensioned I needed, I just kept adding rows until I was out of yarn.

By the time it was done, I discovered welts on my arm, where I would drape the scarf as I was working it. It turns out I'm allergic to this yarn! I thought I'd developed an allergy to wool. At the moment, however, I'm working on a stole using a blend of wool and mohair, and I'm not reacing to it. Granted, it isn't "new wool" like this is, so maybe that is making a difference? I have no idea.

I did find it strange that I developed hives on my arm, but that my palms and fingers, which had much more contact than the back of my arm, didn't react at all. Either way, now that I know, I'm glad I didn't hang on to it for some future sweater or something!

Anyhow, this set worked out all right, and I still love the colours and how soft it is.

Sunday, September 13, 2009

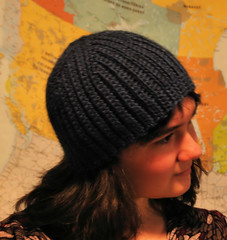
Blitz - Skully

Catching up on the last few days of my blitz. First, what is basically a crochet version of a toque (or tuque)


skully

Pattern: Skully
From: Get Your Crochet On: Hip Hats & Cool Caps by Afya Ibomu

Recommended yarn: worsted weight
Yarn used: Bernat Satin.
Hook: 3.75mm

Changes made: added an extra round to close up the top.

This hat, and several other projects in the book, uses the same shaping/sizing technique Mary Jane Hall puts to such good use in clothing in Crochet That Fits. After working the rows and seaming it into a tube, the top is closed up with reducing rounds of hdc. The instructions said 2 rounds, but I found that still left a rather large opening, so I did one more reducing round, then wove the tail end through to close it up tight.

The hat is light and comfortable, but took far longer to make than I wanted for my blitz. If I do it again, and I most likely will, I'll use a chunky yarn and larger hook.

Saturday, September 12, 2009

Blitz - Lovely Lid

Here's the next cap I finished on the first day of my crochet blitz.

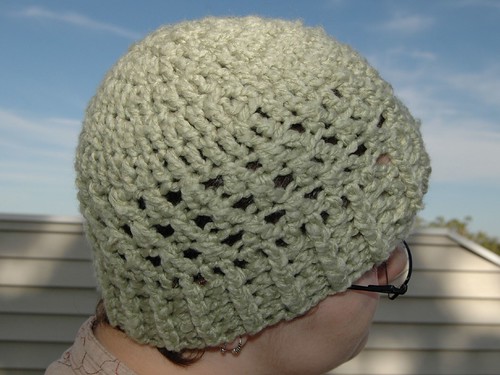
lightgreen6311

Pattern: Lovely Lid
Designed by Denise Black

Pattern from: 24 Hour Crochet Projects by Rita Weiss
Yarn recommended: bulky brushed mohair type yarn - Lion Brand Jiffy
Yarn used: Bernat Harmony (bulky) in silk green
Hook: K (6.50mm)

Changes made: just the different yarn; no changes to the pattern.

A little more complex, this pattern is still done in all dc. It starts out with regular dc stitches, then crossed dc, and finally, alternating front and back post dc for the "cuff."

This one took a bit longer - about 2 hours - and is a real hit with the girls. I'm going to have to make more for ourselves. The yarn is wonderfully soft, light and warm. Perfect for those Manitoba winters. It's an acrylic that's washable and dryable in warm water.

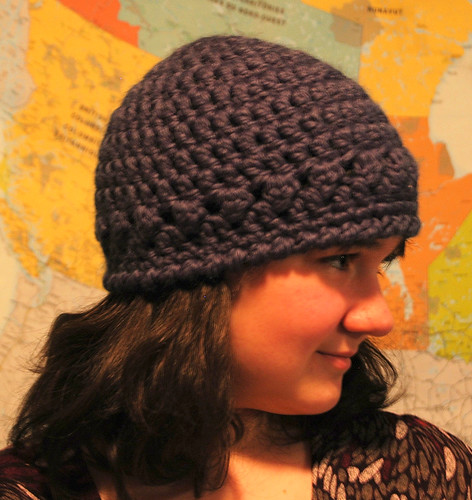
Blitz - Biker's "Beret"

For the next while, I'm shooting for crocheting at least one project a day as gifts. I picked up a bunch of pattern books a couple of days ago and did two on that first night. Here's the first one I did.

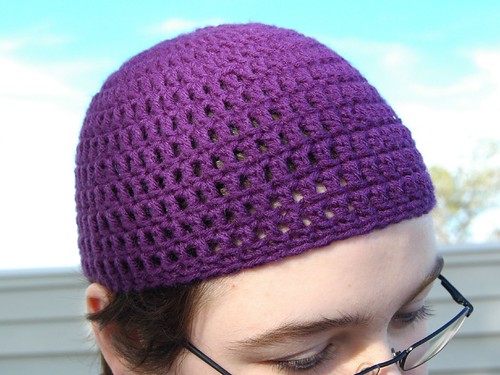
purple6315

Biker's "Beret"
designed by Denise Black

Pattern from: 24 Hour Crochet Projects by Rita Weiss
Yarn recommended: worsted weight, Red Heart Super Saver
Yarn used: some easy care worsted weight acrylic in bulk sizes balls from Walmart in purple. The label disappeared after my younger daughter re-balled the yarn, but it might actually be Red Heart. I don't remember.
Hook: I (5.50mm)

Changes made: added an extra row of dc

This pattern is about as simple as they come - just rounds of dc. The original pattern called for 11 rounds of dc, followed by a round of sc. I tried it on before doing the sc round, and it seemed a touch too short, so I added one more round before finishing it off.

Quick to make up - about an hour - and comfortably snug. This cap will be perfect for cooler days, and with the machine wash and dry acrylic, there's no need to be fussy about it.