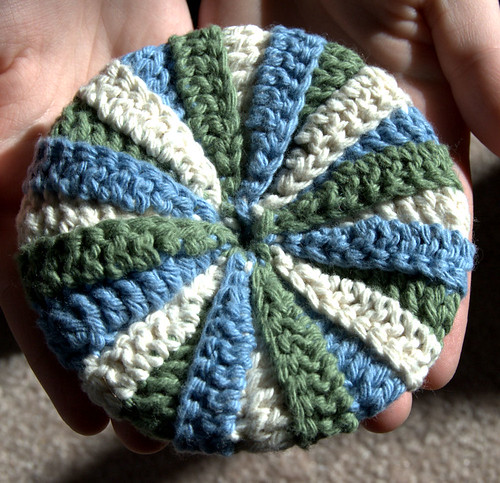
I happened upon this excellent tutorial for a tawashi yesterday. I've never even heard of such a thing before! I was able to whip one up while watching about 3/4's of Chopped and half of Restaurant Makeover. *L* So a little more than 1 1/2 hours from start to finish. Not to bad considering it was not only the first time I've made one, but I didn't have access to the computer and was going completely by memory. Yes, the pattern is that simple! It would be even simpler done all in one colour.
The only thing I changed from the tutorial was adding this little loop at the top. I figure it can be hung up or something to dry better after use, but for all I know, it'll just get in the way. It hasn't been used yet.
Here's what the underside looks like.
This was made using leftovers of some Bernat Handicrafter Cotton and a 4.00mm, size F hook (the tutorial recommends a 3.75mm hook, which is also a size F).
A great little project to whip up when you feel the need to FINISH SOMETHING while working on a larger project. LOL
Thursday, February 25, 2010
A quick tawashi
Labels:
crochet,
crochet - misc,
tawashi
Monday, February 15, 2010
Finished - my daughter's blanket
My younger daughter finished her crochet blanket a little while ago, but I wasn't able to get a photo of it until recently.
The basic pattern was free off a yarn label. She changed it slighly to make it bigger.
As you can see, it's a pretty decent size! Large enough to cover a twin bed. When she reached the length recommended in the pattern, she simply continued the same pattern around the sides as a border. It took her 3 balls of the huge 300g size Bernat Chunky to finish this.
It's kind of hard to tell, but this is a corner turn.
She's very happy with it, and uses it every night. :-D I think she did a great job - and displayed a whole lot of patience to finish it!
Sunday, February 14, 2010
Cable scarf
I had made several scarves a while back, but they were all a bit smaller than my husband needed to keep him cozy while walking to work. I saw this as a good opportunity to make a project from my new pattern book, 1-2-3 Skein Crochet.
I chose the Man's Hat and Scarf pattern - though I skipped the hat part. Here's a scan of part of the photo in the book.
The pattern for the scarf called for 3 skeins of Red Heart Soft, medium weight yarn; 2 in Black, 1 in Toast. What I had was 4 skeins of Bernat Alpaca Natural Blends, 2 in Forest, 2 in Fern. I did stick with the 5.5mm hook recommended, even though the alpaca was a bulky (5) yarn. Using this yarn, the pattern did require all 4 balls of yarn.
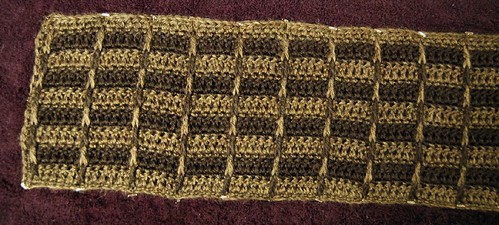
The finished scarf curled around itself quite a lot and did require blocking. Here is one end of the finished scarf.
I'm quite happy with it.
There was, however, one problem with the instructions.
The scarf is done in pairs of rows, with the cables made in a row of sc, followed by a row of dc. With the foundation chain and first row of sc counted as row 1, that means each even number row is a dc row. The problem was in row 17, which reads:
ch 3, dc in each sc across.
This is row 17, outlined in red.
As you can see in the photo, row 17 is clearly another cable row. Row 16, meanwhile, is a dc row, not an sc row.
So I ignored the instructions for that row and did a cable row, which you can see marked in red here.
Then I did the last two rows as instructed.
The only other thing I changed was one of the finished ends. Only the short ends get finished with some sc, as the long sides don't need any finishing at all. The instructions were to finish off the yarn, then re-attach it to a corner for the edging. I prefer to avoid cutting and re-attaching yarn, so when I finished the last row, I turned the corner and did the row of sc as otherwise instructed. Then I re-attached at the other end, as instructed.
My husband really likes the scarf, though he's disappointed that I blocked it. He kinda liked how it curled around itself. We'll see how he likes it, now that it's flat. :-D
Labels:
crochet,
crochet - scarf
Saturday, February 13, 2010
Finished! Reminiscence Afghan
Well, it sure took me long enough, but last night I finally finished the Reminiscence Afghan for my daughter. With all the delays, it's taken me almost 6 months!
It's about 40"x60" in size.
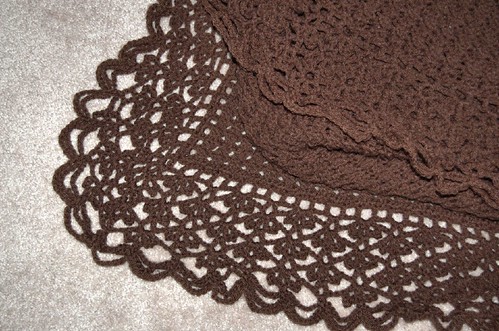
Here's a detail of the lace edging - and I would have loved to have had a clearer photo of the pattern like this while making it! (While I normally try to avoid using the camera's flash, here I deliberately used it so that the light carpet would really show off the lace pattern.)
My daughter LOVES the lace edging on this. It was worth all those friggin' picots.
While there were a few minor errors made along the way in the lace, there was one major error that I made in the body itself.
You can see it here - that open space that shouldn't be there. Somehow, while working the 4 stitch cluster, I lost track of what I was doing, did only one dc instead of a group, then missed it entirely in the next row. This meant and entire "stripe" in the pattern was gone. It also meant that the count for the lace edge would be off by too many stitches to work around.
Unfortunately, by the time I noticed it, I was almost 40 rows away, and 9 rows into a new ball of yarn.
So rather than frogging all that work out again, I figured out a way to put the missing "stripe" back in. After following up from the missing cluster and marking where it should have been at the top row, I added ch 1 space in the next row, worked a ch1, dc, ch1 into that space in the following row, which gave me the stitches I needed to work the full 4 stitch cluster in the next row worked, putting the missing "stripe" back again.
Here's a view showing where the "stripe" was lost, and where it was added back again.
This project ended up needing 3 giant 350g (12.35 oz, 1050 m/1144 yrds) balls of Red Heart Comfort Sport, but I needed hardly any from the third ball. Only about the last round and a half of chain loops around the lace edging was from the third ball.
I did have problems with the instructions for the lace border, but once I did figure it out, it was really very simple. Just a pain, though that's because picots are my least favourite stitch.
If I were to do this again, I would probably want to make it in a larger size. Something big enough to cover a twin bed, perhaps.
The important thing is that my daughter loves it. :-D
Labels:
afghan,
crochet,
crochet - finished details
Monday, February 8, 2010
I am such a suck!
No question about it. I'm a suck.
At least when it comes to the cats.
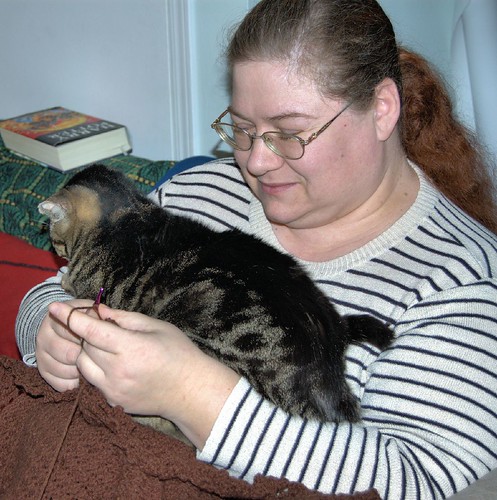
Both cats like to keep me company. Tiger, however, prefers physical contact. She'll frequently find some way to be sitting on me, or leaning against me. While working on my daughter's afghan, she lay down against my hip - right on top of part of the afghan. As I worked my way around the border, more of the afghan ended up on top of her while less was under her. I paused to take the photo before getting the last of it out.
Today?
She did this. One moment, she's on the arm rest of the chair next to me, the next, she's across my chest, settled in an purring! Me? I leave her there! LOL
She didn't enjoy the fact that I kept working while she was there and shifted around a few times before I finally got one of the kids to take her off. A few minutes later, she was back! She didn't stay away until my younger daughter cuddled with her.
Too funny!
Labels:
afghan,
something to talk about
Tuesday, February 2, 2010
Purple crochet shawl
Finally, I'm getting around to posting this one!
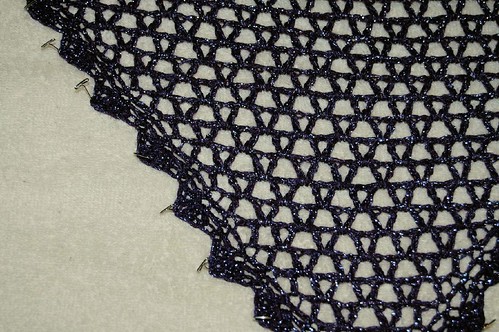
I'd made this as a gift for a dear friend in the US. I used the same Patons Brilliant in plum that I used for the balletneck sweater I'd made for my mother, and a 3.50mm hook. Here it is after it was pinned out to my blocking pieces.
My blocking "board" is several sheets of foam insulation, taped together. The very tips of the shawl didn't fit, even using 4 sheets. I've also got a couple of bath sheets under the shawl to absorb moisture.
The pattern is a simple (dc, ch 1 dc) V stitch, working from the point up. It's actually a really large version of a kerchief pattern that I have. After doing the last row of V stitch across the top, I kept going by working a row of sc along both sides and across the top, then working shells of 5 dc, skip 4 stitches, 1sc along the two sides, finishing off when I reached the top.
I think it worked out rather well. :-D
Subscribe to:
Posts (Atom)