For my first attempt, I worked from the bottom up and did decreases into the crown. After finishing the crown, I went back to the starting row and increased the length in the opposite direction.
The yarn I used was some more Charisma, plus some yarn left over from last year's crochet blitz. The red yarn is a narrower yarn than the blue. My double ended hook is a 6.00mm.
In this view, you can see where I started. First, using just one end of the double ended hook, I worked a foundation sc to a length that would fit around my head, which turned out to be 56 stitches. Without joining the chain, I started picking up loops through the back loops only, so begin a spiral. You can see the slightly diagonal bar where that first Tunisian stitch is joined.
Picking up the yarn for the Tunisian through the back loops only created a ridge I really liked. Had I made the body portion longer, I would have been quite happy to leave just that foundation as the edge of my hat.
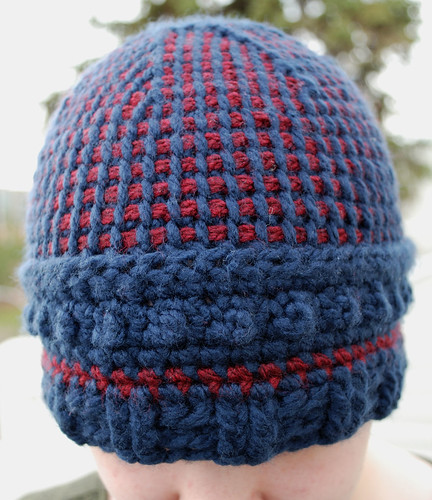
I worked up the sides in the same way I did the Tunisian Simple Stitch can cozie. I quickly discovered that the curl that forms makes the job a LOT more difficult! Mostly because it curls in the wrong direction! Unfortunately, a combination of that curl and not being sure if I had enough of the red yarn had me beginning the decreases earlier than I normally would have.
Decreases are worked in the reverse pass, in this case, when the red yarn is being worked through and the blue loops are worked off. When it reduced in size to the point where Tunisian wasn't working anymore, I continued decreasing in sc in the back loops only.
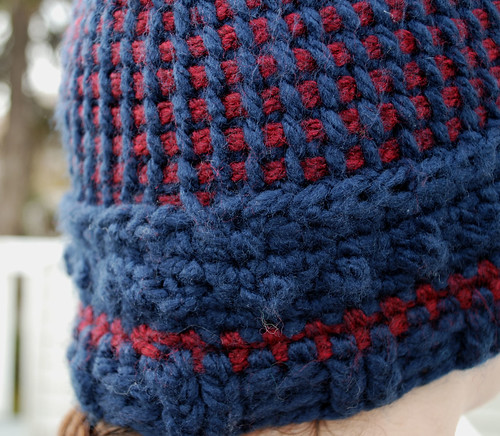
This made for a very short hat, so I went back to the foundation row and, working in rounds instead of a spiral, I worked a round of sc, then turned it to make a round of alternating sc and a long extended sc.
The long extended stitch is worked by inserting the hook through the top of the previous round's stitch, yarn over hook (yoh), then pulling the loop through. There are 2 loops on the hook, just like a single crochet stitch. YOH, then pull the yarn through ONE loop only. YOH, pull yarn through one loop only again. YOH, then pull the yarn through both loops, finishing the long extended sc.
Having a sc on each side of the long extended sc forces the extra length behind the work, creating a sort of bobble, which is why it has to be worked from the back or inside of the piece.
After that, I did 1 round in blue sc, 1 round in red sc, 1 round in blue hdc. The last two rounds alternated pairs of front and back post double crochet.
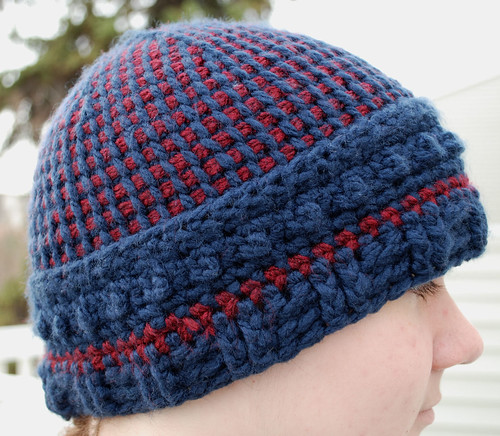
I was able to work this hat in a single evening. The kids just love it - my older daughter says she thinks it's the prettiest hat I've made yet! I wouldn't go so far, but I am rather happy with how it turned out.
Final conclusion:
I am quite happy with the yarn and colour combinations, and how the Tunisian simple stitch looks. The decreases add interesting visual and textural elements. If I were to change anything, I would have made the body of the hat several inches longer. As much as my kids love the decorative brim section, I personally find it too... much. I think I would have preferred more Tunisian, less brim. I also would not have worked the final stitches in the crown in the back loops only, but my family likes how the ridges left seem to be an extension of the decrease lines, giving it a spidery look. In the end, the details I'd change are a matter of personal preference and aesthetics, rather than any problems with the design itself.
The curl that happens when working Tunisian in the round really makes the job more difficult. Especially when beginning the decreases, as it curls against the direction the piece is worked, wanting to flip inside out. In the end, though, it was worth the hassle.
I worked up another version from the top down, which I will post about next. At the end, I'll show what they both look like on the inside.
No comments:
Post a Comment