Pages

Saturday, October 30, 2010

Revisiting Tunisian in the round: step-by-step child's hat

I've decided to take part in our co-ops annual craft and bake sale again, so I'm making more winter wear for my inventory. 

It's also a great excuse to try out new things and work out the kinks in old ones.

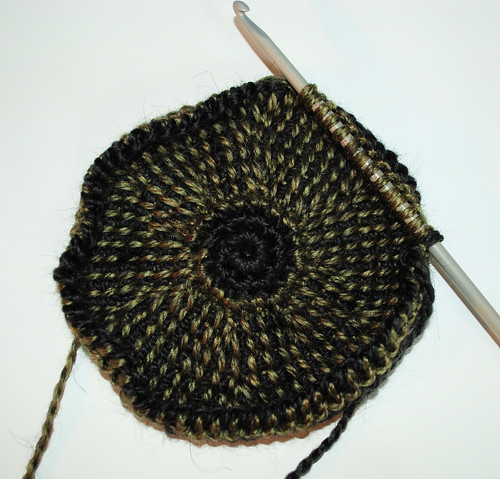
For this hat, I went back to doing Tunisian in the round, working from the top down, in Tunisian simple stitch.  I wanted to see how close to the beginning I could begin the Tunisian.

For the yarn, I went with Bernat Alpaca in Stone and Fern colourways.  My Tunisian hook is a 6.00mm, which is the size recommended for this yarn.

DSC_6798crop

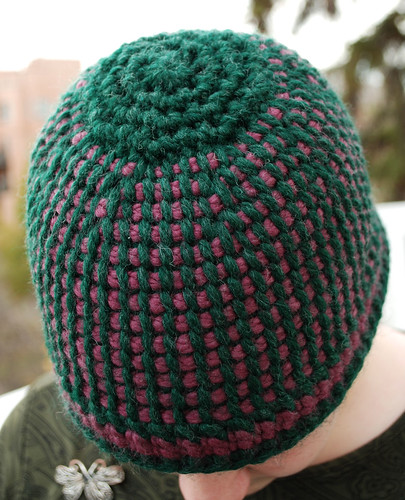
I'm rather happy with how close to the middle I was able to start the Tunisian stitch.  I started with a base 8 ring in sc.  For the first while, I could only pull up about 3 loops on the hook at a time before I had to switch ends, which made things a bit tight, but I much prefered this to having a larger disc in sc.
DSC_6804crop

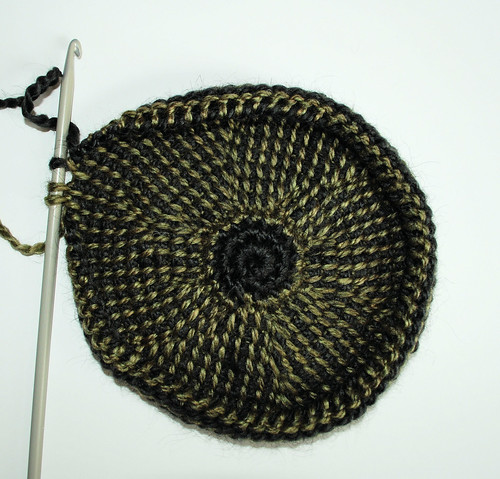
In this photo, you can better see the increases, and how much the work curls in on itself. 

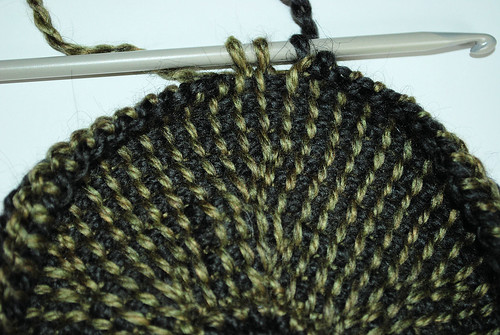
I played around with the increases a bit, starting with 8 increases per round until there were 48 stitches in around, then did a single round with no increases before switching to 6 increases per round until I worked it up to 60 stitches per round.
DSC_6808-50%

Here's a closer view showing the increases in different places.


DSC_6810-50%

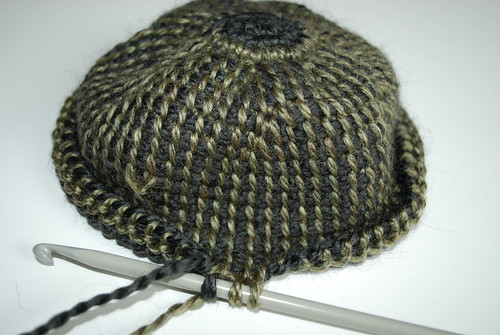
Working the sides at 60 stitches per round.  The gauge using Tunisian made for a size suitable for an older child or small adult.  For an larger adult sized hat, I'd have increased to anywhere from 5-10 more stitches per round.

That tuft you see on the left side is a flaw in the yarn.  I pulled it to the inside with a hook later on, so it wasn't so obvious.
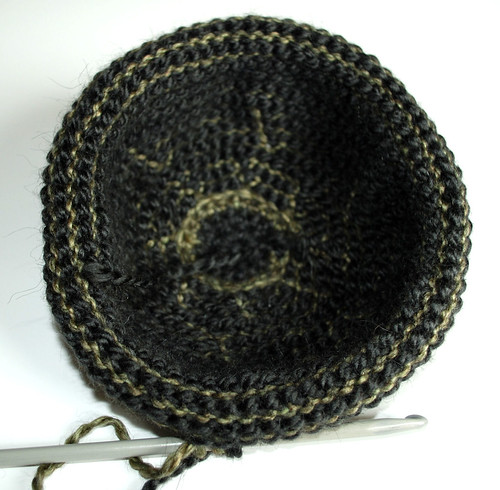

DSC_6812crop

An inside view.  At this point, the sides of the hat were built up as far as I wanted and I was ready to start on the brim.
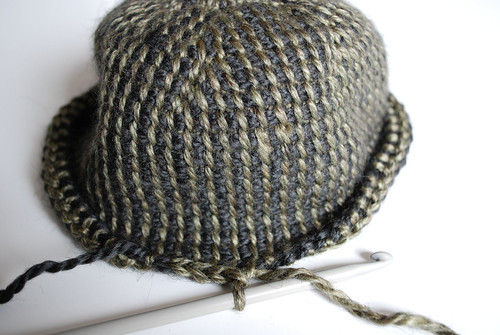
DSC_6813-50%

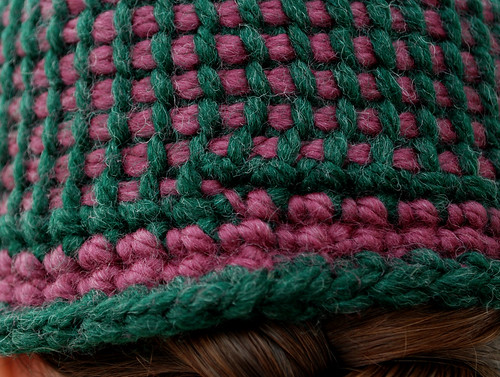
I decided to take advantage of the hat's natural curling tendency and work up a brim in slip stitch, which would then be worn rolled up.  I started by dropping the dark yarn completely and doing a round in the lighter colour, sc into each vertical bar.  You can see a closer view here.
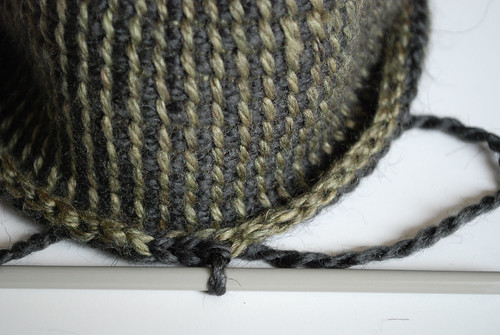
DSC_6816-50%

Then I dropped the light yarn, picked up the dark and began slip stitching into the sc round.  I worked in a spiral, alternating colours with each round, for several rounds, then tried it on.

It didn't work.

The slip stitched rounds were significantly tighter than the Tunisian stitches.  There was no way it was wearable.  Away they went!

I still wanted to do a slip stitched brim, though, so I broke out my 9.00mm hook.
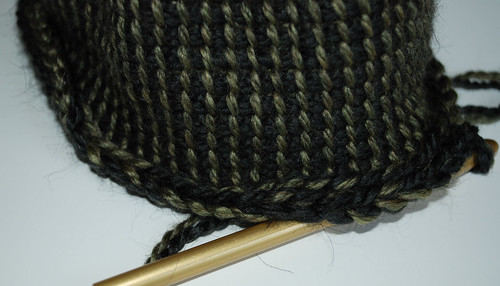
DSC_6820crop50%

Using both yarns on the hook, I worked a round of sc into the vertical bars, then began slip stitching.  In this photo, the first round of sc is done and the slip stitch round is just begun. 

The larger hook and doubled yarn worked out much better.
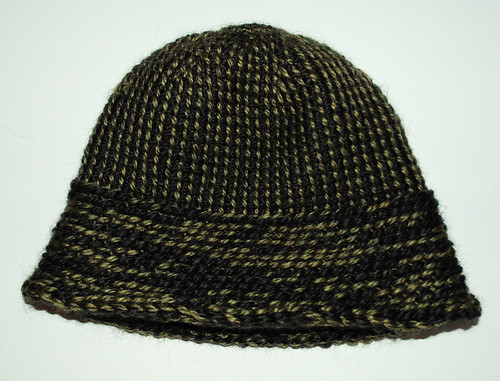
DSC_6822crop50%

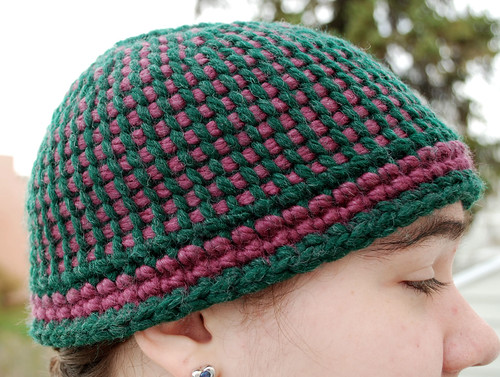
Here is the finished hat.  (Well, almost finished.)  The two yarns together made for a random pattern in the slip stitched portion that I rather liked.
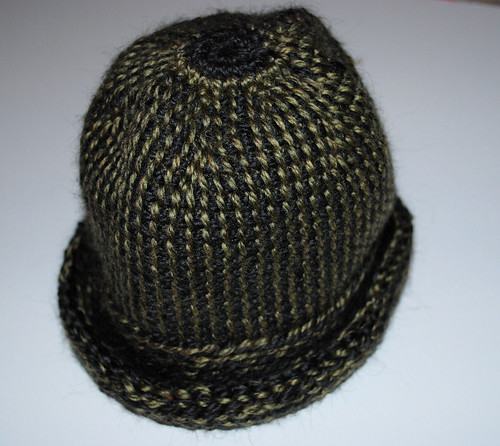


DSC_6825crop50%

When worn, the brim is meant to be rolled up like this.
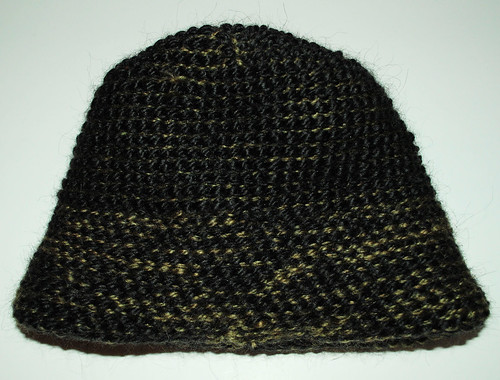
DSC_6829crop50%

Here's an inside view, showing where the yarn was finished off.

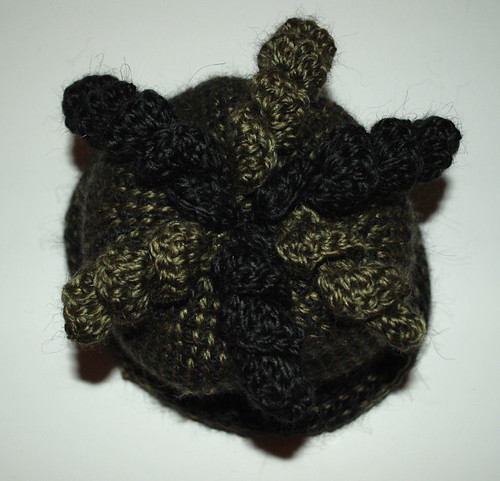
I decided that it needed more, though.  Using the left over yarn, I worked up several spirals.
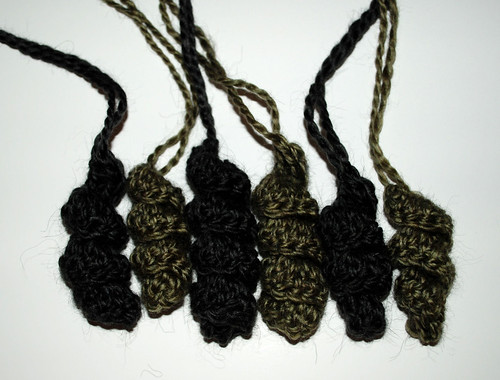

DSC_6832crop50%

I did pairs in each colour of varying lengths, working with foundations of 10, 12 and 15 chains, leaving long tails at the start and finish for attaching to the hat.  At this point, I hadn't decided on how many I would end up using.  To attach them, I tied the start and finishing tails together in an overhand knot as close to the crochet stitches as I could, threaded both ends into my yarn needle, pulled them through the hole at the very top, then stitched them into the inside.  I just kept adding them, alternating colours, and ended up using all six.
DSC_6833crop50%

I think it looks rather cute. :-)
Saturday, October 9, 2010

(late) Feature Friday: How to make a Zombie

Here are a bunch of step-by-step photos for different aspects of zombie costumes.  The theme of the walk this year was Zombie Clowns.  Unfortunately, the organizer discovered that a lot of the group's members didn't participate because they are so disturbed by clowns!  Not the zombies.  Just clowns in general.  So this will be the last time clowns are used as a theme for this group. 

Some of the photos might be a bit disturbing, so I will just post links to them rather than have the actual photo here.  If you want to see all the photos, visit the set I have up on my flickr account.

Last week I featured some completed gore that my older daughter used for her costume.  First, I will post some step-by-step photos on how she made it, as well as a cheek prosthetic she made for her friend.


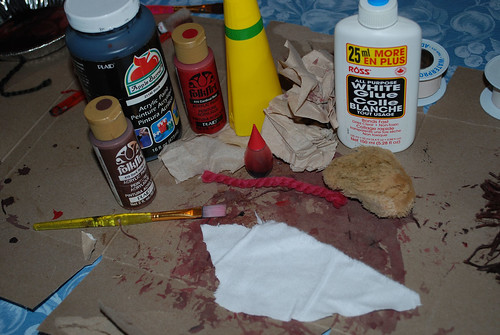
First, the materials.
Zombie make-up

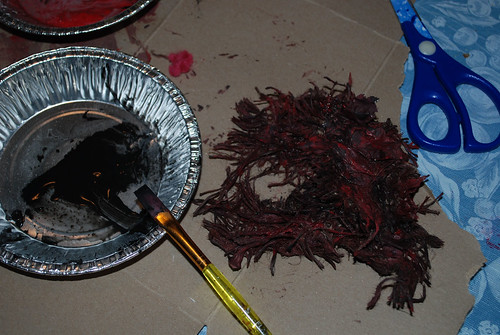
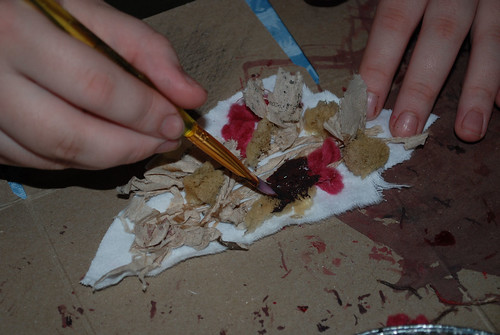
These pieces were made to be held in place with white medical gauze, so the foundation is a plain piece of white flannel we happened to have.  Other materials are white and clear glue, red, brown and black paint, food colouring (red is shown, but yellow was also used), and materials to create the gore texture; paper napkin, yarn and sponge pieces.  Cheap brushes that can be tossed later on are recommended.  Also, a couple of small pie plates to mix paints and glues will be needed, and be sure to have something to work on, like the cut open box used here, to protect the work surface.


Zombie make-up

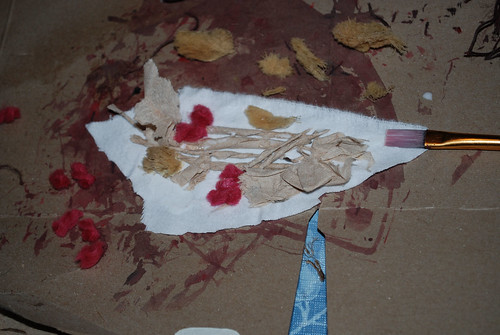
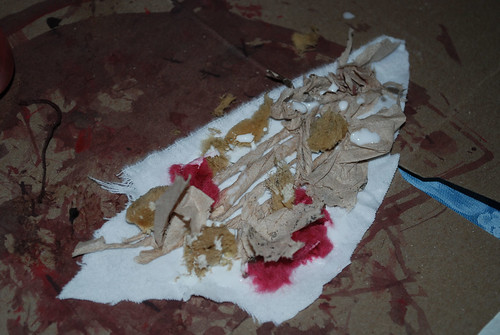
Using white glue, pieces of paper napkin, bits of sponge and fuzzy yarn bits are attached to the base. 


Zombie make-up

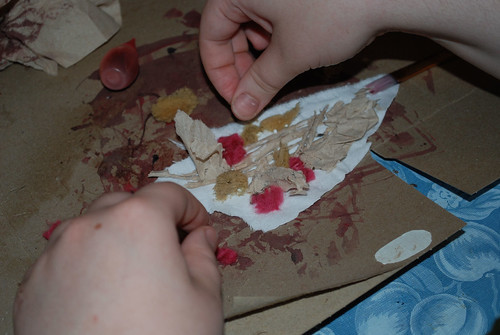
More glue is added and spread with the paintbrush to add more bits in layers.


Zombie make-up

For this, an edge was left for the guaze that will be used to hold it in place to catch.  Once the bits and pieces are layers on to personal satisfaction, the piece is set asside to dry completely.


Zombie how-to: cheek prosthetic

While the glue dried on the flannel backed gore, my daughter touched up the paint on a cheek prosthetic for her friend, which was to be adhered directly to the face. The base of this piece was some burlap with paper napkin glued on for the texture.  The base was cut loosely to shape around the side of the mouth.


Zombie how-to: cheek prosthetic

Once dry, the pieces are very matte, which is not the desired effect.  To make the finished pieces look damp, while also strengthening them and preventing the paint from getting wet and smearing later on, they were given a final coat of clear glue mixed with red food colouring. 


Zombie how-to: cheek prosthetic

The coloured glue is painted on thoroughly, being sure to go into various crevices.


Zombie how-to: cheek prosthetic

Once dry, the glue remains shiny and damp looking.


Zombie make-up

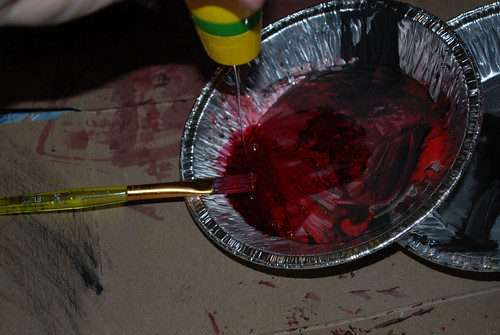
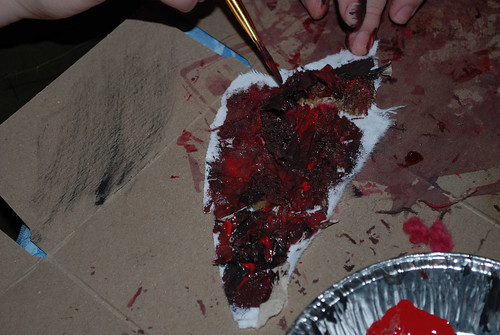
Once the gore base was dry, red, brown and black paints were readied in a mini-pie plate.


Zombie make-up

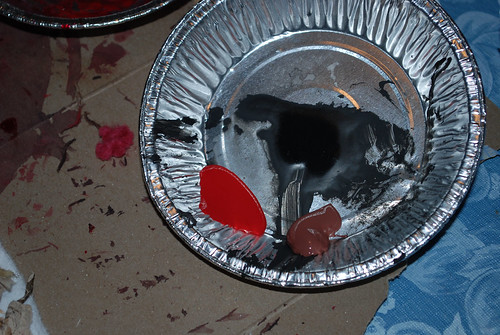
The colours don't get mixed thoroughly, though, leaving varied shades of the paints visible.


Zombie make-up

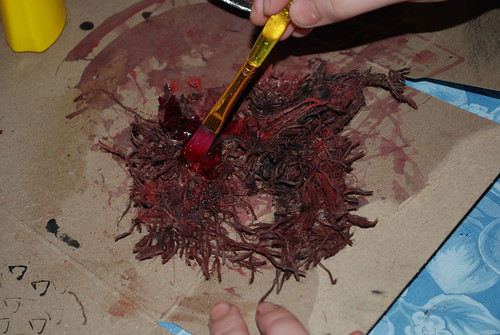
With all three colours on the brush, the paint is spread onto the surface and worked into any dips and crevices.


Zombie make-up

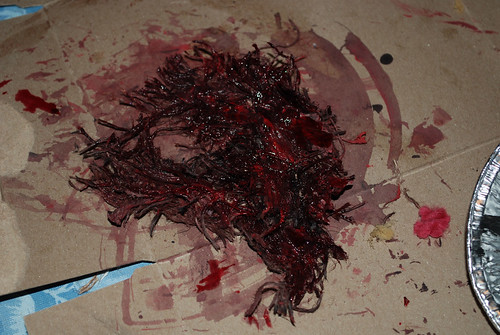
The paint is almost completely finished in this photo.

Once the paint has dried, another layer may be added, if needed.  Otherwise, it gets a layer of glue, as above, to finish it.


Now it's time to make some blood.

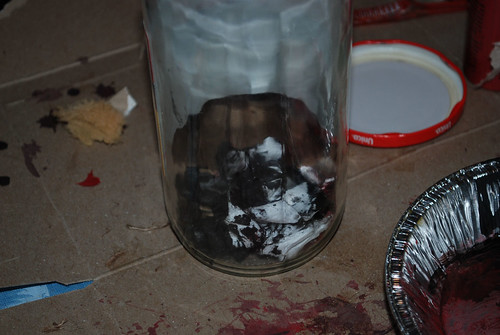
For this, a decent sized jar with tight fitting lid, some dark corn syrup, red and yellow food colouring, toilet paper and black paint are needed.

Zombie how-to: blood

Bunched up pieces of toilet paper, some painted black are placed into the jar first.


Zombie how-to: blood

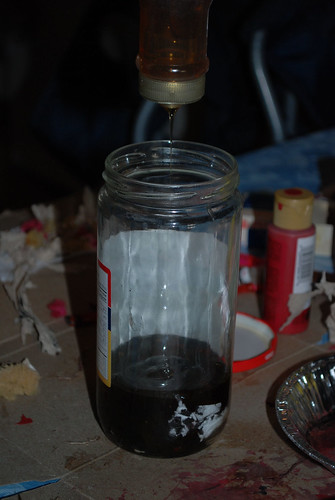
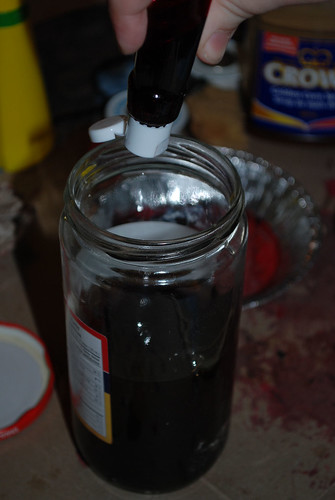
Then the dark corn syrup is poured in.  Lots of it.  Most of a squeeze bottle was used for this. 


Zombie how-to: blood

Next, the red food colouring is added.  Again, quite a lot was used, but start with less first.  You can always add more.  You can't take it out.


Zombie how-to: blood

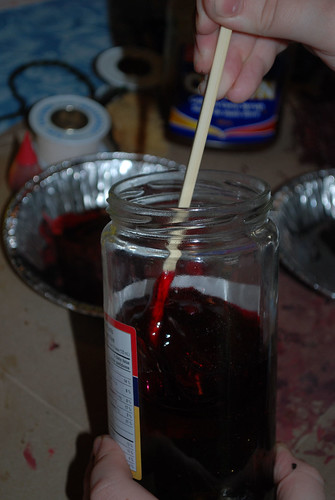
A wooden chopstick was used to stir the colour in and break up the pieces of toilet paper, which forms the "clots" in the fake blood.


Zombie how-to: blood

The colour is then tested out on some paper towel.  Here, it was decided that the colour was off.  Some yellow dye was added and tested out again.

Then it was tested again on skin, where it passed inspection.


Time to put it all together.

For this walk, being themed on clowns, a lot of people put together clown clothing, wigs, masks, etc.  Generally, zombies are just regular folk, so any clothing will do - so long as you're willing to tear it up and get it stained with fake blood!  My older daughter tore up an old button-up shirt, while her friend used an old t-shirt.  My younger daughter, who used only make up and fake blood and no attached gore, had an old pair of jeans cut short at the knees with brightly coloured socks, an old t-shirt, bright arm warmers made from an old pair of socks, and her long hair in messy, uneven ponytails.

For my daughter's friend, he first had to prepare his face for the cheek prosthetic.


Zombie how-to: using the cheek prosthetic

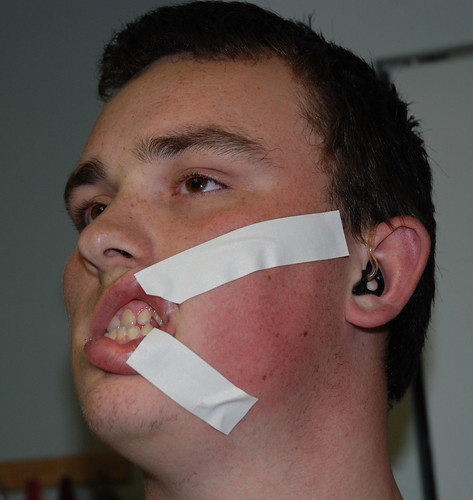
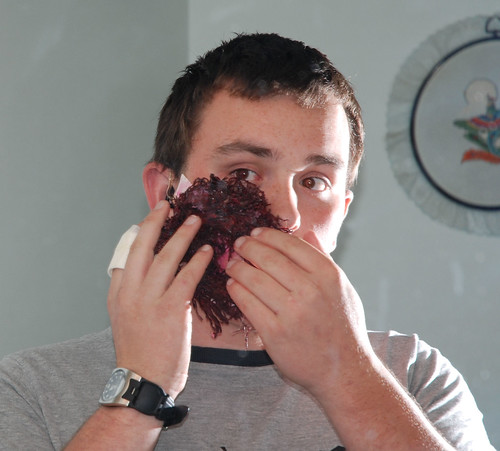
First, some medical tape was used to pull back his lips and expose his teeth.


Zombie how-to: using the cheek prosthetic

(This shot was taken from a mirror.)

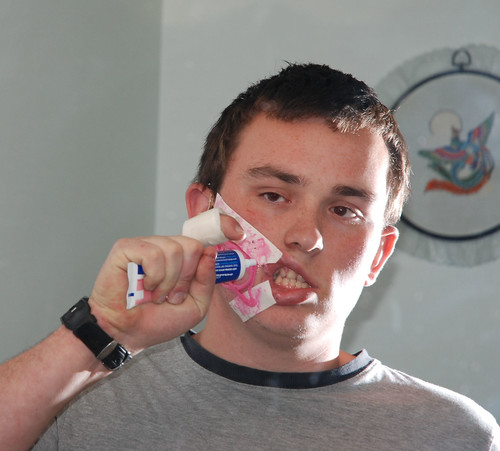
We were in a bit of a quandary, as he'd intended to use spirit gum to attach the cheek prosthetic, but we couldn't find any.  We finally picked up some Polydent and hoped it would work.


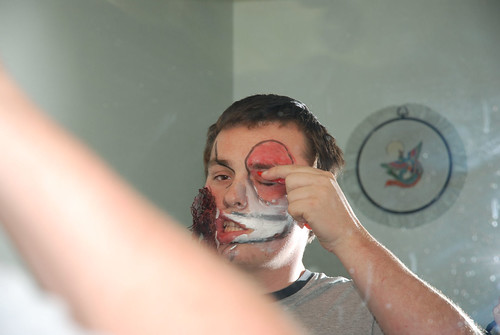
Zombie how-to: using the cheek prosthetic

(Another mirror shot.)

The Polydent was added to the back of the prosthetic, too. 

It almost worked.  Later on, they ended up using medical tape as a "bandage" to hold the piece in place.


Zombie how-to: using the cheek prosthetic

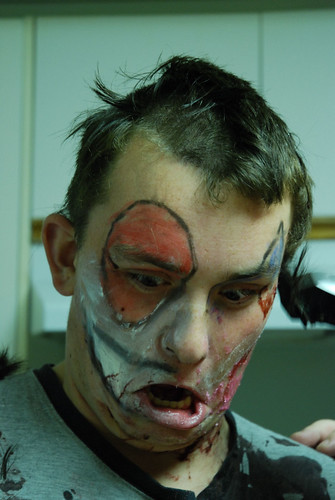
Then it was time for the clown make up.  We only had the cheap face paints, so it was a bit difficult to put on.

The face blood wasn't added until they were on site.  They spattered it on with a tooth brush.  Then shared it with other zombies.

To see my daughter's finished costume using the gore she made, here are a couple of photos.  Do NOT click on them if you are disturbed by blood and gore. 

One
Two

I think she pulled it off rather well!

The kids had a blast with the zombie walk.  The route was about 5 km long, with a stop in front of the legislature for a break before continuing on down Jasper Ave. and finishing at Churchill Square in front of Edmonton's City Hall.  There had been a Movies At The Square earlier, and it was packed with people watching Marmaduke, but they were long gone by the time the zombies arrived.  Sadly, the folks selling mini-donuts, hotdogs and drinks were no longer attending their booths, either.  Too bad.  I think they would have done some brisk zombie business!

There were about 150 zombies in total, with some really amazing costumes.  After the walk broke up at Churchill Square, many of the zombies went on to a couple of bars, where some great bands were playing.  Alas, my kids are too young to go to a bar to see the Dreadnaughts and had to go home.

Of course, at the end, we're left with the clean up.  By the time the walk was done, everyone was eager to wash off the syrup blood.

There was a slight problem, though. Remember that I mentioned the cheek prosthetic needed to be taped in place later on?

Well, part of the tape went up and over his hair.


Zombie how-to: cleaning up

It's a good thing he wanted a hair cut, anyhow!


Zombie how-to: cleaning up

Hair and medical tape don't mix.

There we are!  Now you, too, can make your own zombie gore and blood for Halloween.

A preview - Zombie Walk

Okay, I have finally uploaded the photos we took of the Zombie walk.  I still need to go through and process the photos I took for the Friday Feature: How to Make a Zombie.  Until then, check out my flickr account to see the 150 or so zombies that turned out for the walk.

Warning:  if you are disturbed by blood, gore, zombies or clowns, do NOT follow this link.

River City Zombie Committee, 2010 Clown Zombie Walk.

Friday, October 8, 2010

Feature Friday will be delayed

Just a quick note to say that tonight's Feature Friday, How to Make a Zombie, will be delayed.  I'm going to try and get the photos up tonight, but the resizing and processing will take a while, so I will likely upload the step-by-step tomorrow.

Sunday, October 3, 2010

Top Down Tunisian cloche

After working the Bottoms Up hat, I had to try another version from the top down.

Looking through my stash, I dug out some super bulky (6) Wool Ease Thick and Quick I had left over from other projects.  I wasn't sure I'd have enough of two colours to finish a hat, but there was enough to figure out how to do one from the top down. 

Normally I'd work the super bulky yarn with a 9.00mm hook, but I've only got one size double ended hook.  That changed things a fair bit, which I will cover later on.


Top-down Tunisian cloche

Using one end of my double ended hook, I started by doing a spiral disc of sc working into the front loops only, so it wouldn't be as dense as it would have been if I went through both loops.  I made several false starts before I figured out when to start working the Tunisian Simple Stitch.  Increases are worked in the forward pass, so right from the start, I worked an increase.  To just pick up loops without increases, I worked through the front loops of the previous sc.  The first loop for the increase was pulled up through both loops of the sc, then the second loop was pulled through the front loop of the sc.  Once I was past the disc, the increases were worked by pulling the first loop from the back, in between the vertical bars, then the second loop of the increase was worked through the next vertical bar as usual.  You can see in the above photo that these increase stitches are far less visible than decreases.


Top-down Tunisian cloche

Like the Bottoms Up hat, this one is 56 stitches around at the widest point.  Once I increased to 56 stitches, I just kept going until I started to think I'd be running out of yarn.  The body was a bit longer than the Tunisian portion of the Bottoms Up hat, but not by much. 


Top-down Tunisian cloche

I finished by working rounds of sc in the front loop only. 

Despite being the same number of stitches around and using the same hook size as the Bottoms Up hat, the super bulky yarn made this into a much tighter hat.  Too tight.  The finished size would fit a child much more comfortably. The length would probably look better on a child, too.  The extra thickness made for a fabric stiff enough to hold its own weight.


Top-down Tunisian cloche

Here you can see where I switched from the Tunisian to sc in the front loops.  I kept working in a spiral, too.

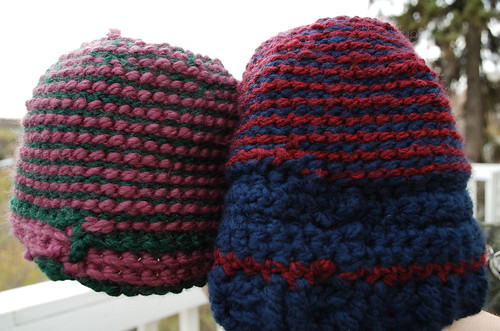
Here's a comparison of the insides.


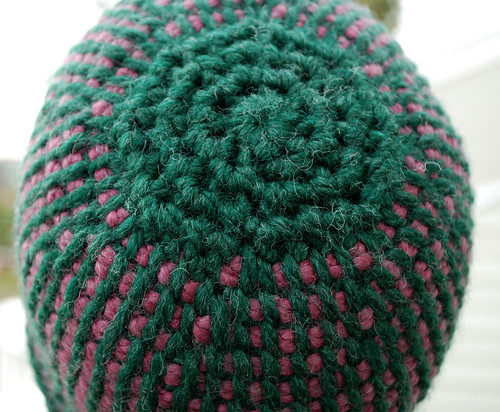
The discs of the crown look completely different with the two methods.  Although top down was easier to work (the curl was not as much of an issue), I like the look of the bottom up method better.  In fact, how the blue middle looks on the inside is how I'd rather it looked on the outside.  


With the top down method, I found I had to make the beginning disk quite a bit larger before I could start up the Tunisian portion, though that might have as much to do with the thicker yarn as the method.


Tunisian hats, inside

In this side view, you can see the transition from the first (blue and red) and last (green and pink) stitches of Tunisian and the brims. 

Getting feedback from the family, they all prefer the Bottoms Up hat.  They like the look the decreases made, as well as the decorative brim, while I preferred the less obvious look of the top down method.

Both methods worked up well, but the bottom up method was harder to actually do because of the curl.  I liked the thickness and extra warmth of the super bulky yarn, though I would have preferred to use a larger hook.  Were I to do it again with the super bulky yarn and the hook I do have, I'd have to make sure to increase the number of stitches for a larger hat, since the density reduces the size significantly.

While the Bottoms Up hat went over better with the family, the aesthetics of both are pleasing.  Top down was slightly easier to work, though it required a larger disc on the crown before I could start the Tunisian.  In the future, if I were to do a top down version, I would work both colours into the starting disc so that it's not so blatantly different. 

In the end, I find I really enjoy doing hats with the double ended hook even with the irritation of how much it curls.  Certainly enough to now be wondering what I have in my stash to try again, this time using a stockinette stitch.

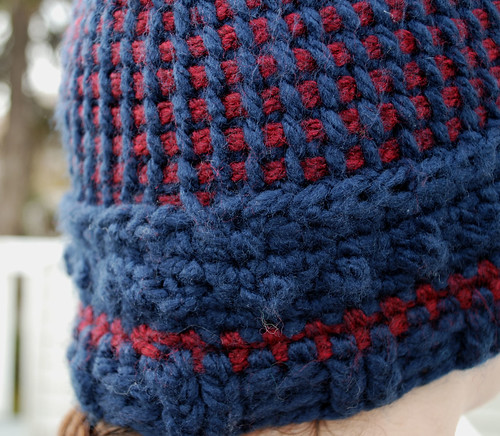
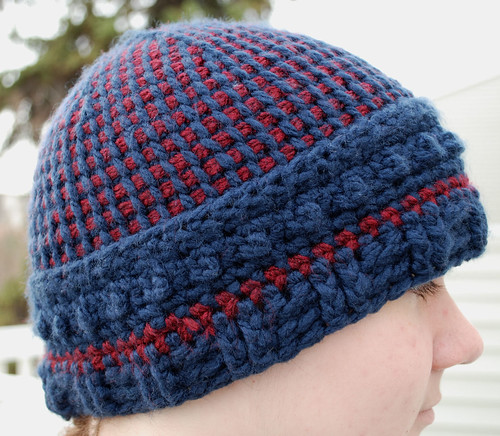
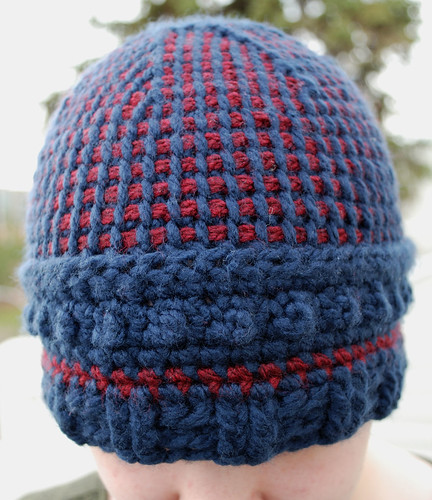
Tunisian in the round - Bottoms Up hat

I've been itching to do more with my double ended hook and Tunisian in the round.  After looking up how to do increases and decreases, I started to experiment.

For my first attempt, I worked from the bottom up and did decreases into the crown.  After finishing the crown, I went back to the starting row and increased the length in the opposite direction.

The yarn I used was some more Charisma, plus some yarn left over from last year's crochet blitz.  The red yarn is a narrower yarn than the blue.  My double ended hook is a 6.00mm.

Bottom Up Tunisian hat

In this view, you can see where I started.  First, using just one end of the double ended hook, I worked a foundation sc to a length that would fit around my head, which turned out to be 56 stitches.  Without joining the chain, I started picking up loops through the back loops only, so begin a spiral.  You can see the slightly diagonal bar where that first Tunisian stitch is joined.

Picking up the yarn for the Tunisian through the back loops only created a ridge I really liked.  Had I made the body portion longer, I would have been quite happy to leave just that foundation as the edge of my hat.


I worked up the sides in the same way I did the Tunisian Simple Stitch can cozie.   I quickly discovered that the curl that forms makes the job a LOT more difficult!  Mostly because it curls in the wrong direction!  Unfortunately, a combination of that curl and not being sure if I had enough of the red yarn had me beginning the decreases earlier than I normally would have.

Decreases are worked in the reverse pass, in this case, when the red yarn is being worked through and the blue loops are worked off.  When it reduced in size to the point where Tunisian wasn't working anymore, I continued decreasing in sc in the back loops only.


Bottom Up Tunisian hat

This made for a very short hat, so I went back to the foundation row and, working in rounds instead of a spiral, I worked a round of sc, then turned it to make a round of alternating sc and a long extended sc. 

The long extended stitch is worked by inserting the hook through the top of the previous round's stitch, yarn over hook (yoh),  then pulling the loop through.  There are 2 loops on the hook, just like a single crochet stitch.  YOH, then pull the yarn through ONE loop only.  YOH, pull yarn through one loop only again.  YOH, then pull the yarn through both loops, finishing the long extended sc.

Having a sc on each side of the long extended sc forces the extra length behind the work, creating a sort of bobble, which is why it has to be worked from the back or inside of the piece.

After that, I did 1 round in blue sc, 1 round in red sc, 1 round in blue hdc.  The last two rounds alternated pairs of front and back post double crochet. 

Bottom Up Tunisian hat

I was able to work this hat in a single evening.  The kids just love it - my older daughter says she thinks it's the prettiest hat I've made yet!  I wouldn't go so far, but I am rather happy with how it turned out.

Final conclusion:

I am quite happy with the yarn and colour combinations, and how the Tunisian simple stitch looks.  The decreases add interesting visual and textural elements.  If I were to change anything, I would have made the body of the hat several inches longer.  As much as my kids love the decorative brim section, I personally find it too... much. I think I would have preferred more Tunisian, less brim.  I also would not have worked the final stitches in the crown in the back loops only, but my family likes how the ridges left seem to be an extension of the decrease lines, giving it a spidery look.  In the end, the details I'd change are a matter of personal preference and aesthetics, rather than any problems with the design itself.

The curl that happens when working Tunisian in the round really makes the job more difficult.  Especially when beginning the decreases, as it curls against the direction the piece is worked, wanting to flip inside out.  In the end, though, it was worth the hassle. 

I worked up another version from the top down, which I will post about next.  At the end, I'll show what they both look like on the inside.

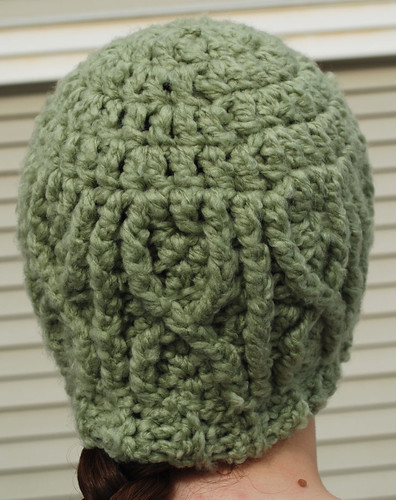
Crossed Cables hat

I got some photos today of another cable hat I'd missed earlier.  My younger daughter has claimed this one for herself.


Crossed Cables

This piece was worked using two strands of Harmony yarn and a 9.00mm hook.  The crown was done in a flat disk of double crochet stitches.  When I reached the size I wanted, I did one round of dc without any increases, then started on the front post stitches to make the cables.

Crossed Cables

The patterns was determined by the number of stitches I ended up having, which was a multiple of five.  The first couple of rounds were in groups of 3 fpdc and 2 hdc.  After that, I split up the first and last fpdc to start the X.

Working the cables really pulled in the sides.  When not worn, the sides look completely straight, rather than gently curving outwards as most of the hats tend to. 

Crossed Cables

The last bit was worked the same was as the Green Cables hat. 

The entire piece was a touch longer than I usually make for a hat that doesn't get turned up - something my daughter really likes!

I'm rather happy with how it turned out, though if I do it again I might change the crossed front post double stitches to front post triple stitches.  I think that would prevent the pulling in.  On the other hand the hat wouldn't be quite a snug as it is, and I don't think I'd want it any looser.  Perhaps if using a thinner yarn or smaller hook, it would be more of a concern.  As it is, I think it worked our rather well.