Part Two
For the next section of my display, I wanted to have a tree branch with leaves hanging down from one corner.
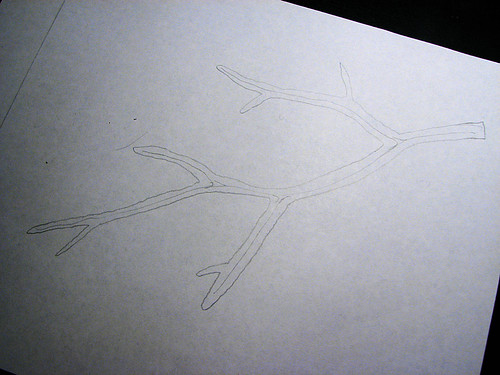
I started off with a simple sketch to decide where and when to place side branches and twigs. The thicker branch portions would be shaped in with the foundation chain, represented by the line in the middle of the branch, then the twigs would be added while working the width of the branches.
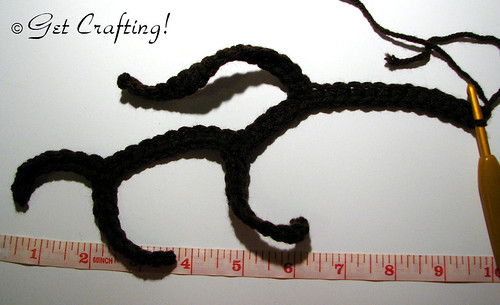
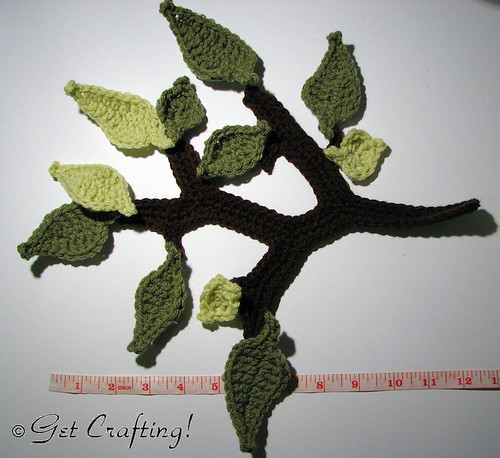
Which turned out like this. The foundation is done by working a chain, then working the back of it in single crochet. The first section of chain (follow along the top of the branch, starting from the hook) was worked the length of the main part of the branch, plus the length of the first side branch. I then worked down the other side of the first side branch in single crochet for the length I wanted, then continued working a chain for then next length of the main branch, plus the second side branch. Single crochet was then worked down the other side of the second side branch for the length I wanted. To do the tip of the branch I continued chaining to the length I wanted, then turned to work the other side in single crochet. (In the photo, the tip of the branch is curled on top of the tape measure.) I continued working single crochet into the back of the chain, past the second side branch, until I reached where I wanted to add the one last side branch. For that, I made a chain for the length I wanted, then worked single crochet along the back, then continued on with single crochet to the end.
The whole thing was a twisted, confused mass by then. I straighting it out as much as I could for the photo. Having that sketch to help me keep track of what I was doing really helped. It was very easy to get lost on where I was.
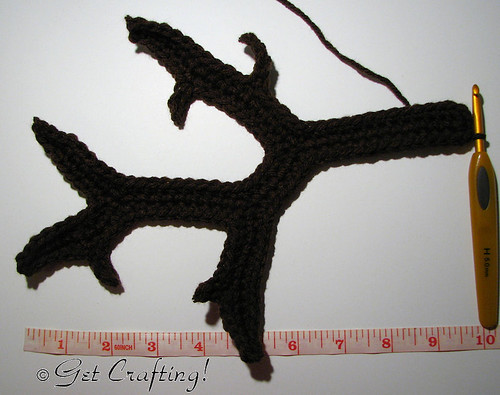
For the branch width, I worked another round of single crochet into the branch, adding twigs by making a few chains, then single crocheting down the backs to rejoin the branches. At the tips of each main branch, I did [1 slip stitch, 1 single crochet with picot, 1 slip stitch] to keep the tips pointed. When reaching the area where the inside of a side branch joined the main branch, I worked a decrease to ensure the side branches pointed towards the end of the main branch. The branch is now complete.
Time for leaves!
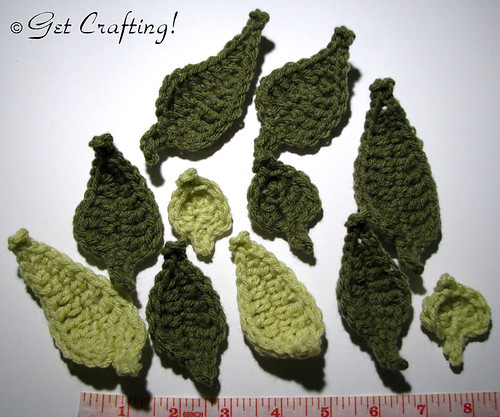
I decided to make leaves using the two greens I'd bought. I had considered using the yellow and orange to make fall colours, but decided they would look too much like the flowers in the vase.
Each leaf is made by working on both sides of a foundation chain, changing the heights of the stitches to create the shapes, starting with a chain the length I wanted for a leaf, plus stem. The first few stitches in single crochet make the stem, triple crochet was used for the widest part of the leaves (to reach the height of the first triple crochet, I changed up between doing a hdc first in some leaves, chaining 3 in others), then doing double, half-double and single crochet to taper to a point. The tips of the leaves, which are worked into the first stitch of the foundation chain, are [1 slip stitch, 1 sc with picot, 1 slip stitch]. The stitches on the other side mirrored the first.
For the smallest leaves, the foundation chain wasn't long enough to do only one stitch on each side per chain stitch. Instead, I did several stitches in one chain, changing up the stitches to get the shape I wanted, though I did the tips the same as for the larger leaves.
At first I had thought to sew the leaves onto the branch, but decided against it. The various parts and pieces will be pinned to a backing, and by leaving them lose, they can be adjusted and arranged to whatever is most aesthetically pleasing.
I've dropped off all the parts with my manger at the store I'm teaching at, along with some fibre fill for the vase, and showing her more or less how it was all supposed to go together. She and another co-worker were to put it all into the frame that evening, so it should be up on display already. I'll be bringing my camera when I come in for a class to get a photo of the finished result.
No comments:
Post a Comment